The Diatonic Harp Reference: Improvising Using Rhythm

Improvising Using Rhythm

Here’s a way to add a sense of structure and cohesiveness and “composition” to your improvised playing. The focus is on the rhythmic pattern of a phrase (or riff or lick or whatever structural component of a solo or song you want).

The idea is to repeat that rhythmic pattern over different notes in different places in the improvisation.  The result is a sense of “variation on a theme” familiarity (where the theme is the rhythmic statement rather than (necessarily) a melodic one).

Rhythmic patterns can come from:

  • The first (or any arbitrary) phrase (lick, riff, etc.) you play
    •  In other words, play a phrase the way you normally would–but pay attention to and remember the rhythmic pattern of the phrase.
  • Some familiar rhythmic pattern you already know
    • For example, try using the rhythmic pattern from “Mary Had A Little Lamb”, only don’t play “Mary Had A Little Lamb”, play other notes.
  • The meter of any sequence of words
    • As you read a series of words, the syllables form a rhythmic meter (e.g. iambic pentameter).  You can reflect these spoken patterns as musical rhythms.
  • Rhythmic patterns of the song in which you’re playing
    • These add a sense of “fitting-in” with the song
  • Rhythmic patterns of phrases from other soloists
    • These add a sense of cohesiveness among the musicians and to the different solos in the song.
  • The basic bass or rhythm “groove” of the song
    • Once again, this maintains a sense of cohesiveness between the improvisation and the song.

When a rhythmic pattern has been established, it can later be improvised off of, again, rhythmically, over and over.  For example, take a quarter note and turn it into a triplet shake, or swing eighths, or a tongue switch warble… endless variety, yet the rhythmic theme is still recognizable.  And you certainly aren’t restricted to a single rhythmic theme.  Play one, play another, repeat the first, repeat the second, play a variation of the second, play a variation of the first, play the second, play the first.  An endless supply of structural combinations exists.

The goal is to get a sense of completeness, cohesiveness (it all fits together), and integration with the whole.

This attention to rhythmic patterns is also useful as a “rut-busting” exercise.  If you find yourself getting bored with the same ol’ thing, try making up new rhythmic patterns and playing a familiar lick using the new pattern.

One variant of the “theme and variations” tip is…trick ’em.  Set something up by repeating a phrase or rhythmic pattern until the listener comes to expect something–a concluding note or phrase, a particular beat or groove, a certain effect, like vibrato (absent or present), etc.–then take it away and give them something else.  This adds interest, and builds a sense of excitement at the unexpected–“what’s coming next that I don’t expect?”  Of course this, like most things, can be over done.  You have to create a balance between playing the expected and the unexpected so the music is neither too predictable nor too “off the wall”.

Too often musicians, especially less experienced ones, pay too much attention to the notes, and not enough to the rhythm.  The notes you choose to play should always fit with the rhythmic content of the music.


Diatonic Harmonica Techniques

Tab is short for tablature and is the term you’ll usually see. Tab is a shortcut notation that indicates how to play which hole on the harmonica.  This is different from standard musical notation, which indicates what note to play, including its relative duration.  The difference is between how to play a hole and what note to play.  How to play a note on the harmonica is specified by several things:

  • which hole to play,
  • whether you are inhaling (i.e. drawing) or exhaling (i.e. blowing), and
  • what alteration to apply,
    • be it a bend,
    • overblow,
    • other harp specific effect.

Of course, how to play a note on a harp is equivalent to what note pitch gets played, so tab is a kind of shortcut or aid to standard musical notation.  What tab doesn’t show well is timing and rhythm, which is why standard notation is better for really communicating just how something is supposed to sound. 
Ways to show timing for tab include providing the lyrics, when possible, or indicating the measures (bars) and the beats.  Tab can also be used in conjunction with standard musical notation to augument the standard notation with harmonica-specific techniques and effects.

I have considered several important factors for good tab notation conventions, including:

  • Using standard ASCII characters (instead of arrows or other special graphic characters, as is seen so often) so the tab can be easily typed on a standard keyboard and e-mailed or posted on web pages, etc.
  • Keeping all the characters for a note or chord on the same line, for ease of reading
  • Not using letters like B, D, b, etc., which can be confused with note names
  • Selecting characters that maximize “white space”, which makes the tab easier to scan
  • Minimizing the number of characters needed to specify the way a hole is played
  • Making it as obvious as possible.

Here is the notation I use for describing how to play a hole: 

Notation Convention Example Meaning
A number name by itself means a draw note 3 3 draw
A number followed by a greater than sign “>” means a blow note 3> 3 blow
each apostrophe ‘ means a 1/2 step bend 3′ 
3” 
8>’
3 draw half step bend 
3 draw whole step bend 
8 blow bend
a sharp sign “#” after a number means overbend 6># 
7#
6 overblow 
7 overdraw
a tilde “~” before a number means a dip bend ~4 smooth bend from 4′ to 4
an ampersand “&” between numbers means play them at the same time 1&4 
1>&2>&3>
octave on 1 and 4 draw 
chord on 1, 2, and 3 blow
a slash / between numbers means a slur 2/3 2 draw with a little 3 draw
a percent % before a number means “tongue slap” the note %4 slap the 4 draw
2 percents %% between two numbers means “flutter tongue”  2%%5 draw 2, 5; flutter on 3, 4
an equal sign = between two numbers means a two hole shake 4=5 shake between 4 and 5 draw
a vertical bar “|” separates measures 2 3 | 3 2 1st bar: 2 3, 2nd bar: 3 2
a lower case “v” after a number means add vibrato to the note 3>v 3 blow with vibrato

Here is an example of some tab.

  • Blue Midnight as by Charlie McCoy in his “Tribute to Little Walter”

“Misty” 
Lyrics by Johnny Burke, Music by Erroll Garner

Listen to my version in Real Audio.

verse: 
Look at me, 
 ~4    3   2’… 
I’m as helpless as a  kitten  up a tree, 
1   2> 2″    5>.. 5> 6> 5> 4.. 3  2 2>… 
And I feel like I’m clinging to a cloud; 
1>   1 2>  2     3      4  4    4   4′ 4.. 
I can’t un-der-stand, I get misty just holding your hand. (repeat for 2nd) 
4> 3   4>  4      2      3″ 3  4> 2> 2>  2′   2      3″     2 
Bridge: 
You can say that you’re leading me on 
2       3″   3     4      5>     5     5     5   5… 
But it’s just what I want you to do. 
5>   5   ~6    6>  4  5>   5>  6> 5> 
Don’t you notice how hopelessly  I’m lost, 
6>       6    7  8      8>    9>’ 9>’ 9>’ 8> 9>’… 
That’s why I’m foll-ow-ing you. (DS for 3rd verse) 
9>’       9>’ 8> 10>” 9>’ 8> 8 (fill for turnaround)

I just wanted to add a couple comments about Jerry Portnoy’s rendition of Misty. I heard him do it at SPAH 97, and–despite not being that fond of the song before hand–I was blown away by how great a job that Jerry did. He was so attentive to the details.. rhythmic, pitch–especially on the embarrassingly exposed intermediate bends (3 draw whole step (3″) and 2 draw half step (2′) bend), and tone (see note with pitch). It’s a piece where “the slow” is definitely in evidence, less is more.
His tone on the bends was just killer.. very horn like I thought. It’s great practice for those intermediate bends because:
1)the melody is so well known, you’re familiar with what the note must sound like, and 2)the bends are right out there on important sustained notes.. you’ve got to get them clean and strong and pure. There is also some good work on the top end. The 9 blow bend (9>’) is the key note of the melody on the bridge.. you have it hit it without ever getting the unbent 9 blow.. same with the 10 blow whole step bend (10>”).. but you go from 9>’ to and from 8>, so you’ve got to keep hitting the 9>’ plain, without bending into or out of it.

How to Make Your Own Harp Tab

Here’s a great way to easily make your own harp tab. 

  1. Get the shareware program, Melody Assistant, from http://www.myriad-online.com
    Available in several languages for Mac or PC.
    (1a. If you like it and use it, send them the $20 registration fee. Unbelievably reasonable price.)
  2. Search the web for any MIDI song you like, and download it. 
    There are thousands of MIDI files out there for just about any music style you could want, including blues, jazz, classical, pop, rock, country, hymns, etc.
  3. Open the MIDI file in Melody Assistant, select the part with the melody, and give the “Edit Tab” command.

Melody Assistant offers 3 different harp tab styles (as well as guitar tab), and will optionally optimize for breath direction and show overblows. You can specify the key of the harp, so you can get the tab for any position you want.  Plus, it supports all the standard commercial special tunings, or you can define your own tuning!

Presto! That’s it! Now you’ve got tab for any song you can find in MIDI, in any position, for any tuning of harp!

You can even play the MIDI and follow the tab along with the melody as the song plays. This is a  great way to learn new songs.  There are even options that allow you to color the notes, say making blow notes, draw notes, and bends a different color, making the music easier to read.

AND, you can learn to a*sociate standard notation with the harp tab!  This is a super way to learn how to read standard notation, since the harp tab’s right there with the music notation.  It’s also nice because you can get the timing and rhythm information from the standard notation, and use the tab to get the right pitch.

If you don’t find the MIDI song you want, you can always go buy a book of sheet music, quickly enter in the melody, then use Melody Assistant to generate the harp tab.

Diatonic Harmonica Techniques

This table lists a large variety of techniques that can be used for playing the diatonic harmonica.  These are in some order of difficulty, however even simple techniques can require much practice and expertise to master. The harmonica is sometimes called the easiest instrument to play, but the most difficult to master.  While that is certainly arguable, don’t think that becoming an expert on the harmonica is easy or will happen over night, despite what some book titles might lead you to believe…

This table should give you an idea about “where you are” in your ability, and what techniques you still need to master.

I’ve included sample Real Audio clips to demonstrate most of these techniques, where it makes sense.  Some areas, such as embouchure, should not effect the resulting sound to an appreciable degree.  The samples are most all played on a key of A harp.


Diatonic Harmonica Techniques

Technique Remarks Sample
Wow, you can make noise *sucking*
too!
Playing should be done by breathing
through the harmonica
, not by thinking about blowing or
sucking.  We talk about blows and draws, but it’s about inhaling
and exhaling.  The breathing should come from
the diaphragm
.  Breath control is as important in
harmonica
playing as in singing. The air should be slowly inhaled and exhaled.
Practice
playing a note and holding it for as long as you can, being careful not
to get dizzy.  Also practice breathing in as much air as you can..
hold it.. now breathe in a little more, and a little more. 
Practice
breathing in and out as fast as you can–think of a panting dog.
Play
Simple 1st position play (i.e.
“straight
harp”)
Many traditional “camp fire”
songs are easy
for the beginner, like “Oh Susanna”, “Red River Valley”, “Clementine”,
etc.  These are normally played by ear and use 1st position where
the key of the song is the same as the key of the harp.  The
middle
octave is most often used, where a full diatonic scale is available
without
requiring any bends.
Play
Chords and
Chugging Rhythms
The harmonica lets you play
chords as well
as single notes, and the chords are easier to get than single
notes. 
The chords can be used as backing rhythms to compliment melodic
play. 
The tongue block embouchure
is normally used so that chords can be played and then blocked to
produce
single notes.  Chord chugging can make use of rhythmic
breathing patterns
.
Play
Play
Single notes Because of the close proximity of
the holes
on diatonic harmonicas, some technique and practice is required in
order
to get clean single notes.  The way of putting the mouth on the
harp
is called embouchure, and several
different embouchures can be used to get single notes. The main
embouchures
are the pucker or lip
block
, the tongue block,
and the U-block or slotted tongue.
Play
The 2 draw The hole-2 draw is often
problematic for
beginners, and sometimes the 1 draw as well.  Many beginners think
there’s something wrong with the harp, because this note won’t
play. 
The usual reason is a “pre-bend” condition where the mouth/vocal tract
shape causes a flatted note or keeps the note from sounding.  The
beginner should concentrate on a mouth shape for making an “eeeee”
sound,
and might want to let a little air in through the nose at first
to help play the note.  If you can draw holes 1-2-3 and hear the 2
draw note, you know the harp is okay.
Play
Hand techniques Cupping
the
harp with the hands
, and opening/closing the hands and fingers is a
common and traditional way to achieve very characteristic harmonica
specific
sounds.  The key is getting a very air-tight cup with the hands,
which
mutes the sound.  Opening and closing this cup creates the
characteristic
“wah-wah” sound of the harmonica.
Play
Multiple key harmonicas Diatonic harmonicas come in all
different
keys (i.e. C, D, E, … Ab, Bb, F#, etc.). The normal range of harps
from
low to high (such as when harps are offered in a set) is G at the low
end
to F# on the high end, but doubled keys add high G and low harps from D
(or even low C). The sample has chords for A, C, and D harps, 3 of the
most common keys.
Play
Note
articulations 
The tongue can be used to start
or attack
notes differently, which changes the color of the notes and adds
variety
to the sound of the harp.  These articulations can be
associated
with various spoken syllables, like saying “ta” or “ka” or “da” or “ha”
or “ga”, etc.  Articulation can also be done by slightly lifting
the
upper lip off the harp and replacing it in a sort of “biting” or
“kissing”
the harp fashion.  Articulations are easiest using the pucker/lip
block embouchure, but can also be done using tongue blocking.
Play
Shakes A shake is a rapid
alternation between
adjacent holes. Shakes are similar to trills, but the notes are more
than
1/2 step apart. Sometimes shakes are called “warbles”.  Shakes are commonly done by shaking the head from
side to side, but can also be done
by moving the harp from side to side, twisting the harp, or some
combination
thereof.  More advanced shakes can incorporate note bending to add
variety.  The samples are from Stormy Sea II.
Play
Play
Play
2nd position
(i.e. “cross harp”)
2nd position is the most commonly
used approach
to playing blues, rock, and country music.  The scale
for 2nd position
is a 5th higher than the natural key of the harp,
for example, for a key of C harp playing it in 2nd position means
playing
in the key of G.  2nd position starts on the 2 draw and uses
mostly
draw notes, especially on the low end of the harp, rather than mostly
blow
notes as in 1st position (the key of the harp).  The draw notes
provide
more possibilities for bends and expressive vibrato than the blow notes.
Play
Draw
Bends

as ornaments 
When beginners first achieve draw
bends,
which are available on holes 1-6, they are primarily quick changes from
the natural note, like a quick flattening of a note continuously
bending
a little down and then back up to the primary note.  In other
words,
the bent notes are not used as notes in their own right.  The note
bends, but the player has little control over the depth and duration or
the note. The sample has a thin weak sounding draw bend, and is an
example
of what NOT to do.
Play
Blow Bends as ornaments Blow bends are available on holes
7-10. 
The sample has a thin weak sounding blow bend, and is an example of
what
NOT to do.
Play
Dip bend A dip bend is a quick smooth bend into the note to be
played. 
This technique is frequently used to ornament notes, especially on the
draw notes.  It is done by initially attacking the hole as a bent
note, then gradually releasing the bend to slide into the final
note. 
Or, the hole can be started unbent, and a smooth gradual
bend can be used to slide into the final bent note.  The sample
clip
is from Stormy Sea II.
Play
Glissando A glissando is a sequence of notes played in rapid succession
that
ends on the primary note to be played.  Play a single note and
then
slide the harp around in your mouth.. that is essentially a
glissando. 
The notes in a glissando are not individually articulated, but are
played
as a single continuous physical movement.  A “ripped” glissando is
essentially an articulation of the final note.  The sample clip is
from Stormy Sea II.
Play
Diaphragm
Tremolo
Diaphragm tremolo is distinct
from throat
vibrato
, and as its name implies it emphasizes the diaphragm
instead
of the throat, though each is used to a certain degree. It is
characterized
by a volume oscillation tremolo as opposed to a pitch oscillation
vibrato. 
However, when using vibrato on a held bend, the diaphram is used to
gently
add the tremolo, and the pitch will vary due to the pressure changes.
Diaphragm
tremolo is basically achieved by repeating “ha ha ha ha” as when making
a laughing sound.  The sample tremolo is somewhat exaggerated so
you
can easily hear it.  Often the term vibrato is used instead of
tremolo
to mean either vibrato or tremolo.
Play
Draw
Bends

for note production:
– Full bends 
– Intermediate Bends
Draw note alterations are
so-called
bends that alter the natural pitch of a note to a different usable
on-pitch
note. The word “bend” implies a continuous pitch change, but bends on
the
harmonica do not have to be changes from other notes–in other words, a
bend as an altered note can be played separately from other notes, and
the natural note need not be played at all.  Draw bends in holes 2
and 3 have bend ranges more than a single half step (semi-tone), while
draw bends in holes 1, 4, and 6 have a half step range.  Bends
tend
to alter most easily to the extreme range, called a full bend,
and
notes between the natural note and the most altered note are called intermediate
bends,
and are more difficult to achieve, control, and maintain on
pitch than normal bends.  The sample has a number of draw bend
notes
mixed in with normal notes.
Play
Blow Bends for note
production 
Holes 8 and 9 have a half step
blow bend,
while hole 10 has a whole-step bending range.
Play
Rhythm and melody together (i.e. vamping) Using a tongue
blocking
technique, rhythm chords and melody can be played at the
same
time.  Normally a chord containing the melody note is played, and
then notes of the chord are blocked from being played by using the
tongue. 
Similar effects can be achieved with a lip block by opening and closing
the embouchure or rolling the harp up at the back to go from a chord to
a single note.  This technique is often used on the bottom 3 holes
where lip blocking is more difficult.
Play
Playing from a Rack A rack is a device that holds the harp so you can
play hands-free. 
Usually the rack goes around your neck.  Often a “wing nut” is
used
to hold the rack tight at a pivot point, and often the rack will slip
and
push away from your mouth.  Using two conical washers or a lock
washer
can help keep the rack tighter.
n/a
Amplified
play
Traditional blues style harp is
played amplified
through a microphone

The mic and the amp work together to produce the sound, and what you
should
get depends on what you like to hear.  Traditional mic’s are
bullet
shaped vintage or vintage reissued models like the Shure
Green Bullet, Astatic JT30
, Hohner Blues Blaster, etc., though
many
players use ordinary vocal mics such as the Shure SM-57 and
SM-58. 
The Shaker brand mics are smaller, lighter and easier to cup than
traditional
bullet style mics  Tie clip electret mics can also be used, and
these
are easier to cup tightly and produce acoustic-style hand effects. Preferred amplifiers
are normally tube amps
, and vintage
Fender
amps are highly valued as harp amps.  Popular amps include the
Fender
Bassman, the Bassman ReIssue (RI), the Fender Champ, Fender Princeton,
etc.  Many players prefer amps with reverb, or use separate reverb
“tanks”.  Digital or analog delay pedals are a common effect in
amplified
play.
Play
Slurs and
double stops
A slur is where a bit of
an adjacent
note is played along with the primary note.  A double stop
is where two notes are played at the same time with essentially equal
strength. 
Double stops can be played using bent notes and combinations of bent
and
un-bent natural notes, especially on holes 1-4.  It is even
possible
to play an overblow so that both reeds sound and two notes are
generated. 
A slur has a primary note and a softer secondary note. Slurs can add a
“bite” to a note, especially when amplified.  When playing 2 notes
together think about 1)Blending the sound or 2)giving each note its own
voice.  The sample has first a slur, then a double stop for the
same
notes. Notice how much smoother the slur sounds.
Play
Split Intervals 
– 4-hole octaves 
– 5-hole octaves
Split intervals are notes
that are
played that have intervening notes blocked out, normally by the tongue.
The most common split interval is an octave, for example holes 1 and 4
blow or draw at the same time, with the tongue blocking out holes 2 and
3.  Hole 4 and 8 draw also form an octave, with holes 5, 6, and 7
blocked out.  The sample plays single notes an octave apart, then
together, for both blow and draw octaves.
Play
Octave Shakes An octave split interval is played and rapidly alternated
with an adjacent
octave, as in a 2-hole shake with single notes, by shaking the head
and/or
harp.  This effect is heard relatively infrequently on the
diatonic,
but was used by classic blues harpers like Little Walter on songs like
“Blues With A Feeling” and “Got My Mojo Working”.  This is a
commonly
used effect on blues chromatic, and the sample is played on a Hohner
Super
64X.
Play
Resonance 
Vocal tract
– Hands/cup
Resonance is a
reinforcing
of sound waves that amplifies a note.
  Achieving good tone
on a harmonica requires resonance, and tuning the vocal tract to the
note
being played.  This requires opening the vocal tract and playing
“from the diaphragm”
. Hand resonance can add to the player’s vocal
tract resonance and further amplify a note.  Very minute changes
to
the hand cup can produce or eliminate this resonance. The samples were
played with the same force of breath.  The differences in volume
are
due to the added resonance.  Notice how the tone goes from thin
and
weak to full and strong.
Play
Play
Vibrato Throat vibrato is a slight
wavering of a
note’s pitch similar to the effect singers use. Throat vibrato, as
distinct
from diaphragm tremolo, is mainly
felt
in the throat as a pinching of the air stream.  In reality both
throat
vibrato and diaphragm tremolo use elements of both the throat and the
diaphragm,
but the emphasis is different as the names imply.  Throat
vibrato is a very important technique that should be learned by
everyone.
 
It is very frequently used and adds much to the tone
and note shaping capabilities of the harp.  There are other types
of vibrato that can be achieved by moving the mouth or the lips. 
A slight chewing motion, or chin vibration produces a kind of vibrato,
as does a motion similar to whistling a vibrato.  Similar vibratos
can be achieved by articulating “oy oy oy” or “yo yo yo”.  These
non-throat-vibrato techniques are especially useful on bends and
overbends, as well as notes that don’t respond as well to throat
vibrato.
Play
Tongue Slap A tongue slap is a
technique where
a chord is played for a brief time, then all but one or two notes are
suddenly
blocked out with the tongue.  The air that had been flowing
through
normally 4 holes is suddenly diverted to 1 or 2 holes, and the sudden
blocking
of 2 or 3 holes causes a kind of slapping sound.  The sample is
exaggerated
to highlight the effect. The tongue slap is one of the characteristic
techniques
often used with the tongue block embouchure, and serves to thicken up
the
sound of the harp and punctuate single notes.
Play
Flutter
tongue/tongue
lift effects (i.e. rapid vamping)
A flutter tongue or rapid
vamping
technique
is where (normally) a split interval is played and the tongue is
rapidly
and repeatedly removed and replaced off and back onto the blocked
notes. 
It causes a rapid switching between a chord and an interval like an
octave,
or even a single note.  The sample first plays an octave slap,
then
the rapid alteration between a chord and the octave, for both blow and
draw.
Play
Tongue Rolls  A tongue roll is where a note is
played and
the tongue is vibrated or rolled as in a Spanish-style rolled-R. 
This is a seldom used effect more than a normal playing technique.
Play
Whoops A “whoop” is using your voice to
whoop or
holler while playing the harp. This is normally a seldom used effect
rather
than a standard playing technique. You can also do barks, clicks, and
other
mouth or voice effects in conjunction with playing the harp. 
Sonny
Terry and Peter “Madcat” Ruth make frequent use of this kind of effect.
Play
Growl A growl is an effect used in
conjunction
with deep draw bends. The soft palette at the back of the mouth is
relaxed
and allowed to vibrate; it’s kind of like snoring while playing. 
This vibration along with the bent note causes the growl sound.
Play
Back-Pressure Chords By using a very air tight hand cup it is possible to play the
harmonica
backwards, by having air enter through the back of the harp in addition
to through the front.  In essence, your cup is so tight that when
you play a note the air pressure builds up in your hand cup and flows
back
into the harp.  Similarly, a draw note causes enough of a vaccuum
to suck air into the harp through other non-played holes.  You
block
the holes you don’t want to sound with your thumb or finger and use the
back-pressure activated notes along with the played note to create new
chords.
Play
3rd position
(i.e. “draw harp”)
As 2nd position is playing in a
key a 5th
above the natural key of the harp, 3rd position is playing in a key
another
5th higher than the natural key of the harp, e.g. for a key of C harp,
2nd position is the key of G, and 3rd position is D. 3rd position play
starts on the hole 1 or 4 draw. The natural mode of 3rd position is a
minor
key so 3rd position is often used to play with minor key songs.  A
complete 3rd position blues
scale

is available on the first two octaves, so this is a common position for
blues next to only 2nd position in frequency of use.  The sample
is
the blues scale in 3rd position.
Play
Knowing where you are Beginners usually don’t know
right where they are on the harp at all times, while expert players
usually do.  As you gain more techniques like bends and overbends,
it becomes important from a technique standpoint (separate from a
musical standpoint) to know where you are because each hole plays
differently; some bend well, some don’t, some bend more or less than
others, some are draw bends and others are blow bends, some holes are
good for overbends and others not so much.  Musically, you need to
know what note you’re on, and where the other notes are.  You need
to become extremely familiar with the harp note layout, both within a
hole and across the harp.
Able to go where you want Once you know where you are, you
need to be able to visualize where you want to go, and you need to be
able to get there accurately.  This is more difficult when you are
going to holes not adjacent to the current one.  Corner switching
from a tongue block embouchure can make octave jumps and other
intervals easier to hit accurately than pucker/lip-blocking since the
mouth doesn’t have to move far because the tongue is moving too.
Playing both ends of the harp There are usually 2 different
octaves (sometimes 3) where you can start playing your song, lick,
riff, or phrase…the bottom end and the top end.  You should be
able to play the same thing starting in different octaves, as long as
you don’t run out of harp.
Special Tunings  Special tunings are modifications
to the
standard diatonic layout of notes, which is the Richter
tuning. 
Common special tunings include the natural minor, which provides a
minor
key for normal 1st and 2nd position playing, the Lee Oskar Melody
Maker,
which raises the b7ths (i.e. hole 5 draw) to Maj7th and raises hole 3
blow
a whole step, Steve Baker Specials which adds a duplicate of the low 3
holes as the 1st 3 holes an octave lower, country tuning, etc. etc.
These
special tunings make playing certain styles easier than using normal
Richter
tunings. The sample has chords from a Melody Maker tuning, a Natural
Minor
tuning, and a rare tuning called Tempting.
Play
Train
Songs
Train songs use train-like
rhythms on chords
on the low 3 holes, and work best on lower key harps (like G and
lower).
A train whistle is simulated by drawing holes 3 and 4 at the same
time. 
One articulation that mimics a train is “Tah hooka tooka hooka” where
only
the “hooka” is played exhaling, and many variations on that theme, like
“Tooka hooka tah hooka”.  Other fast tongue articulations can be
used
to augment the breathing pattern,
such as “diddly hooka diddly hooka tah hooka diddly hooka”.
Play
Multiple Embouchures The 3 primary embouchures
are the puker/lip block, the tongue block, and the (relatively seldom
used)
U-block. The lip block and tongue block can be used for different
effects,
so it is good to learn and use both and be able to switch back and
forth
easily depending of the effect you want.  Many players believe the
best blues tone can only be achieved by using the tongue block. 
Many
effects and techniques require use of the tongue block embouchure.
Subtle effect on player’s tone
Playing out of both corners (of
the mouth);
TB left and right
Tongue blocking is typically done
with the
tongue blocking holes on the left with the single note being played by
the right corner of the mouth.  It is also useful to be able to
block
on the right and play out of the left corner, for fast accurate note
jumps
(corner switching) and playing holes 1-3.
It’s how, not what you hear
Bends from all embouchures and
corners
Many players bend from one
embouchure, like
a pucker/lip block, and not from another, like the tongue block. 
It is best to be able to bend from all the different embouchures and
both
sides of the mouth.
It’s how, not what you hear
Split interval bends It is possible to bend both
notes of a split interval, e.g. an octave, at the same time.  You
can also bend one note of an interval to form an octave, for example
the 3 draw whole step bend (3″) and the 6 draw.
Tongue
Switch Shimmer 
The tongue switch shimmer is an
effect where
the tongue is rapidly switched from side to side to allow opposite
corner
holes to sound.  This can be done extremely rapidly.
Play
Draw Bend Vibrato Getting a smooth vibrato
on draw bends requires a delicate control and balance between the
throat
and the diaphragm. Without this delicate control the vibrato becomes
very
chunky.  The sample is a hole 2 half step “intermediate” bend.
Play
Blow Bend Vibrato Blow bend vibrato also requires a
more delicate
control than vibrato on straight “unbent” notes.
 Play
Speed Speed playing requires note and
rhythmic
accuracy and control of rapid changes to breath direction.  It is
easy to overuse speed, which can detract from musical expression. 
The sample is a clip from Stormy Sea II.
Play
12th Position 12th position (sometimes called
“1st flat”) is the key with one more flat than the key of the harp, or
equivalently a 4th above the key of the harp.  For example, on an
F harp 12th position is the key of Bb.  12th position is useful
for melodic play in a major key. To play 12th on the bottom of the harp
you need to be very good at the 2 draw whole step bend and the 3 draw
whole step bend.
Positions
4-12
Learning positions 4-12 requires
additional
familiarity with the diatonic note layout.  The natural scales
associated
with position play correspond to various modes.  Best use of these
positions requires the ability to play chromatically by using either valves
or overblows.  5th and 12th
positions
are particularly useful.
n/a
No speed needed Sometimes speed can be used as a
crutch to
hide defects in playing. Attention to details and nuance of note
formation, tone,
timing, and phrasing can require more expertise than merely playing
fast. 
Details and mistakes are more exposed during slow play than during fast
passages.  Speed is best when the precision and nuances required
for
beautiful slow play are incorporated in the fast passages as
well. 
The sample is a clip from Misty.
Play
Valved
Bends
Valved bends use only a single
reed for the
bend, rather than both reeds as in a  normal diatonic bend. 
Valved bends have a greater potential range than normal bends, but
require
a different attack and bending approach.
Play
Overbends
(i.e.
overblows and overdraws)
Overblows and overdraws activate
the opposite-than-normal
reed as an opening reed as opposed to the normal closing
reed activation.  Overblows activate the outer “draw” reeds to a
note
about 1/2 step above the natural draw note, while overdraws activate
the
inner “blow” reeds to a note about 1/2 step above the natural blow
note.
Overblows require relatively narrow or tight reed
gaps
.  Achieving overbends requires much more focus and
finesse
than ordinary bends, with much stricter requirements on mouth/throat
shape
and pressure.
Play
Bending overbends and overbend
vibrato
It is possible to bend the pitch
of overblows
and overdraws, and add effects such as vibrato
to the overbends.  Overbends themselves require much greater
facility
with the harp than normal bends, and further bends and effects require
still greater control and expertise.  The first sample for bending
an overblow (hole 6) is a clip from Stormy Sea II on a C “Golden
Melody”. 
The second sample is a hole 7 overdraw with vibrato followed by a 7
blow
with vibrato.
Play
Play
Chromatic play By using overbends and/or valved
(isolated
reed) bends in addition to normal bends and the natural notes it is
possible
to play every note on a diatonic harp, that is, to play a diatonic
chromatically. 
This adds enormous capability to the diatonic and especially position
play. 
However, it is extremely difficult to get tonal or timbral consistency
between unbent, bent, and overbent notes.
See “Jazz” sample
Jazz The ability to play the diatonic
chromatically
brings jazz into the realm of the diatonic.  Jazz is a difficult
genre
on any instrument, and especially so on an instrument such as the
diatonic
that requires advanced techniques to make available all the chromatic
notes. 
The sample is the song Blue Monk using a normal and a low Eb, 2nd
position.
Play
Counterpoint Counterpoint is more than one
melody at the
same time. By sophisticated use of single notes, double-stops, playing
out of both sides of the mouth, and split intervals, simultaneous
melodies
can be played on the diatonic harp.  Diatonics have one advantage
over chromatics in this area because wider splits are possible due to
the
smaller hole size of diatonics as compared to chromatics.  Special
tuned harps are often used for counterpoint play.
Listen to Richard Hunter
<!-- Play -->
Chromatic play in all keys Since a single diatonic harmonica
has all
chromatic notes available (though some have a different timbre than natural notes), it is possible to play every key diatonic in
every key.  This of course requires a great deal of practice and
study.. very few can do it.
Listen to Howard Levy


How to Hold your Harmonica?

How to hold harmonica? That is problem which many people ask HarmonicaTabs. As many people know: holding a harmonica properly is the first step toward playing it successfully. If you’re a lefty, follow these instructions but reverse the left and right hands. 
Make sure the harmonica is right-side up: The holes of the harmonica should be facing you, with those that produce the lowest notes on the left and those that produce the highest notes on the right.
Most harmonicas have the numbers 1–10 embossed on the top cover plate over each hole. The leftmost hole should be numbered “1,” and the rightmost hole should be numbered “10.”

Diatonic

Hold the body of the harmonica in the left hand between the thumb and index finger. The three remaining fingers will then be curved slightly, to form a small resonating space. Place the flat of your right hand over the harmonica (not the mouthpiece side!), and enclose it, forming a tight cup. Optimally, the cup should form a large resonating space.

Tremolo

 With the left hand, hold the harmonica somewhere around the left of the center. If one has the strength, hold the harmonica with the thumb and index finger, and let the three remaining fingers curl together to form a resonating space. With the right hand, hold the harmonica somewhere around the right of the center.
If one has the strength, hold the harmonica with the thumb and index finger, and let the three remaining fingers curl together to form a resonating space. The fingertips of both hands should touch each other, while the palms face each other. Some players also recommended crossing the fingers to ensure a good resonation is formed, but this may hinder the movement of the harmonica.

Chromatic

There are quite a few variants for holding a chromatic. One is a deviation of the diatonic hold, using the right thumb to work the slide button. This is particularly used by Blues player, which often play Chromatic in 3rd position only.
The other popular variant is very similar: With the left hand, hold the harmonica somewhere around the left of the center with the thumb, index and middle fingers. Then twist your right hand along the wrist, so that the fingers point to a two o’clock position and palm facing up.
Place the right palm at the bottom of the harmonica (usually sit right below the left thumb) and wrap all the fingers except the index fingers around the harmonica. If done properly, the right wrist will form a right angle. Your index finger will be touching the slide button, and will always be touching there, regardless if you use the button or not.

If it’s a 16-hole variant, hold it in similar manner, except your cup will be located closer to the center. Alternatively, break up the cup.

How to hold harmonica with 10 steps

[toc heading_levels=”3,4,5″]

Step 01. Place the harmonica between your left index finger and thumb

Step 01. Holding Your Harmonica

. Hold your thumb and index finger parallel as if you were about to pinch something. Place the harmonica between the two fingers, pushing the left end inside your purlicue (the skin between the pointer finger and thumb).

Step 2. Position the instrument so its lowest note is on the left.

How to hold Harmonica - Holding Your Harmonica step 2

To properly play a harmonica, make sure its lowest note is on your left side. If the notes are not engraved on the instrument’s cover plate, blow on both ends to find which side is lower.

Step 3. Leave the lip of the harmonica exposed.

How to hold Harmonica - Holding Your Harmonica step 4

To leave room for your mouth, make sure about half the harmonica is exposed. When blowing, keep your thumb and index finger back so you do not have trouble connecting with the instrument.

Step 4. Cup your right hand around the harmonica to create an air seal.

How to hold Harmonica - Holding Your Harmonica step 3

While holding your harmonica, place your hands next to each other so they are straightened out with knuckles down. Move your right hand up so the tip of your left ring finger lines up with the tip of your right pinky. From this position, roll your hands together to create a sealed air pocket between your harmonica and palms.[

  • Make sure to close large and noticeable gaps, especially at the back of your hands and around the harmonica itself.
  • There is no way to make a complete seal using your hands, so don’t worry about tiny gaps.

Step 5. Place your right thumb in front of the harmonica for control or comfort.

How to hold Harmonica - Holding Your Harmonica step 5

If your thumb is uncomfortable or you’re having trouble controlling the harmonica, try placing your right thumb in front of the instrument’s high notes. Just make sure to move it 

Step 6. Hold your right elbow in

How to hold Harmonica - Holding Your Harmonica step

When playing, make sure to hold your right elbow flush against your side. This will help prevent arm, shoulder, and neck strain, as well as give you greater control over your hand techniques.

Step 7. Slide your harmonica to change notes

How to hold Harmonica - Holding Your Harmonica step 7

To change from one note to another, slide the harmonica right or left in your mouth. Most harmonicas will have between 10 and 16 notes to create sound, though specialty harps may have more. Most consumer harmonicas are locked to one key with note variations made by changing how you blow.

Step 8. Keep your hands closed to create low tones

How to hold Harmonica - Holding Your Harmonica step 8

Play the harmonica with your hands fully closed to create low, bass-heavy notes. The tighter your hands are, the bassier the note will sound. This technique is used heavily in blues music

Step 9. Open your hands to create high tones

How to hold Harmonica - Holding Your Harmonica step 9

To play higher, brighter-sounding notes, open your hands to let more air escape. Instead of sad, muted tones, this will give you the bright, bouncy ones used throughout folk music.

Step 10. Open and close a section of your hand to create wah wahs

How to hold Harmonica - Holding Your Harmonica step 10

To create the classic warbling sound harmonicas are known for, move your right hand to create a small passage where air can escape. When you rapidly open and close this passage, you will create wah wah sounds. Some areas to open your hand include:

  • Behind the harmonica, done by slightly twisting your right hand.
  • On top of the harmonica, done by extending the fingers on your right hand.
  • Below the harmonica, done by bottoming out your right wrist.

Source: Internet.


How to breathe when playing Harmonica?

To play like a pro, it’s essential that you learn how to breathe correctly. It’s the only way to produce notes that sound full and pleasing to the ear without running out of breath.

Blows and Draws

Each note on the harmonica is produced by blowing or drawing on the holes. In some instances, you’ll also change the pitch of a draw or blow note with a technique called bending (see How to Bend Notes on the Harmonica).

Blow notes (blows): Notes sounded by blowing into the harmonica

Draw notes (draws): Notes sounded by sucking air out of the harmonica

Nearly all beginners make the understandable mistake of a*suming that to play blows they should just blow into the harmonica as they would a balloon, and that to play draws they should suck in air as they might do to smoke a cigarette. On the contrary, you should never do either—the sounds that result will be unpleasant and difficult to control.

Proper Breathing

The steps below show the proper way to play blows and draws.

Relax

You always hear people–musicians, athletes, and people skilled at just about any activity–talking about being relaxed or the importance of relaxation, don’t you?  The best ice skaters look perfectly comfortable and at ease, the best athletes seem to glide, float, and coast, the best performers seem relaxed and at home on their stage.  Even when they are heavily exerting themselves.  When they say “relax” they don’t mean relax all your muscles–they mean, relax all the muscles you don’t need to be using.  Don’t fight yourself.  Muscles work in pairs often times, and if you are tense, one muscle that you don’t need to be using may be fighting a muscle that you do need to be using.  To relax the proper muscles, you first have to become aware of what muscles you are using, and which ones you need to be using.  Then you have to control the ones you don’t need to be using so they remain relaxed.  Relaxation takes control over your muscles.  Relaxation is a form of control.  Adding relaxation is adding control.  If you don’t have enough control over some element of your play, try to isolate the muscles involved–the ones you need to use and the extra ones you’re using besides, and gain control by relaxing the muscles you don’t need to be using.

From Your Diaphragm

Through out these pages you have heard (or will hear) me harp on breathing from the diaphragm.  Hopefully it has sunk in (or will sink in) that breathing from the diaphragm is important, worth paying attention to, worth working on, worth thinking about, considering, contemplating… and even practicing.

But what does it even mean?  Well, basically, we humans can breathe through our nose and/or mouth by using our lungs and/or our diaphragm to pump air in and out.  Our lungs are up in our chests, and our diaphragm is underneath, about the level of our stomachs.  Learn to isolate and separate the feelings of breathing from your lungs, both your lungs and diaphragm, and just your diaphragm.

The common advice on how to go about isolating your diaphragm breathing is to lie on the floor (hard surface helps) on your back and relax.  Put a book on your stomach and watch it move up and down.  Feel the weight of the book against your stomach and feel where your stomach pushes back against it.  Down there.  That’s your diaphragm.  Breathe from there.  Breathe all the way out and cough.  Feel the pounding of your diaphragm?

Get your lungs out of it.  If you feel your chest expanding you’re breathing from your lungs.  Chest equals lungs.  Stomach equals diaphragm.  Some guys say “play from your toes.”  From deep.  As deep as you can get.  If your shoulders are going up and down you’re breathing from your lungs.  Lungs are higher up.  Feelings caused by breathing that are high up in your body–your chest and your shoulders–are caused by breathing from your lungs.  Relax those muscles.  Stop expanding your chest and raising your shoulders.

Why?  You don’t like the answer that experience shows that breathing from the diaphragm works and sounds best?  You’re not happy with the thought that all the great players say the same things, and that the same wisdom is known by singers?  Okay, here’s another justification for you.

Put the harmonica to your mouth: Lick your lips as well as a few of the middle holes of the harmonica. Then bring the harmonica to your mouth so that its holes push just past your lips and the outside of your mouth and are right in front of your teeth—don’t simply reach forward with your lips and put them around the holes. In proper position, your lips should rest on the cover plates and press up gently against the fingers of your left hand. In general, the deeper you can hold the harmonica in your mouth while still breathing comfortably, the better your tone will be. Make sure to maintain proper hand positioning, and keep your cup open about halfway. 
Drop your lower jaw: Without changing the position of your mouth, lower your jaw slightly to expand the resonating space within your mouth. This will improve the tone of the notes you produce. 
Take a few breaths: With the harmonica properly positioned in your mouth, exhale and inhale as you normally would into the holes near the middle of the comb. Continue breathing until your blows and draws begin to feel natural.

How to breathe when playing Harmonica?

As you experiment with blowing and drawing, pay attention to your posture as well. It’s best to sit up straight with your shoulders back, not slouched. In time, you’ll get comfortable breathing properly in a more casual posture.

Resonance

Resonance is a reinforcing of sound wave echoes so that some frequencies in essence get amplified more than others.  Resonance is what breaks the crystal goblets when singers hit just the right note in just the right way.  Echoes are sound waves bouncing around, and since sound waves in air basically travel at the same speed, the affected (amplified) frequencies (how fast the sound waves jiggle the air, which jiggles our ear drums, which rate determines the pitch we hear) are determined by the size of the echo chamber; the distances of the walls from each other.  The lower the note, the longer the wave length, the bigger the chamber must be to affect that frequency.  This amplification of certain frequencies greatly influences the resulting tone and volume of the note being produced.

It turns out that our mouths are not quite big enough to provide an optimally sized resonant echo chamber for the sounds we produce either playing or singing, especially on lower notes.  The mouth is very important in manipulating the resonant chamber size (and shape) so we can tune it to the notes we are playing, reshaping the sound, but we need a little bigger chamber, something with more volume.  We add our hands, and this helps both in creating a larger chamber and providing a way to manipulate the chamber size to maximize the impact of each individual note.  But hands and mouth together are still not big enough.  The control comes from there, but the capacity–the size and volume of the chamber in which the sounds echo and resonate, benefits from use of the entire vocal tract, everything below the throat and back down into the lungs.  The lungs themselves are full of tissues and fluids, along with a myriad air sacks, so I don’t know how much the lungs themselves add to the resonance chamber–but, the airways that lead to the lungs are very important.  We need to relax the chest muscles that operate the lungs so we can control and expand the vocal tract resonance chamber.  Then we can still use the diaphragm to control the air flowing into and out of our lungs while maintaining control over the vocal tract that feeds the lungs.  We need to make ourselves big on the inside to take advantage of the resonant capabilities of our bodies.

Through the Nose?

Most of us play the harp with our mouth most of the time.  Unfortunately, there are exceptions, but let’s try not to think about that.

What do you do if you run out of air, either breathing in or breathing out?  Well, pretty much you have to breathe out or in to compensate, if only a little.  If your mouth is on the harp and you change your breath direction, you change the note you’re playing as well, and if you don’t want to do that you have two choices: breathe through your nose or remove your mouth from playing position.

You can quickly take a bite of air, or let some go, by momentarily taking your lip off the cover plate and breathing through your mouth but not through the harp.  This feels much like a biting motion, where you’re biting at the harp.  This lip biting technique can be used to articulate notes, and the articulation can be combined with breath equalization.

More often, excess air is expelled through the nose while playing notes while breathing out.  Some players talk about almost always letting a little air out when they play blow notes because they know they’ll need the lung capacity later, since they play mostly draw notes.  Running out of air is seldom the problem.  Having too much air is often the problem, and this letting out of air during blow notes helps keep their lungs in equilibrium.

On the other hand, air leaking in through the nose during draw notes is usually not a good idea.  Control over draw bends and vibrato is greatly reduced or lost if air is allowed to come in the nose.  And besides, as I said above, too much air is usually the problem, and excess air coming in is not what you need.  If you have trouble holding notes for a long time, see if you are letting air enter or escape through your nose.  If you are, you need to learn to control that.  Don’t get discouraged if you can’t control it right away.  Like so many things, it’s something you have to work at and learn.  But once you get it you probably won’t even think about it again, unless you read something that reminds you…

Exercises

Whenever you do breathing exercises, use caution not to overdo it and make yourself dizzy or hurt yourself in any way.  You’re not trying to force your body to do something it doesn’t want to do, you’re trying to train it and teach it and condition it to want (or be able) to do more.  I’m no physician, so if you have any health problems that concern you–as always, check with a doctor first.

Anything that helps you gain relaxation control over your breathing should be beneficial to your harp playing.

Meditation in its various forms and guises tends to emphasize controlled, often slow and deep breathing, sometimes even with chanting.  Breathing exercises a*sociated with meditation practice can be applied to breathing for the harmonica.

Running, swimming, and other aerobic exercise can help strengthen your lungs and possibly improve your lung capacity, or at least allow you to more effectively utilize the lung capacity you have.

Most people breathe from only the top third or so of their lungs.  Most of the capacity lower in the lungs is not used, not well developed, and not contributing much to the person’s breathing.  Playing diatonic harp in cross harp position (2nd position) involves mostly breathing in.  When you “run out of air” it’s usually because you are getting too much air into your lungs.  We need to develop the lower parts of the lungs, breathing fully and deeply.

Breathe out slowly as far as you can.  Completely empty your lungs.  Squeeze out the last bits of air.  Got it all out?  Try coughing–see how much more there was?  Cough some more.  Get all that old deep stale air out of there.

Then slowly and willfully allow your lungs to begin filling.  This is a process of gradually relaxing the muscles that have been called into play to force the air out, up to a point.  After a while your lungs will be comfortably full of air, but keep slowly and gently filling them deeply.  Concentrate on using your diaphragm to take your slow deep breath.  It should feel like you are pushing out with your stomach.  Make sure your chest is not expanding and your shoulders aren’t rising.  Take several such long slow breaths, completely emptying your lungs first, then relaxing with control to slowly fill them back to neutral, then drawing with your diaphragm to fill them completely full.  Think you’ve got them all the way full?  Try a few quick inward pants just when you think you’re holding as much air as you can.  Picture the videos you’ve seen of pot smokers trying to inhale just a little bit more.

Pant like a dog.  Go on.  Feel the exercise your diaphragm is getting?  Open yourself up and go to it.  Let out all your air and pant.  Fill your lungs full and pant.  Keep panting while slowly breathing all the way in and all the way out.  That’s not as easy as it sounds, is it..  Keep at it, you’ll be gaining strength and control.

Practice rhythmic breathing.

Practice train songs.

Practice holding notes for a long time, both breathing in and breathing out.

While you’re holding notes, slowly vary the volume from soft to loud to soft.  Gain control of how much pressure you are using to generate the different dynamics.

Practice with the harp in your mouth, and play big full round smooth even chords.

Practice without the harp in your mouth when you can think about breathing, but can’t play your harp.

Playing the harp 
  Begins and ends 
With breathing.

Breathing in and out.

When you want.

As fast or slow as you want.

As hard or soft as you want.

For as long as you want.

Whenever you want.

Work on all those things.

How to Build Harmonica Playing Endurance

Beginners often run out of breath when they first try harmonica breathing. You might also find that your lips crack and your mouth dries quickly as you play. This is natural. Playing the harmonica is a demanding form of respiratory exercise, and until you train your body for it, you’re likely to run out of breath after just a few minutes. The best way to overcome these problems is by building up slowly. Try proper harmonica breathing for five minutes the first time, then add five minutes each day for a week. Your body will adapt, and your endurance will improve quickly.


What is rhythmic breathing?

Breathing patterns are repeated successions of inhaling and exhaling.  We can look to drumming patterns for ideas and names.  For example, the in-in/out-out pattern is called a “double stroke roll” in drum terminology.  Another basic pattern is called a “perididdle”, which is in-out-in-in/out-in-out-out or vice versa as out-in-out-out/in-out-in-in. Symmetrical drumming patterns let the drummer end up on the correct hand (as opposed to the right hand, which might be left).  Symmetrical breathing patterns let the harp player maintain a balance of air so we neither take in too much or too little to maintain the pattern.

Breathing is basic to harp playing, and rhythmic breathing should be part of every practice session.  Start by using rhythmic breathing patterns to play draw and blow chords on holes 1-3.  Practice as fast as you can, but not faster than you can.  If you find yourself stumbling over the pattern, slow down and work it into your muscle memory.  Be sure to relax, open up your throat, and use your diaphragmto control your breathing, not your lungs, mouth, or tongue.  This will improve your resonance and the depth and richness of your tone.

Fast improvisation can be achieved by using repeated breathing patterns to select the notes you play, rather than selecting notes some other way then doing whatever you need with your breath to get those notes.  Of course this style should not replace other improvisation, or dominate, necessarily, but can add to other styles and put another tool in your bag of tricks.  Seems to me that John Popper uses this approach routinely.

The other point with respect to breathing patterns is that analyzing difficult passages to identify the underlying breathing pattern can greatly simplify the learning and playing of the passage.

There are superimposed rhythmic patterns at work when we play:

  1. the rhythm of the music
  2. our breathing patterns that enable the notes

It is easy to concentrate on the rhythm of the music and ignore the underlying rhythm of our breath which enables the music–we just kind of unconsciously get there by working on getting the right notes.  But much of the difficulty is solved once the enabling breathing pattern is learned.


Chromatic Harmonica Scales

Permission to republish this page kindly granted by Aqueduct

This post shows the notes included in the major scales and how they are played on a solo layout 12 hole chromatic harmonica in key of C. The idea is to help visualise the different keys. Repeated or choice notes are shown so you may make your own choice from the alternatives shown. In all the diagrams, the upper two rows are the blow notes, and the lower two rows are the draw notes; the top and bottom rows are played with the slide pressed, as shown in the diagram for C Major. In all cases (for Ionian/Major) the tonic note is shown in red, the Third in green and the Fifth in blue.

Chromatic Harmonica Scales

In Western music theory there are only 12 chromatic notes in an octave, so there are four enharmonics which are not shown in these tables:

  • Fb which is the same note as E
  • E# which is the same note as F
  • Cb which is the same note as B
  • B# which is the same note as C

You can read more about music theory on this website.

I have also added all the other scales each layout represents, the tonic is the name of the scale. All references to minor scale are Natural Minor, for Harmonic minor raise the sixth (from minor tonic) a semi tone, for Melodic Minor raise both the sixth & seventh (from minor tonic) by a semitone when going up the scale


C Major, A minor

No Sharps or Flats in Signature.
A Natural Minor AKA Aeolian. B Locrian. C Ionian. D Dorian. E Phrygian. F Lydian. G Mixolydian.

Blow, Slide In . F . . . F . . . F . .
Blow, Slide Out C E G C C E G C C E G C
Draw, Slide Out D F A B D F A B D F A B
Draw, Slide In . . . C . . . C . . . D

G Major, E minor

F#. Signature
E Natural Minor AKA Aeolian. F# Locrian. G Ionian. A Dorian. B Phrygian. C Lydian. D Mixolydian.

. . . . . . . . . . . .
C E G C C E G C C E G C
D . A B D . A B D . A B
. F# . C . F# . C . F# . D

D Major, B minor

F#, C#. Signature
B Natural Minor AKA Aeolian. C# Locrian. D Ionian. E Dorian. F# Phrygian. G Lydian. A Mixolydian.

C# . . C# C# . . C# C# . . C#
. E G . . E G . . E G .
D . A B D . A B D . A B
. F# . . . F# . . . F# . D

A Major, F#/Gb minor

F#, C#, G#. Signature
F# Natural Minor AKA Aeolian. G# Locrian. A Ionian. B Dorian. C# Phrygian. D Lydian. E Mixolydian.

C# . G# C# C# . G# C# C# . G# C#
. E . . . E . . . E . .
D . A B D . A B D . A B
. F# . . . F# . . . F# . D

E Major, C#/Db minor

F#, C#, G#, D#. Signature
C# Natural Minor AKA Aeolian. D# Locrian. E Ionian. F# Dorian. G# Phrygian. A Lydian. B Mixolydian.

C# . G# C# C# . G# C# C# . G# C#
. E . . . E . . . E . .
. . A B . . A B . . A B
D# F# . . D# F# . . D# F# . .

B Major, G#/Ab minor

F#, C#, G#, D#, A# Signature
G# Natural Minor AKA Aeolian. A# Locrian. B Ionian. C# Dorian. D# Phrygian. E Lydian. F# Mixolydian.

C# . G# C# C# . G# C# C# . G# C#
. E . . . E . . . E . .
. . . B . . . B . . . B
D# F# A# . D# F# A# . D# F# A# .

F# Major, D#/Eb minor

F#, C#, G#, D#, A#, E#/F. Signature
D# Natural Minor AKA Aeolian. E# Locrian. F# Ionian. G# Dorian. A# Phrygian. B Lydian. C# Mixolydian.

C# E# G# C# C# E# G# C# C# E# G# C#
. . . . . . . . . . . .
. E# . B . E# . B . E# . B
D# F# A# . D# F# A# . D# F# A# .


F Major, D minor

Bb. Signature
D Natural Minor AKA Aeolian. E Locrian. F Ionian. G Dorian. A Phrygian. Bb Lydian. C Mixolydian.

. F . . . F . . . F . .
C E G C C E G C C E G C
D F A . D F A . D F A .
. . Bb C . . Bb C . . Bb D

Bb Major, G minor

Bb, Eb. Signature
G Natural Minor AKA Aeolian. A Locrian. Bb Ionian. C Dorian. D Phrygian. Eb Lydian. F Mixolydian.

. F . . . F . . . F . .
C . G C C . G C C . G C
D F A . D F A . D F A .
Eb . Bb C Eb . Bb C Eb . Bb D

Eb Major, C minor

Bb, Eb, Ab. Signature
C Natural Minor AKA Aeolian. D Locrian. Eb Ionian. F Dorian. G Phrygian. Ab Lydian. Bb Mixolydian.

. F Ab . . F Ab . . F Ab .
C . G C C . G C C . G C
D F . . D F . . D F . .
Eb . Bb C Eb . Bb C Eb . Bb D

Ab Major, F minor

Bb, Eb, Ab, Db. Signature
F Natural Minor AKA Aeolian. G Locrian. Ab Ionian. Bb Dorian. C Phrygian. Db Lydian. Eb Mixolydian.

Db F Ab Db Db F Ab Db Db F Ab Db
C . G C C . G C C . G C
. F . . . F . . . F . .
Eb . Bb C Eb . Bb C Eb . Bb .

Db Major, Bb minor

Bb, Eb, Ab, Db, Gb. Signature
Bb Natural Minor AKA Aeolian. C Locrian. Db Ionian. Eb Dorian. F Phrygian. Gb Lydian. Ab Mixolydian.

Db F Ab Db Db F Ab Db Db F Ab Db
C . . C C . . C C . . C
. F . . . F . . . F . .
Eb Gb Bb C Eb Gb Bb C Eb Gb Bb .

Source: Internet


Introduction to Chromatic harmonicas

The chromatic harmonica is a type of harmonica that uses a button-activated sliding bar to redirect air from the hole in the mouthpiece to the selected reed-plate desired. When the button is not pressed, an altered diatonic major scale of the key of the harmonica is available, while depressing the button accesses the same scale a semitone higher in each hole.
Thus, the instrument is capable of playing the 12 notes of the Western chromatic scale. The chromatic harmonica can thus be contrasted with a standard harmonica, which can play only the notes in a given musical key.

Famously accomplished chromatic harmonica players include classical players Larry Adler, Tommy Reilly, Sigmund Groven, and Willi Burger, jazz players Toots Thielemans, Gregoire Maret, Yvonnick Prene, Hendrik Meurkens, and William Galison, and popular musicians Norton Buffalo and Stevie Wonder.

Chromatic harmonicas are usually 12, 14 or 16 holes long. The 12-hole chromatic is available in 12 keys, but because the entire chromatic scale is available by definition, most professionals stick with the key of C—which is perhaps easier to remember, since slide in will automatically be the sharps of the a*sociated note.

Chromatic harmonicas are traditionally tuned to solo tuning, which has a similar layout to the diatonic’s Richter tuning except that it eliminates the G on the draw and doubles the Cs that are not on the ends of the instrument. In the standard 12-hole chromatic in C the lowest note is middle C, while 16-hole variants start one octave lower. For the 16-hole variant, the layout is usually as follows. Note that the “D” in the last key-in draw note is common, though by no means present in all chromatic harmonicas.

Introduction to Chromatic harmonicas

Introduction to Chromatic harmonicas

[toc heading_levels=”3,4,5″]

blow C E G C C E G C C E G C C E G C key out
draw D F A B D F A B D F A B D F A B
1
aa1′
2
2′
3
3′
4
4′
5
1
6
2
7
3
8
4
9
5
10
6
11
7
12
8
13
9
14
10
15
11
16
12
blow C♯ F G♯ C♯ C♯ F G♯ C♯ C♯ F G♯ C♯ C♯ F G♯ C♯ key in
draw D♯ F♯ A♯ C D♯ F♯ A♯ C D♯ F♯ A♯ C D♯ F♯ A♯ D

Advantages

Because it is a fully chromatic instrument, the chromatic harmonica is the instrument of choice in jazz and classical music.] The “solo tuning” layout repeats itself at each octave, which simplifies playing in different octaves and keys in contrast to the Richter tuning system. Also, due to the windsavers on the low and mid-range holes, it can bend notes on both blow and draw notes, giving additional tonality if needed. In traditional harmonica bands, the chromatic harmonica plays the lead part.

Stock chromatics are well suited for players who play chromatics in third position traditional Chicago Blues, and benefit from having a selection of keys.

Disadvantages

While the chromatic harmonica is capable of playing in all keys, it does have limitations. For example, while chromatic harmonicas can “bend” notes down in pitch, as a single-reed bend it sounds quite different from the typical dual-reed bend of a blues harp, and can only bend downward by a semi-tone. Furthermore, unless the windsavers are removed, chromatic harmonicas cannot “overblow” except on the upper four holes. However, dual-reed bends and overblows are possible on slideless chromatic harmonicas, as the Tombo S-50.

Perhaps more importantly, the number of chords, double-stops, and legato phrasings available is limited, unless the harmonica is retuned from standard tuning; the lack of a G on the draw makes it impossible to play the G chords available on a Richter-tuned device.
Thus, while a chromatic harmonica is well-suited for playing lead or melody, diatonic harmonicas have a greater advantage when playing harmony or accompaniment.

As the chromatic harmonica is designed to play melodies in any key, many 16-hole and special version chromatic are only made in the key of C. Because of this, there are many approaches to get over the limits of the chromatic harmonica: the first and the most common approach, encouraged mainly by classical music players (such as Franz Chmel), is that a good harmonica player should try his or her best to use the chromatic in the key of C; some even discourage switching to other keys.
An alternative approach is to have several keys and play them as if playing key of F on a key of C.
Although it still requires being able to play over complex changes, modulating and so forth, it enables the player to focus more on the music. Another approach is using altered tunings such as Diminished, which requires learning to play three (or four) patterns and then be able to play in all keys.

Chromatic harmonicas tend to be significantly more expensive than their diatonic counterparts—with a typical chromatic harmonica selling at a price that is up to ten times higher than a simple diatonic harmonica. Chromatic harmonicas produced by reputable companies (such as Hohner, Seydel, and Suzuki) can cost hundreds of US dollars.

Slider design

Chromatic harmonicas are often described as either “straight tuned” or “cross tuned”. This refers to the way the slider is shaped to isolate the reed set being played at a given position (button “in” or button “out”).
Traditionally the chromatic was “straight tuned” and the slider selected either the upper reed-plate (button out) or the lower reed-plate (button in).

In the later half of the 20th century a new system came into use in which the slider played the upper and lower reed-plates at the same time, staggered by which hole (thus with the button out the player might play the upper reed-plate in hole 1, the lower reed-plate in hole 2, and then the upper again in hole 3 and so forth; pressing the button reversed this).
This allows for a larger hole in the slider, and thus presumably more air gets through, allowing a louder volume. The two methods co-exist with some companies and players preferring one style and others another.

There are at least two other types of slider design as well. The first one has holes side-by-side with each other in the slider, thus opening only the left side of the chamber or the right side depending on button position. The Renaissance chromatic uses this design, which is claimed to mix the larger hole of a cross-tuned design with an even shorter movement than in straight tuned sliders.
The simple way of doing this is to construct the harmonica more like a traditional Richter diatonic whereas the standard chromatic design shares more in common with the Knittlinger octave harmonicas. Note, however, the Renaissance uses a complex comb design to achieve their slider design.
The second type of alternative design is found mostly in East Asia and is based more along the traditional Weiner tremolo construction.
Here each reed is isolated in its own cell within the comb and the slider selects a single reed at a time rather than a cell containing both blow and draw reeds. The Tombo Ultimo is an example of this type of chromatic.

Finally, there are also several types of non-slide chromatic instruments available, particularly in Asia, such as the horn harmonica, as well as Tombo’s S-50, Tombo’s Chromatic Violin Range, and others.
Tombo Chromatic Violin Range (three and a half octaves), as well as S-50 (three octaves) use the tremolo scale tuning system (but with only one-reed): in essence it is a C♯ tremolo harmonica sitting on top of a C tremolo harmonica, with blow and draw reeds each sitting in a single cell. The player switches between a top row tuned to C♯ and a bottom tuned to C by changing the angle of the harmonica.

Alternative tunings

Like diatonic harmonicas, chromatics are available in numerous tunings. However, there are three more popular versions: one is Irish tuning, whereby notes are flattened (instead of sharpened) when the slide is in. This makes playing Irish music and, to a certain extent, blues, easier, since Irish music is commonly played in either the key of D or key of G.

The use of C, with no sharps or flats, and B, with all flats, allows common Irish modes to be played while the downward-tuning slide allows ornamentation in keeping with the Irish tradition. Irish tuning can be achieved easily by reversing the slide (flipping the slide upside down) of a chromatic in the key of B major; alternatively, one can use the B major as is, but with slide-in as the home position.

blow C E G C C E G C C E G C C E G C key out
draw D F A B D F A B D F A B D F A B
1′ 2′ 3′ 4′ 1 2 3 4 5 6 7 8 9 10 11 12
blow B E♭ G♭ B B E♭ G♭ B B E♭ G♭ B B E♭ G♭ B key in
draw D♭ E A♭ B♭ D♭ E A♭ B♭ D♭ E A♭ B♭ D♭ E A♭ B♭

Another variant is bebop tuning, which is done by tuning the redundant C/C♯ in holes 4′, 4, 8, and 12 blow into a B♭/B pair. This allows playing chords in the key of F, as well as playing a C7 chord.

blow C E G B♭ C E G B♭ C E G B♭ C E G B♭ key out
draw D F A B D F A B D F A B D F A B
1′ 2′ 3′ 4′ 1 2 3 4 5 6 7 8 9 10 11 12
blow C♯ F G♯ B C♯ F G♯ B C♯ F G♯ B C♯ F G♯ B key in
draw D♯ F♯ A♯ C D♯ F♯ A♯ C D♯ F♯ A♯ C D♯ F♯ A♯ C

Another popular version of alternative tuning is classical tuning, which is done by switching between the blow and draw of the fourth hole of each octave:

blow C E G B C E G B C E G B C E G B key out
draw D F A C D F A C D F A C D F A C
1′ 2′ 3′ 4′ 1 2 3 4 5 6 7 8 9 10 11 12
blow C♯ F G♯ C C♯ F G♯ C C♯ F G♯ C C♯ F G♯ C key in
draw D♯ F♯ A♯ C♯ D♯ F♯ A♯ C♯ D♯ F♯ A♯ C♯ D♯ F♯ A♯ C♯

This easily allows Imaj7 and IIm7 chords, as well as many others, to be played–a benefit for various musical styles.

Another tuning is minor tuning for natural and harmonic minor Im7 and IIdim7 normal position.

blow C E♭ G B♭ C E♭ G B♭ C E♭ G B♭ C E♭ G B♭ key out
draw D F A♭ B D F A♭ B D F A♭ B D F A♭ B
1′ 2′ 3′ 4′ 1 2 3 4 5 6 7 8 9 10 11 12
blow C♯ E G♯ B C♯ E G♯ B C♯ E G♯ B C♯ E G♯ B key in
draw D♯ F♯ A C D♯ F♯ A C D♯ F♯ A C D♯ F♯ A C

Chromatic Harmonica Solo Tuning Layouts

Some 12 hole harmonica brands are available in a range of keys:LowestTenor C, D, Eb, E, F, G, A, Bb, B, middle CHighestThe highest tuned stock chromatic harmonica is the regular C starting on middle C (similar range to a concerto flute), and the lowest stock chromatic harmonica is the Tenor C (a semitone lower in range than an Alto Eb Saxophone).
Stock 16 hole Chromatic Harmonicas are only available in key of C starting on C below middle C, the same starting note as a Tenor C 12 hole chrom. Stock 14 hole Chromatic Harmonicas are only available in key of C starting on G below middle C, the same starting note as a key of G 12 hole chrom, but with the same layout as a C chromatic harmonica.

In Western music theory there are only 12 chromatic notes in an octave, so there are four enharmonics which are not shown in these tables:

  • Fb which is the same note as E
  • E# which is the same note as F
  • Cb which is the same note as B
  • B# which is the same note as C

You can read more about music theory on this website.


The 12 hole Chromatic Harmonica

Key of C and C Tenor

Hole           10 11 12
Blow, Slide In   C# G# C# C# G# C# C# G# C#
Blow, Slide Out 
Draw, Slide Out 
Draw, Slide In   D# F# A# D# F# A# D# F# A#

Key of D

Hole           10 11 12
Blow, Slide In   D# A# D# D# A# D# D# A# D#
Blow, Slide Out  F# F# F#
Draw, Slide Out  C# C# C#
Draw, Slide In   G# G# G#

Key of Eb

Hole           10 11 12
Blow, Slide In   Ab Ab Ab
Blow, Slide Out  Eb Bb Eb Eb Bb Eb Eb Bb Eb
Draw, Slide Out  Ab Ab Ab
Draw, Slide In   Gb Db Eb Gb Db Eb Gb Db

Key of E

Hole           10 11 12
Blow, Slide In   F F F F F F
Blow, Slide Out  G# G# G#
Draw, Slide Out  F# C# D# F# C# D# F# C# D#
Draw, Slide In   A# A# A# F#

Key of F

Hole           10 11 12
Blow, Slide In   Gb Bb Db Gb Gb Bb Db Gb Gb Bb Db Gb
Blow, Slide Out  A A A
Draw, Slide Out  Bb Bb Bb
Draw, Slide In   Ab Eb Ab Eb Ab Eb

Key of G

Hole           10 11 12
Blow, Slide In   G# D# G# G# D# G# G# D# G#
Blow, Slide Out 
Draw, Slide Out  F# F# F#
Draw, Slide In   A# C# A# C# A# C#

Key of A

Hole           10 11 12
Blow, Slide In   A# A# A# A# A# A#
Blow, Slide Out  C# C# C#
Draw, Slide Out  F# G# F# G# F# G#
Draw, Slide In   D# D# D#

Key of Bb

Hole           10 11 12
Blow, Slide In   Eb Gb Eb Gb Eb Gb
Blow, Slide Out  Bb Bb Bb Bb Bb Bb
Draw, Slide Out  Eb Eb Eb
Draw, Slide In   Db Ab Bb Db Ab Bb Db Ab

Key of B

Hole           10 11 12
Blow, Slide In  
Blow, Slide Out  D# F# D# F# D# F#
Draw, Slide Out  C# G# A# C# G# A# C# G# A#
Draw, Slide In   C#

The 16 hole Chromatic Harmonica

A 16 hole Chromatic Harmonica in key of C major has the following note layout

Hole            10 11 12 13 14 15 16
Alternative     °1 °2 °3 °4 10 11 12
Blow, Slide In   C# G# C# C# G# C# C# G# C# C# G# C#
Blow, Slide Out
Draw, Slide Out
Draw, Slide In   D# F# A# D# F# A# D# F# A# D# F# A#

Hole one blow is C below middle C, so the next set of C’s are middle C. On some 16 hole harps the first octave holes are numbered 1 to 4 with dots above them, then the remaining holes are numbered 1 to 12. Other 16 hole chroms are numbered from 1 to 16. It depends on the make, model and production date.


The 14 hole Chromatic Harmonica

A 14 hole Chromatic Harmonica in key of C major has the following note layout

Hole            10 11 12 13 14
Alternative     °  °° 10 11 12
Blow, Slide In   G# C# C# G# C# C# G# C# C# G# C#
Blow, Slide Out
Draw, Slide Out
Draw, Slide In   A# D# F# A# D# F# A# D# F# A#

Hole one blow is G below middle C, so the first set of C’s are middle C. On some 14 hole harps the first two holes are not numbered at all, then the remaining holes are numbered 1 to 12. Other 14 hole chroms are numbered from 1 to 14. It depends on the make & model.

Source: Internet


Introduction to Blues Harmonica

Blues is the most important harmonica style. Once you have learnt the basics, you will be able to play blues with musicians everywhere.
Most people a*sociate the harmonica with blues, music sounding like this:

Blues Harmonica Type (or Blues Harp) is name used in the Americas. But in Asia, people call  Richter-tuned harmonica, or 10-hole harmonica, is the most widely known type of harmonica.

 It is a variety of diatonic harmonica, with ten holes which offer the player 19 notes (10 holes times a draw and a blow for each hole minus one repeated note) in a three-octave range.

The standard diatonic harmonica is designed to allow a player to play chords and melody in a single key. Because they are only designed to be played in a single key at a time, diatonic harmonicas are available in all keys. Harps labeled G through B start (on hole 1 blow) below middle C, while Harps labeled D♭ through F♯ start above middle C (C4). Here is the layout for a standard diatonic harmonica, labeled C, starting on middle C (C4).

Blues Harmonica

Although there are three octaves between 1 and 10 “blow”, there is only one full major scale available on the harmonica, between holes 4 and 7. The lower holes are designed around the tonic (C major) and dominant (G major) chords, allowing a player to play these chords underneath a melody by blocking or unblocking the lower holes with the tongue. The most important notes (the tonic triad C–E–G) are given the blow, and the secondary notes (B–D–F–A), the draw.

Introduction to Blues Harmonica

[toc heading_levels=”3,4,5″]

Valved diatonics

The valved diatonic is one of the most common ways of playing chromatic scales on diatonic harmonicas. While chromatic is available, valved diatonic is also common, and there are reasons to use a valved diatonic rather than chromatics. It does not have a slide a*sembly (so that it has less air leakage), and it has a wider tonal range and dynamic. As well, it has a smaller size and is much more suitable to use with microphone, and it is still cheaper than chromatic, even for a premade one like Hohner’s Auto Valve or Suzuki Promaster MR-350v.

Valved diatonics are made by fitting windsavers on draw holes 1–6 and blow holes 7–10; this way, all reeds can be bent down a semitone at least, although most players can easily bend down a whole tone. Alternatively, one can simply buy a factory-made valved diatonic such as the Suzuki Promaster Valved.

The disadvantage of the valved diatonic is that it does not require one to develop proper embouchure in order to bend the notes accurately. Also, many of the notes reached by bending are nearer just intonation, and the slightly lower equal tempered pitches preferred by western classical music are unattainable.
This limits the number of chromatic notes available when playing classical repertoire when compared with that of jazz or blues. Another thing worth noting is that, due to the valved bends being one-reed bends, the sound is less full than traditional bends, and may seem dull, making it less dynamic. One way to address this is by having an additional reed that activates when one bends a note; this is the philosophy of Hohner’s XB-40 and Suzuki’s SUB30 Ultrabend.

Playing in different keys

Aside from bending, Richter-tuned harmonicas are modal.

Playing the harmonica in the key to which it is tuned is known as “straight harp” or “first position” playing. For example, playing music in the key of C on a C-tuned harmonica.

More common (especially in blues and rock) is “crossharp” or “second position” playing which involves playing in the key which is a perfect fourth below the key of the harmonica (for example, on a C tuned harmonica, a second position blues would be in G—resulting in the instrument playing in mixolydian mode). This is because the notes of the G pentatonic scale (a commonly used scale in blues and rock) are more easily accessible on a C-tuned harmonica.
The lower notes of harps in the lower keys (G through C) are easier to bend, but take more wind. Since much of crossharp is played on the inhalation, every opportunity for exhalation must be capitalized upon—by blowing out lots of air on every exhaled note and during every pause. Crossharp lends itself to seventh and ninth chords (particularly G7 and G9) as well as blue notes (particularly on D chords, where the harmonica is tuned to play D minor while the other instruments play D major).

Another method is to play in the key one whole tone above that of the harmonica. On a C-tuned harmonica, this would mean playing in the key of D. This is known as “slant harp” or “third position” playing, and results in the harmonica playing in dorian mode. This is much less intuitive as it requires the ability to bend notes completely accurately, and there are fewer useful chords available than in 1st or 2nd position playing.
The technique offers many notes that are not achievable in the other positions without overblows, such as the blue note on the third degree, which may or may not be favorable depending on the circumstance. The bends available at the lower end of the instrument also make playing melodies in a D major scale relatively easy for those who have any semblance of proficiency at the bending technique, though most of the notes (all but the second and fourth, E and G) in the scale are on the draw, requiring great skill and strategy in exhaling, even more so than in crossharp.

Continuing along the circle of fifths, fourth position, fifth position, sixth position and zeroth positions can be played, with the scales played in those positions indicated as follows:

Position Tonic Heptatonic mode Pentatonic scales Name
0 F Lydian Major
1 C Ionian (major) Major, ritusen Straight harp
2 G Mixolydian Major, ritusen, suspended Crossharp
3 D Dorian Minor, ritusen, suspended Slant harp
4 A Aeolian (natural minor) Minor, man gong, suspended
5 E Phrygian Minor, man gong
6 B Locrian Man gong, blues

Note that using blue notes, any of the seven positions can be used over music in its corresponding major scale if only the notes in the corresponding pentatonic scale are played.

Specially tuned instruments

Some players prefer specially tuned variants of the diatonic harmonica. Several manufacturers, for instance Lee Oskar Harmonicas, make a variety of harmonicas to help players used to a “cross-harp” style to play in other styles. Cross-harp players usually base their play around a mixolydian scale starting on 2 draw and ending a 6 blow (with a bend needed to get the second tone of the scale; a full scale can be played from 6 blow to 9 blow).
Lee Oskar specially tunes harmonicas to allow players to play a natural minor or major scale from 2 draw to 6 blow, or a harmonic minor scale from 4 blow to 7 blow. Below are some sample layouts (the key labels describe the scale from 2 draw to 6 blow, whereas traditional harmonicas are labelled according to the scale between 4 and 8 blow).

  • Country tune: Identical to standard Richter tuning, except hole 5 draw is raised a semitone.
  • Natural minor (cross harp, 6 blow to 9 blow) / Dorian (straight harp, 4 blow to 7 blow):
1 2 3 4 5 6 7 8 9 10
blow C E♭ G C E♭ G C E♭ G C
draw D G B♭ D F A B♭ D F A
  • Harmonic minor (straight harp, 4 blow to 7 blow)
1 2 3 4 5 6 7 8 9 10
blow C E♭ G C E♭ G C E♭ G C
draw D G B D F A♭ B D F A♭
  • Major (cross harp, 6 blow to 9 blow), Lee Oskar Melody Maker (this will be labeled as “G”: Melody Major’s key indicate cross harp’s key, starting from draw 2)
1 2 3 4 5 6 7 8 9 10
blow C E A C E G C E G C
draw D G B D F♯ A B D F♯ A

With the major second on 3 blow (where, in standard Richter tuning, the cross harp tonic would be repeated) and a major 7th (rather than a minor 7th) on 5 draw, the Melody Maker has a full major scale. This can be very useful for playing major key melodies, for example, fiddle tunes, quickly, without having to do a lot of precise bending or overblowing.
This tuning, designed and marketed by Lee Oskar, is a particularly interesting evolution of the harmonica, since it allows a player accustomed to playing “cross harp” (in Mixolydian) to play in a major key (which is what the standard layout is designed for in the first place).
Rather than providing the standard tonic C and dominant G7 chords, the Melody Maker provides a GM7 chord (2–5 draw), a C6 chord (1–4 blow), an Am or Am7 chord (3–5 or 3–6 blow), a D chord (4–6 draw) and a C chord (6–10 blow). If we are in the key of G, then, the melody maker provides the I chord, the IV chord, the V chord and the ii chord, allowing ii–V–I progressions as well as I–IV–V progressions.

  • Optimized blues tuning (this will be labeled as “C”: starting from draw 1)
1 2 3 4 5 6 7 8 9 10
blow B♭ D♭ F A♭ B♭ D♭ F A♭ B♭ D♭
draw C E G B C E G B C E

It is also possible for harp players to tune the harmonica themselves. By making small scratches in a reed, the note played can be changed. It is possible to either get a higher or a lower note. Some harp players make extensive use of these modifications.
One of the most famous examples is the harp solo on “On the Road Again” by Canned Heat, on which the harmonicist, Alan “Blind Owl” Wilson, gets the minor third crossharp on the sixth drawn reed, which is normally the major second crossharp. There are books, toolkits and guides to tuning and harp customization available on the Internet; anyone interested in trying their hand at tuning should be prepared to sacrifice a few harmonicas during the learning curve.

12-hole and 14-hole diatonic

Hohner had made a few non-standard harmonicas. All of them have more than 10 holes and are labeled “grosse richter”. For 12 holes, Hohner makes the M364 Marine Band, as well as the M36460 Marine Band Soloist. The Marine Band Soloist is solo tuned, with 3 full diatonic octaves with all notes of the major scale of the key of C.
Since it can bend notes in the same way as a regular diatonic harmonica in the middle octave, some players use this for blues (and even jazz) instead of the more well-known solo-tuned harmonica, the chromatic harmonica, since the bent notes sound very different from true semi-tones. (For layout, see below at Chromatic harmonica, key out) In this configuration, blues players usually play in the third position, the D-minor blue scale.

In addition to the M364 models with 12 holes, there is also the Hohner Marine Band M365 14-hole harmonica. The general dimensions of the 12- and 14- hole Hohner harmonicas are a bit bigger than regular diatonic harmonicas. The M36401 and M36501 harmonicas (in the key of C) are pitched one octave lower than the standard 10-hole C diatonic. Thus, hole-4 blow is the same pitch as hole-1 on a regular diatonic harmonica in the key of C. The Marine Band M36408 and M36508 (in G) are similar to a usual G diatonic, having the higher end expanded.

Holes 1 through 4 and 6 are draw-bendable, and holes 8 through 14 are blow-bendable. Note the extra holes 11–14 which in theory extend the bending capabilities a lot (from A down to E in hole-14, for example), although in practice these are quite limited.

1 2 3 4 5 6 7 8 9 10 11 12 13 14
blow C E G C E G C E G C E G C E
draw D G B D F A B D F A B D F A

There is also the Steve Baker Special (M3658) manufactured by Hohner, a special tuned 14-hole diatonic. Below, the layout of the Steve Baker Special in the key of C:

1 2 3 4 5 6 7 8 9 10 11 12 13 14
blow C E G C E G C E G C E G C E
draw D G B D G B D F A B D F A B

They come in five keys:

  • C – M36581
  • D – M36583
  • F – M36586
  • G – M36588
  • A – M36590

This harmonica opens up lots of interesting possibilities, especially for blues harmonica, like extended tongue-block octave playing, the possibility to play exactly the same 2nd position riffs in two octaves, etc.

Extra-reed harmonicas

Two harmonica models have been released with altered designs that allow for increased bending abilities, and in effect, chromatic playing on a diatonic harmonica. They are often referred to as “extra-reed” harmonicas, because they carry more than the usual 20 reeds of a diatonic harp.

The Hohner XB-40, invented by Rick Epping, features an entirely new body design, though in practice, it is still a Richter-tuned (diatonic) harmonica. Here the blow reeds and the draw reeds are sealed off one from another with valves, effectively creating two separate cells in the comb for each hole in the mouthpiece: one for blow and another for draw. A second reed is then placed in this cell at a zero-offset (no gapping) so that it does not sound under normal playing.
However, it is placed on the opposite side of the reed-plate from the speaking reed and tuned so that it responds when the player “bends” the note downwards in pitch. This allows for every note on the XB-40 to be bent downwards a whole-tone or more, whereas on standard diatonics only certain notes (the higher-pitched in the cell) will bend at all.

1 2 3 4 5 6 7 8 9 10
blow B♭
B
C
D
E♭
E
F
G♭
G
B♭
B
C
D
E♭
E
F
G♭
G
B♭
B
C
D
E♭
E
F
G♭
G
A♯
B
C
draw D
D♭
C
G
G♭
F
B
B♭
A
A♭
D
D♭
C
F
E
E♭
A
A♭
G
B
B♭
A
D
D♭
C
F
E
E♭
A
A♭
G

The other Richter-tuned harmonica of this kind is the Suzuki SUB30 Ultrabend. Where the XB-40 uses valves and a total of 40 reeds, the SUB30 takes a different approach. Each hole of the harmonica houses a third reed, totalling thirty reeds altogether and thus, where the harmonica draws its name.
The third reed is dubbed a “sympathetic reed”, tuned one tone below the pitch of the lowest note, and is normally passive to airflow. The reed becomes active when the player uses the bending technique, allowing the low note in each hole to be bent down one semitone. Unlike the XB-40, the SUB30 retains the typical shape and size of most other ten-hole diatonic harmonicas.

Source: Internet


Clever Harmonica Tips Techniques For Beginners

The Harmonica

The harmonica commonly called the mouth organ is one of those musical instruments that have a lot of appeal and charm for an instrument beginner. This is because it is amongst the most uncomplicated musical instruments to play and still ranks top amongst the most romantic ones, primarily as it sound the most like a human voice than any other instrument. Learning to play the harmonica, involves breath control and lots of practice. Before that, however, you have to know the different types of Harmonica and make a choice based on your needs and budget.

Choosing a Harmonica

There are many different varieties of harmonica available for purchase. This varies based on what it is to be used for and its price. It is recommended for starters that you purchase either a chromatic or a diatonic harmonica, here at Honkin’ Harmonica Shop we favour the ‘blues’ so specialise in diatonic harmonicas. Any of the two can be used to play blues, folks and lot of other popular music however.

The most commonly used is the diatonic harmonica. It is also generally the cheapest which is another reason to make harmonica attractive for the beginner player. It is tuned to a particular key, one of twelve but the most popular beginner key  diatonic harmonica is C. There are three types of the diatonic harmonica; they are the “blues harmonica,” the “tremolo harmonica,” and the “octave harmonica.”

The two favourite harmonica played for blues by both beginners and pro’s alike are Hohner Marine Band which has been around since 1896 and the Hohner Special 20.

Bending

The chromatic harmonica controls which holes makes noise by using a mechanical button-activated sliding bar to redirect air from the hole in the mouthpiece to the decided reed-plate desired. Elementary chromatic harmonicas with ten notes can only play one full key just like a diatonic harmonica; however, chromatics with 12-16 holes can be tuned to any key. Chromatics are usually more costly than a lot of diatonic harmonicas; purchasing a top quality chromatic from a renowned brand can cost several hundred pounds.

How to Correctly Hold The Harmonica

Correctly holding the harmonica is one of the principal steps in learning how to play the harmonica. You generally cannot play a harmonica and acheive a decent tone if you do not hold it right. Below are the procedures for holding the two types of harmonicas discussed above.

Generally, the lower number should be on your left in all harmonicas. If however, your harmonica doesn’t have a numbering system (as is the case in the East Asia Tremolo), then the lowest note should be on your left.

Holding the Diatonic and the Chromatic Harmonica

1.    Diatonic

There are two steps to correctly holding a diatonic harmonica;
In your left hand, between the thumb and index finger, place the body of the harmonica. Let your three remaining fingers curve slightly; this would form a small resonating space.
Over the harmonica, but not on the mouthpiece side, lay the flat of your right hand. Enclose it, to form a tight cup. Optimally, this cup should create a large resonating space.

2.    Chromatic

Since there are various variants of a chromatic harmonica, there are also quite a few variants for holding a chromatic. One is a variation of the same technique used in holding a diatonic, but the right thumb would be used to work the slide button. The other popular variant is quite similar:

Using your left hand, place the harmonica somewhere around the left of your center with the thumb, index and middle fingers.

Twist your right hand along the wrist so that your fingers point to a two o’clock position and your palm is facing up. Place your right palm at the bottom of the harmonica, and wrap all your fingers except the index fingers around it. If this is done correctly, your right wrist will form a right angle. Your index finger should touch the slide button, keep it always there, notwithstanding whether you use the button or not. If you own a 16-hole variant, hold it in a similar manner, except set your cup closer to the center. Alternatively, you can break up the cup.

Blowing a harmonica/How to Hold Your Lips on A Harmonica

There are two methods of playing the harp; the Pucker method and the tongue blocking method. Both methods of playing are accurate, neither is more acceptable than the other although blues guys tend to favour tongue blocking for a traditional blues style. When you become more experienced, you should be able to switch comfortably between the two. However, start with the one that feels natural to you, keep practicing the one that seems alien to you as it’ll eventually need mastering if you are to become magnificent with the harp! None of the two styles are easy to master immediately; you would need lots of practice to do so, but with time, it will drop into place, and you’ll have the hang of it, just be patient. There are lots of videos on you tube that can help with these techniques that a lot of beginner blues harp players find useful.

How to place the Harmonica in your mouth

When you’re holding the harp by its ends, put it in your mouth with these steps:

  1. Open your mouth wide like you want to yawn.
  2. Use your forearms to bring the harmonica to your open mouth.
  3. Place the harmonica between your lips until it touches the corners of your mouth; the place where your top and bottom lips meet.
  4. Gently close your lips over the cover.

A Tip for playing, Do not move your head along the harmonica, instead, move the harmonica.

Puckering

Puckering is the common way to begin playing. It involves narrowing your lips to get a single note. A lot of new students learn this method first, and it is certainly the easiest way of the two approaches to tackle blow and draw bends. To pucker, with a quick lick, ensure your lips are, purse your lips as you would do when whistling, this would create an aperture. Relax your lips and loosen up slightly. Use the tip of your tongue to locate the hole you want to play and then apply your pucker right around the harp. Get stuck in.

To play, exhale gently and push from your diaphragm; Inhale gently, pulling from your chest and diaphragm. 

It is okay if you hear more than one note at first, however, work on playing individual holes. Keep practicing, listening and learning to adjust your pucker until you can narrow down the sound. 

Tongue Blocking

In tongue block, you get a single note by covering 3-4 holes with your mouth and use your tongue to cover (or “block”) all but one. If puckering comes to you naturally, blocking would take a lot of time to. It is, however, ideal to learn blocking if you wish to get that big tone and to give your sound a chunky quality. Tongue slapping, chord and rhythm accompaniment, fluttering, octaving and a lot of other great effects becomes available once you crack this method and essential for blues harmonica, but be warned it is a skill that takes a lot of time, years in most cases.

Breath Control; Blowing and Drawing Notes

“Blowing” and “Drawing” are the terms used to describe how notes are played on the harmonica. You need to think of blow and draw as inhale and exhale to get magnificent tones when you play the harmonica. You do not puff at a harmonica; instead, you exhale through it. You also do not suck air through a harmonica; you inhale through it. Like singing, all good harmonica notes come from the diaphragm. Never overdraw or over blow when playing! A lot of beginners often go overboard and put too much air into it. Playing a harmonica really doesn’t need a lot of air to get a great sound. The harmonica responds well to very minimal amount of air movements. If you want more volume than the harmonica naturally provides, instead of blowing harder to get it, get a microphone and amplifier.

Reading the Harmonica Tablature

Like guitars, you can play a harmonica by following a tablature. This helps reduce the number of notes on a single sheet of music to a system of holes and breath pattern that is very easy-to-follow. Tablature is useful for playing larger chromatic harmonicas as well, but it differs somewhat from diatonic tablature, and is less familiar.

All though there are a few options of displaying tabs the most common version which is easier for the beginner harmonica player to pick up is arrows being used to mark breathing. An upward pointing arrow symbolizes a breath out while a downward pointing arrow symbolizes a breath in and when a bend is required to achieve the correct note there is a kink in the arrow.

Here is a simple example-

On a diatonic harmonica, most holes produce two “neighbor” notes on a given scale; hence playing C and then D on the same scale is achieved by blowing into the fitting hole for C, and then drawing in from the same hole to produce D.

Numbers, from the lowest tone to the highest are used to mark the holes.  Hence, (up) 1 and (down) are the lowest two notes. While the highest note is a (down) 10 on a 10-hole harmonica.

Most notes on a standard 10-hole harmonica are overlapped, notably the (down) 2 and (up) 3 notes. This is essential as it allows proper range for playing scales.

  • There isn’t a regulated system of tablature that is used by every single harmonica player. However, once you practice and get comfortable with reading any one type, most other types are likely to begin quickly making sense to you.

Bending

Bending is unquestionably the blues harmonica technique. You lose half of the harmonica’s expressive capacity without bending; the cries, the moans and the wails, remember nothing sounds more like the human voice than the cry of a humble harmonica. Bending is a way of making use of your tongue, palate and throat to change the INTERNAL configuration of your mouth, this is so you can apply pressure to the air stream in such a way that lowers the pitch of a note.  Draw bends are possible on a diatonic harmonica on holes 1 through 6 while blow bends are possible on holes 7 through 10. To get that big bluesy tone that’s made the harmonica popular, you unquestionably need to learn how to bend notes on a harmonica. A lot of people that pick up the harmonica never figure out this essential technique that allows them to play with great soul and feeling.

The Technique of Bending

It is quite difficult to describe the technique for bending notes in a way that is understandable to someone who hasn’t done it before. The major reason this is so is because bending is a somewhat “subjective” technique, that is, different groups have their different ways which they approached it in, these diverse approaches however produces the same results. This is also difficult because you would be required to do things with your mouth, tongue, and vocal cavity that humans just don’t do. The following tips are for producing draw bends on the major diatonic harmonica. It is recommended that you use just the 4-hole draw for now, this is because it is the easiest to get started on.

Keep it in mind that the goal in bending is to change your airflow and the pattern of your vocal cavity so that you change the flow of air over the reeds, this in turn changes the way that they vibrate.

So. On the hole number 4, simply draw the note, thinking and feeling how the air moves over your tongue and into the back roof of you mouth. Now, think about dragging this channel of air into your stomach. To do this lower your tongue down and to the back, as you breath in you should feel the air move into your stomach, as this happens the pitch should lower.

Note. This will not happen the first time you try it, it takes lots and lots of practice so be patient. Maybe watching a video of which there are lots of on YouTube will help you with a more in-depth instruction.

Basics for Playing Amplified

If you have mastered the first few steps of playing harmonica and are keen to get playing the classic Chicago sound of many of the great recording of the 50’s you will need a microphone and an amplifier. Here are a few tips to get you playing amplified blues harp.

Firstly, buying an expensive rig will not improve your tone, if you are buying a rig to sound better, you will be more than likely a little disappointed. Tone starts with you and your harmonica, a good playing technique is necessary to get a “good” tone. Only when you have mastered a good quality acoustic playing tone is it called for to go in search for that perfect rig. A good rig does not make you great harmonica player, however, if you are a great player, your performance would benefit substantially from a good rig. A good player will make a “poor” rig sound great all the same.  Unfortunately there is no such thing as like a magic microphone, effects pedal or amplifier, it is all you, being amplified but of course there are some tips to make best of the situation as many classic errors can be avoided.

An amplifier is high impedance so you must match this with a high impedance mic to achieve the correct sound. Most mics are low impedance so it is essential you check you have the correct match. Traditionally small tube or valve amplifier is used for amplified blues harp as they tend to have a warmer tone and drive into distortion when you play a certain way. Usually the smaller the valve amplifier the better so around 5w of tube power is preferred. It is believed Little Walter invented this technique back in the 50’s.

Basic controls for that Chicago sound are turn your treble way down and the bass way up. Players tend to like a nice muddy sound but be careful not to be too low as if you are playing with a band and it is the same frequency as the bass you will not cut through the sound to be heard so find you frequency carefully.

Volume is always tricky, you want to be heard but you don’t want that dreadful squealing that is feedback. Turn up as loud as you can go till it starts making the wrong noises then just bring it back a touch, if that is not loud enough in a band situation you will need to trace the sound through the PA to boost the overall signal. Remember you will never be louder than any guitarist or drummer.

As feedback is the harmonica players curse the simplest way to deal with it is stand way back from the amplifier. If you stand in front or even behind it will feedback, especially as you are trying to use the controls but you will see as you veer away the feed back lessens you should be able to achieve a strong tone at good volume without the unnecessary noises.


How many types of harmonicas are there?

The harmonica, also known as a French harp or mouth organ, is a free reed wind instrument used worldwide in many musical genres, notably in blues, American folk music, classical music, jazz, country, and rock and roll. There are many types of harmonica, including diatonic, chromatic, tremolo, octave, orchestral, and bass versions.
A harmonica is played by using the mouth (lips and tongue) to direct air into or out of one or more holes along a mouthpiece. Behind each hole is a chamber containing at least one reed. A harmonica reed is a flat elongated spring typically made of brass, stainless steel, or bronze, which is secured at one end over a slot that serves as an airway. When the free end is made to vibrate by the player’s air, it alternately blocks and unblocks the airway to produce sound.

How many types of harmonicas are there?

How many types of harmonicas are there?

Have many people asked me: How many types of harmonicas are there?
Today, i will intro you about each of harmonica types.

[toc heading_levels=”3,4,5″]

Chromatic harmonica

The chromatic harmonica uses a button-activated sliding bar to redirect air from the hole in the mouthpiece to the selected reed-plate, though one design—the “Machino-Tone”—controlled airflow by means of a lever-operated flap on the rear of the instrument.
Also, a “hands-free” modification to the Hohner 270 (12-hole) lets the player shift the tones by moving the mouthpiece up and down with the lips, leaving the hands free to play another instrument. While the Richter-tuned 10-hole chromatic is intended to play in only one key, the 12-, 14-, and 16-hole models (which are tuned to equal temperament) allow the musician to play in any key desired with only one harmonica. This harp can be used for any style, including Celtic, classical, jazz, or blues (commonly in third position).

Diatonic harmonicas

Strictly speaking, diatonic denotes any harmonica designed to play in a single key—though the standard Richter-tuned harmonica diatonic can play other keys by forcing its reeds to play tones that are not part of its basic scale. Depending on the country, “diatonic harmonica” may mean either the tremolo harmonica (in East Asia) or blues harp (In Europe and North America). Other diatonic harmonicas include octave harmonicas.

Here is the note layout for a standard diatonic in the key of G major:

1 2 3 4 5 6 7 8 9 10
blow G B D G B D G B D G
draw A D F♯ A C E F♯ A C E

Each hole is the same interval (here, a perfect fifth) from its key of C counterpart; on the diatonic scale, a G is a perfect fifth from C. The interval between keys can be used to find the note layout of any standard diatonic.

Tremolo-tuned harmonica

The distinguishing feature of the tremolo-tuned harmonica is that it has two reeds per note, with one slightly sharp and the other slightly flat. This provides a unique wavering or warbling sound created by the two reeds being slightly out of tune with each other and the difference in their subsequent waveforms interacting with each other (its beat). The Asian version, which can produce all 12 semitones, is used often in East Asian rock and pop music.

Orchestral harmonicas

Orchestral harmonicas are primarily designed for use in ensemble playing.

Orchestral melody harmonica

There are eight kinds of orchestral melody harmonica; the most common are the horn harmonicas often found in East Asia. These consist of a single large comb with blow-only reed-plates on the top and bottom. Each reed sits inside a single cell in the comb.
One version mimics the layout of a piano or mallet instrument, with the natural notes of a C diatonic scale in the lower reed plate and the sharps and flats in the upper reed plate in groups of two and three holes with gaps in between like the black keys of a piano. Another version has one “sharp” reed directly above its “natural” on the lower plate, with the same number of reeds on both plates (therefore including E♯ and B♯).

Horn harmonicas are available in several pitch ranges, with the lowest pitched starting two octaves below middle C and the highest beginning on middle C itself; they usually cover a two- or three-octave range. They are chromatic instruments and are usually played in an East Asian harmonica orchestra instead of the “push-button” chromatic harmonica that is more common in the European and American tradition.
Their reeds are often larger, and the enclosing “horn” gives them a different timbre, so that they often function in place of a brass section. In the past, they were referred to as horn harmonicas.

The other type of orchestral melodic harmonica is the polyphonia, (though some are marked “chromatica”). These have all twelve chromatic notes laid out on the same row. In most cases, they have both blow and draw of the same tone, though the No. 7 is blow only, and the No. 261, also blow only, has two reeds per hole, tuned an octave apart (all these designations refer to products of M. Hohner).

Chord harmonica

The chord harmonica has up to 48 chords: major, seventh, minor, augmented and diminished for ensemble playing. It is laid out in four-note clusters, each sounding a different chord on inhaling or exhaling. Typically each hole has two reeds for each note, tuned to one octave of each other.
However, less expensive models often have only one reed per note. Quite a few orchestra harmonicas are also designed to serve as both bass and chord harmonica, with bass notes next to chord groupings. There are also other chord harmonicas, such as the Chordomonica (which operates similar to a chromatic harmonica), and the junior chord harmonicas (which typically provide six chords).

The Suzuki SSCH-56 Compact Chord harmonica is a 48-chord harmonica built in a 14-hole chromatic harmonica enclosure. The first three holes play a major chord on blow and draw, with and without the slide.
Holes 2, 3, and 4 play a diminished chord; holes 3, 4, and 5 play a minor chord; and holes 4, 5, and 6 play an augmented, for a total of sixteen chords. This pattern is repeated starting on hole 5, a whole step higher; and again starting on hole 9, for a total of 48 chords.

ChengGong harmonica

The ChengGong harmonica[2] has a main body, and a sliding mouthpiece. The body is a 24-hole diatonic harmonica that ranges from B2 to D6 (covering 3 octaves). Its 11-hole mouthpiece can slide along the front of the harmonica, which gives numerous chord choices and voicings (seven triads, three 6th chords, seven 7th chords, and seven 9th chords, for a total of 24 chords).
As well, it is capable of playing single-note melodies and double stops over a range of three diatonic octaves. Unlike conventional harmonicas, blowing and drawing produce the same notes because its tuning is closer to the note layout of a typical Asian tremolo harmonica or the Polyphonias.

Pitch pipe

The pitch pipe is a simple specialty harmonica that provides a reference pitch to singers and other instruments. The only difference between some early pitch-pipes and harmonicas is the name of the instrument, which reflected the maker’s target audience. Chromatic pitch pipes, which are used by singers and choirs, give a full chromatic (12-note) octave. Pitch pipes are also sold for string players, such as violinists and guitarists; these pitch pipes usually provide the notes corresponding to the open strings.

Source: Wikipedia


How to read Harmonica Tabs?

Have you ever asked yourself: How to read Harmonica Tabs?
Harmonica tablature (Harmonica tab or Harp Tab) informs you which ones hole to experience, whether it’s a blow or draw note, and whether a bend or any other effect is needed. Within the system I personally use with my students, plain figures are blow notes and figures having a minus sign are draws.

[toc heading_levels=”3,4,5″]

How to read Harmonica Tabs?

How to Read Harmonica Tabs?

Knowing how to read harmonica tablature, or tab, isn’t difficult. Harmonica tablature shows you which hole number on the harmonica to go to and indicates if you need to exhale (arrow pointing up) or inhale (arrow pointing down). When hole numbers are stacked, you play several holes. Holes you block with your tongue are shown as black rectangles.
Check out this sample tab:

how to read harmonica tab

When you bend a note down, the arrow has one slash for each semitone you lower the pitch of the note. When you bend a note up (when you overblow or overdraw), the arrow has a circle through it. For example, check out this sample tab:

how to read harmonica tab 1

Harmonica Positions

A harmonica position is the connection between the key of the harp and the key of the tune you play on it. Each numbered position plays the same way no matter what the key of the harmonica. The following chart shows the uses of some common harmonica positions:

Position Uses for Position
1st position Melodies in major keys; fiddle tunes; country tunes; folk
songs; blues (top and bottom registers)
2nd position Melodies in major keys (but watch out for Draw 5 and 9); fiddle
tunes with a flat 7th (the Mixolydian mode); major tunes that go
below the home note; blues (all registers)
3rd position Minor key melodies (but watch out for Draw 3 and 7); fiddle
tunes in the Dorian mode; minor blues
4th position Minor keys in the high and middle registers
5th position Minor keys (but watch out for Draw 5 and 9)
12th position Major keys (but watch out for Draw 3 and 7); the middle and
upper registers

Positions for All 12 Keys of Harmonica

Harmonica positions are numbered 1 through 12. You reach the next numbered position on your harmonica by counting up five scale steps from the key of the harp. When you play more than one key of harp, the idea of positions is helpful.(You can read full Harmonica Position Chart.)

how to read harmonica tab 2

Blows & Draws
1 means blow on hole 1
-1 means draw on hole 1

Double Stops
1,2 means blow on holes 1 and 2 together
-1,2 means draw on holes 1 and 2 together

Bends
-3′ means draw on hole 3 with a half-step bend
-3″ means draw on hole 3 with a whole-step bend
-3″‘ means draw on hole 3 with a step-and-a-half bend

Same idea for blow bends, except the number won’t have a minus sign.

Chromatic Harmonica
For chromatic harmonica, parentheses tell you to push the slider button:
(-1) means draw on the first hole while pushing the button.

Overblows and Overdraws
On the diatonic harmonica, I use parentheses to indicate overblows and draws:
(4) means play an overblow on hole 4.
(-7) means play an overdraw on hole 7.

There are a number of harmonica tab systems out there, but I prefer this one because it uses only ASCII keyboard keys, which makes it easier to type up songs and transmit them online. Other systems use up and down arrows, or circles around the numbers to communicate blows and draws.

Rhythm & Your Ear
Simple tab systems don’t give you rhythm instructions, so they work best to get you started on songs you’re already familiar with. It is possible to learn new songs using tab, but you’ll need audio examples to demonstrate how they’re supposed to go. It’s also not a bad idea to get used to listening closely to songs, tapping your foot, and singing along with melodies to develop your ear.

Standard Notation
I’m all for learning to read traditional music notation, since it communicates rhythm and articulations better than tab, and in the long term it’s a great investment in your musicianship. In the short term though, it’s probably more important just to get started playing music immediately, so you can get thoroughly hooked on playing your harmonica. In my experience, numeric tab requires less translation by your brain and gets the basic idea across more quickly.


Key To Tab

DIATONIC HARMONICA

Blow / Draw

  • 1B – Hole 1 blow
  • 2D – Hole 2 draw

Bends

  • 4D’ – Hole 4 first draw bend
  • 2B” – Hole 2 second draw bend
  • 10B” – Hole 10 second blow bend
  • 3D”‘ – Hole 3 third draw bend

Phrasing

  • 2D 3D play 2 draw  and 3 draw as separate notes
  • 2D..3D run 2 draw into 3 draw (slur)
  • 3D’..3D scoop into 3 draw from below (first draw bend in hole 3)
  • 4D….. sustain 4 draw
  • ….4D play 4 draw after the down beat
  • 1D..gliss..4D glide from 1 draw up to draw 4 (glissando)
  • 4D..gliss..1D glide from 4 draw down to 1 draw (glissando)

Multiple Notes

  • 1B-2B-3B play 1 blow, 2 blow and 3 blow together
  • 2D-3D-4D play 2 draw, 3 draw and 4 draw together

Splits and Octaves

  • 2D-5D play 2 draw and 5 draw together (4 hole split)
  • 1D-4D play 1 draw and 4 draw together (4 hole split and octave)
  • 7B-10B play 7 blow and 10 blow together (4 hole split and octave)
  • 3D-7D play 3 draw and 7 draw together (5 hole split and octave)

Trills

  • 4D-5D~ trill between 4 draw and 5 draw
  • 8B-9B~ trill between 8 blow and 9 blow

Overbends

  • 5B+ 5 hole overblow
  • 7D+ 7 hole overdraw

Suggested or Passing Notes

(6B 7B) 6 blow and 7 blow can be sounded in passing but are not essential

_____________________________________________________________

CHROMATIC HARMONICA

A hole number with B or D is played with the slide open (shutter out). The tab will resemble the basic diatonic tab above. So 3D is 3 draw with the slide open. 12B is 12 blow with the shutter open.

A hole number with B or D followed by # means play with slide closed (shutter in). For example 3D..3D..3B..2D# So 3 draw open, 3 draw open, 3 blow open and 2 draw closed. Here the notes are dotted,  so they run into each other (slurred) as in the diatonic tab above.


The Blues Harp

How to make a ‘tin sandwich’…

The Blues Harp

The Blues Harp

Comb

The centre section (black PVC plastic in the picture). The comb houses 10 blow holes and chambers. Originally it was crafted from pear or apple wood (it still is on models such as the Hohner Marine Band and Blues Harp). Wood expands and shrinks with moisture however. Longterm this can lead to loss of airtightness and warping.

Plastic combs were introduced around the 1970’s for greater durability and economy of production. There are also light metal alloy combs (Suzuki and Hohner both have examples). Players may prefer different combs; generally a wooden comb gives warmer tone. The harmonica key is normally stencilled or embossed on the short end of the comb.

Reed plates

Made from bell metal or brass alloy, each reed plate carries 10 reeds (see image above). The upper reed plate is for the blow notes; the lower reed plate is for the draw notes.

Often you can see where machine tools have milled metal from the rivet end of a reed in order to fine tune the pitch (scratch marks and blemishes in the metal). Reed plates bolt to the comb with small screws. The longer the reed, the lower the pitch.

Cover plates

These protect the reeds. Traditionally they are attached by two screwbolts and flat nuts (see image above). Nowadays there are also countersunk screws that do not require nuts. Either way, the screws are bolted through the comb, over the reed plates and tightened to keep the cover plates in place. Normally cover plates are nickel, tin, alluminium or a shiny metal alloy.

The Hohner Pro Harp has a matt black coating which looks sharp, and there are plastic alternatives on cheaper models. The upper cover plate usually has numbers 1 to 10 visible along the leading edge. The brand and model type is also embossed on one or both cover plates (Lee Oskar in the image above).

And that’s all there is to it! Here you have the basic ingredients for your ‘tin sandwich.’ Also commonly known as the Blues Harp (name derived from the ‘French Harp’ brand sold in America in early 1900’s), Gob Iron (British), Mississippi Saxophone (US), Lady Shaver (some old perv who should get out more) and Cookie Cutter (Lee Oskar).

Top tip

Lee Oskar pioneered a ‘modular’ system that has become standard for most brands. This means next time you ‘blow’ (or break) a reed, you can purchase and install replacement reed plates at half the cost of a new harp. So go out and invest in a jeweller’s screwdriver kit from your local hardware store and keep it with your harps in preparation.

By the way, when Lee Oskars first appeared, Hohner adapted their basic spec to match. Essentially the blow holes changed from a narrow rectangular entrance to a uniform (and wider) square entrance. The net effect was that harps became slightly longer. Check out ‘Hand Made’ or original Hohner Marine Bands for the early spec we were once all playing!

Try standing it end to end with a modern Hohner or Lee Oskar. Notice the difference? Incidentally, the newer Hohners have ‘MS’ printed on the cover plate to indicate they are Modular System. ‘Hand Made’ normally refers to non-Modular System models. It may also be possible to obtain replacement Hand Made reed plates, but you’ll need to know the difference when ordering. And now you do!


Modes

ModesThe Diatonic Scale
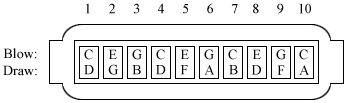
Imagine you were given a piano with no black keys. You could still produce a familiar do re mi scale and plenty of melodies using the key of C major, as this doesn’t require the sharps or flats of the black keys. Your white keyboard would effectively be a C diatonic keyboard, offering up the notes of the C major scale in each direction from Middle C. The notes of the C major scale are  C   D   E   F   G   A   B and C again. That’s an eight note sequence, or octave. And it’s exactly what’s in our 10 hole diatonic C harp between holes 4 and 7. Try it for yourself  4B    4D    5B    5D    6B    6D    7D   7B. These are our melody, or soloing, notes.

The Chromatic Scale
If we reintroduced the black keys to our piano, it would become a chromatic keyboard, offering us the luxury of ascending and descending in half note steps. If we did so between two C keys an octave apart, the result would be:

Ascending    :  C    C#   D    D#   E    F    F#   G    G#   A    A#   B    C
Descending :  C     B    Bb    A    Ab   G   Gb   F     E     Eb   D    Db  C

ModesThat’s a thirteen note sequence. And, just in case you’re wondering, yes C# is the same note as Db on a chromatic keyboard. This aspect of musical theory is called enharmonics; two names for the same note. Knowing exactly how, and exactly when to use each, is complicated theory we will save for a rainy day. On diatonic harmonicas, and on a bandstand however, you’ll normally hear the notes of the chromatic scale referred to as follows:

Common use :  C    Db   D    Eb   E    F    F#   G    Ab   A    Bb   B    C

How to crack the modal code
Let’s return to our imaginary diatonic, or white key, piano for a moment. To break the routine of the C major scale outline above, we could experiment by ascending and descending between other like-notes an octave apart; D to D, or E to E for example. In doing so, we would be entering the magic kingdom of modal scales. Tabbing them for the 10 hole harp in sequence from C, the result is displayed in the chart below left. Take some time now to play each line left to right and right to left (up and down) a few times on your C harp. Listen carefully the end product in each case – the different character, or flavour, of each scale. How does each one leave you feeling? Can you find any useful or interesting musical licks? Do any of the scales remind you of tunes you have heard before?

ModesC     4B   4D   5B   5D   6B   6D   7D   7B
D    4D   5B   5D   6B   6D   7D   7B   8D
E     5B   5D   6B   6D   7D   7B   8D   8B
F     5D   6B   6D   7D   7B   8D   8B   9D
G     6B   6D   7D   7B   8D   8B   9D   9B
A     6D   7D   7B   8D   8B   9D   9B   10D
B     7D   7B   8D   8B   9D   9B   10D  10B

Now let’s analyse what’s actually happening by mapping out the musical steps, or intervals, we’re making in each case. Referring to the chromatic piano keyboard pictured above right will help you visualise what’s happening. We’ll call a whole-tone step T and a half-tone (or semi-tone) step s.

C        T     T     s     T     T     T     s                                C   D   E   F   G   A   B   C
D        T     s     T     T     T     s     T                                 D   E   F   G   A   B   C   D
E        s     T     T     T     s     T     T                                 E   F   G   A   B   C   D   E
F        T     T     T     s     T     T     s                                 F   G   A   B   C   D   E   F
G        T     T     s     T     T     s     T                                 G   A   B   C   D   E   F   G
A        T     s     T     T     s     T     T                                 A   B   C   D   E   F   G   A
B        s     T     T     s     T      T    T                                 B   C   D   E   F   G   A   B

And this is almost all you need to know – it’s that hard! In the left hand panel above, can you see how the semi-tone steps shift to the left each time we move up a mode? These are the intervals between E and F, and B and C. The right hand panel demonstrates this too. The semitone shifts are what changed the ‘flavour‘ of theModes modal scales you played earlier. They move closer to the start note each time; until they eventually become the start note.

Name and shame
I’ve used the term ‘flavour‘ with some forethought. I could have used ‘mood‘ but I don’t want to confuse this with mode, so let’s stick with the cooking metaphor for now. In which case, just as we’ve given each tone a letter of the alphabet, so each of the diatonic recipes above, or modal scales, has a given name:

C        T     T     s     T     T     T     s        Ionian
D        T     s     T     T     T     s     T        Dorian
E        s     T     T     T     s     T     T        Phrygian
F        T     T     T     s     T     T     s        Lydian
G        T     T     s     T     T     s     T        Mixolydian
A        T     s     T     T     s     T     T        Aeolian
B        s     T     T     s     T      T    T        Locrian

ModesThese are ancient Greek names. The Greeks recognised the science, art and magic of music. Indeed, music was actually part of the ancient Olympic Games. The Dorians were one of the four major Greek tribes and came from central Greece – they built temples with plane looking, Doric, capitals to their  columns. Locrians were a minor tribe from north-west mainland Greece. Two of the other major Greek tribes were the Ionians who settled the Ionian seaboard in what is now Turkey, and the Aeolians, originally from Thessaly in mainland Greece. The Phrygian community was from Asia Minor (Turkey), as were the Lydians of Anatolia. Myxolydian means half, or almost, Lydian, and is a technical afterthought rather than an actual Greek tribe of small stature.

Nouvelle cuisine
Relating each of the modal scales to parts of the known world made the ‘flavour‘ of the mode more meaningful to the Greek listener. In the post-modern world we might call Phrygian the Spanish or Moorish mode, Lydian the Scottish mode, Aeolian the Klezmer or Yiddish mode and Dorian the English Folk mode. Meanwhile, philosophers ancient and modern might describe the ‘feeling‘ or ‘mood-changing‘ effect of each mode in the following way:

Ionian             Harmonious or tender
Dorian            Serious or melancholic
Phrygian        Mystic
Lydian             Happy or vibrant
Mixolydian   Angelic or youthful
ModesAeolian           Sad or tearful
Locrian           Wistful or yearning

Getting real with it
Now that the underlying theory is clearer, one glaringly important question arises; what practical use is there for musical modes while playing the diatonic harmonica? The answer in one word is, lots! But first let’s translate everything into harp speak.

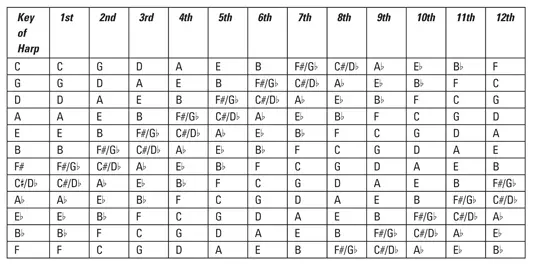
To start with, it’s useful to equate each mode name with a standard key name. We’ll then need to agree a useful root note, or start point, for each key; officially called the point of resolution. Finally, it helps to find a memorable tune we can use as an aide memoire to recall each mode in a practical sense. Using a C harmonica, our shortlist might look like this:

Mode                Key                    Root Note(s)      Memorable tune
Ionian               C major              4B, 1B, 7B, 10B      When The Saints Go Marching In
Dorian             D minor              4D, 1D, 8D             Scarborough Fair
Phrygian        
E  minor             5B, 2B, 8B              Knights in White Satin (Moody Blues)
Lydian             F major               5D, 9D, 2D”            Au Claire de la Lune / Skye Boat Song 
Mixolydian    G major               2D, 6B, 9B             Norwegian Wood (Beatles)
Aeolian           A minor               6D, 3D”, 10D         When Johnny Comes Marching Home
Locrian           
B diminished     3D, 7D                     She’s A Rainbow (Rolling Stones)

Running around in circles
Some of you may be thinking this is all very user-friendly, but you’d really like to get some engine oil under your fingernails. OK, roll your sleeves up, it’s time to haul the whole thing onto the inspection ramp. To truly relate the concept of modes to the 10 hole diatonic harp, we have to embrace a pivotal subject of musical of theory. It’s one that can quickly cause harp playing eyes to glaze over; the circle of fifths (or positional playing). Trust me when I say it’s really quite simple. If I can get it, so can you. Let’s gently set the ball rolling using a C harp.

We know we can play any number of straight harp tunes, including When The Saints Go Marching In, from 4B right? We also know this is called 1st Position. Well, to put it politely, these tunes soon feel pedestrian. We want to rock it up and play like Little Walter! So we find ourselves flipping through the next pages until we come to Cross Harp, where we adopt 2D as our root and range up and down between it and 6B. We then start to investigate draw bends. Modes
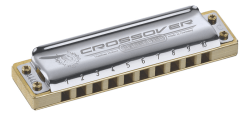
As we do so, we’re probably aware that we’re playing in G major. We also know this as 2nd Position.

But let’s revisit what just happened for moment. To reach G from C, we’ve ascended 5 degrees, or notes, of the major scale. If we wanted to use posh musical vocabulary, we could call this a diatonic interval of 5. We’ve gone from C, through  D   E   F up to  G in 5 steps. Remember that we include the root note of C as step 1 when we start counting. It’s like the working week from Monday to Friday – five days in all. Hold that thought.

Modes

Step back baby, step back
Stepping back into modal terms for a moment (and once again if I can do this, you can too, so stay with it), we’ve moved from Ionian (C) out of root note 4B, to Mixolydian (G) out of root note 2D. Et voila! It’s that simple. We’ve worked our way from 1st to 2nd position, from 4B to 2D, from Ionian to Mixolydian and it’s all making sense. Ready for the next step?

If we counted up another interval of 5 from G, we’d reach D and that would be Dorian mode. Which is 3rd position from 4D. Hold up the fingers and thumb of either hand and double-check this: G  A  B  C  D. You just used your naturally patented, circle-of fifths, double-checking system. Take it with you whenever you play. By the way, to be absolutely accurate, we actually found D minor. We won’t explain the reason for this right now, as it will interrupt our line of thought. But once you’ve finished this page, had a massage and finished a cold glass of whatever takes your fancy, you can check it all out here.

Back on message. Position-wise, we can keep going round the circle of fifths using our fingers and thumbs until we eventually return to C. In doing so, we will have covered all twelve degrees of the chromatic scale. Or will we? I hear some of you asking ‘how come, when counting round in intervals of 5 takes us from C to G, G to D, D to A, A to E, E to B, B to F and finally from F to C? That’s only 7 notes on the keyboard, not 12!‘.

Better by half
ModesHere’s the solution. To be empirically accurate, we need to start counting not in diatonic intervals, but in chromatic intervals, or half steps only. This way the chromatic interval between C and G is 8 half-step degrees. The chromatic interval from G to D is also 8 half-step degrees. Only now, when we continue to count in this particular way, do we actually cover all 12 degrees of the chromatic scale; the white and black keys of our piano keyboard. Using the piano keyboard image above if necessary, let’s check it all out, ascending in 8 half-step intervals from C:

C     G     D     A     E     B     F#    Db    Ab    Eb     Bb   

Modes

Well done! Here you have an absolute DNA blueprint for all twelve positions on a C major diatonic harmonica. You can take this same 8 half-step formula, apply it to any key of diatonic harmonica, and work out its integral twelve positional note names.

At the same time, you can confidently accept that you’ll encounter our seven modes as you go (in bold above). The modal positions also happen to be the most practical of the twelve options available to diatonic harp players – 1st, 2nd, 3rd, 4th, 5th, 6th and 12th – as the root note is not always hidden in an inconvenient bend. Now, just to round everything off, here are the 7 modes again with their root notes and corresponding position on the harmonica, again using a C major harp.

Mode                Key                    Root Note(s)       Harp Position
Ionian               C major               4B, 1B, 7B, 10B      1st position
Dorian              D minor              4D, 1D, 8D              3rd position
Phrygian          E  minor             5B, 2B, 8B               5th position
Lydian               F major              5D, 9D, 2D”            12th position
Mixolydian     G major              2D, 6B, 9B               2nd position
Aeolian             A minor              6D, 3D”, 10D          4th position
Locrian             B diminished    3D, 7D                      6th position

Welcome to the human race!
If any of this is page unclear, it’s probably because you’re human, or else you’ve been playing your harmonica instinctively. The message is, it’s time to start playing smart as well as hard, so review the information above and add it to your arsenal. We guarantee it will help shape you into a musician.  Very soon you’ll be surprising those who a*sumed you were ‘just the harp player’. Now read and re-read this page until you can comfortably do it all yourself. Then tell all your harp friends where you found the inspiration!


Harp History

Harp History - Harmonica History

Harp History – Harmonica History

The harmonica has a long history, beginning in China with an instrument called the Sheng. The harmonica was further developed in Europe early in the 19th century, with the first harmonicas manufactured in Germany. The best known harmonica company, Hohner, is still based in Germany.

Matthias Hohner introuduced the harmonica to 19th century America, which really began the modern history of the harmonica. The harmonica was cheap and easy to carry, perfect for a country on the move, like America back then. While there were many harmonica types, the most widely used harmonica (at least in Western countries) became the 10 hole “diatonic”, as shown in the picture.

[toc heading_levels=”3,4,5″]

Where did it come from?

The roots of the harmonica can be traced across many centuries. Ancient mouth blown, free reed instruments probably originated in South East Asia. The Sheng from China and the Khene from Laos are two examples, the former of which first arrived in Europe in the early 18th century.

Another likely forerunner which is common to many cultures is the Jew’s Harp. A finger plucked, vibrating ‘reed-tongue’ produces the sound. By altering the mouth cavity and vocal tract, the sound quality can be changed. By simultaneously inhaling across the vibrating reed-tongue, the sound can also be amplified. It is the Jew’s harp that is behind that slightly comical twang you hear on the soundtrack to Westerns. It is also closely a*sociated with Hillbilly and Jug Band music.

Ancient Roman military tactics may, or may not, have had a bearing on matters too. The terrifying and eerie sound of the Draco was borrowed from other traditions across the vast Roman Empire. It is uncertain however, whether the noise was produced by flute heads, whistles or reeds.

There is debate as to whether, and when, these instruments would have influenced the development of the harmonica in Western Europe. Written reference indicates that free reed instruments may have existed in German-speaking Europe as early as the mid 17th century. Pat Missin’s excellent website identifies a German, Cyrill Demian, who claimed the reeds he patented had been used in organs for over 200 years. These were known colloquially as Regale (Shelves), Zungen (Tongues) and Schnarrwerk (‘Buzz’ factories).

How is it input together?

In Western countries the most commonly used harmonica has 10 holes, as shown above. Each hole has two metal reeds inside it. When you blow into a hole, one of the reeds vibrates and produces a sound (or note). When you breathe in, the other reed in the hole vibrates, and produces a different note. So, each hole can produce two notes. There are 10 holes, and therefore 20 notes. Actually you can produce more than 20 notes.

The harmonica has five main parts. These are the two outer cover plates, two brass reed plates, each holding 10 reeds, and the “comb”, usually made from plastic or wood, which has the holes. These 5 parts are held together with screws. If the screws are removed, the parts look like this.

The harmonica is common in Western music. In the past, harmonica bands, with many harmonica players were popular. These days, the harmonica is usually a*sociated with blues. Most people who learn harmonica want to play blues, and for good reason … it is tremendous fun. The harmonica is also widely used in folk music, with Bob Dylan a well known exponent. In recent years, players such Howard Levy and Brendan Powerhave developed new and exciting harmonica styles.

Please note however: Because the harmonica is a relatively cheap instrument, many people think that serious musicians do not play it. This is not true. Like any instrument, the harmonica has many world class players, who play unique and beautiful music.

History of the Harmonica

The harmonica was first invented in China, a few thousand years ago. This instrument, called the “Sheng”, had bamboo reeds, and became a prominent instrument in Asian traditional music. The Sheng was introduced to Europe in the late 18th century, and soon became popular.

In the early 19th century, European instrument makers began experimenting with instruments using metal reeds, instead of the wooden ones used in the Sheng. In about 1820, a young instrument maker named Christian Friedrich Buschmann created an instrument with metal reeds, which he called “The Aura”. This instrument became popular, however it only provided blow notes.

Around 1825, a European named Richter invented an instrument which has become the modern harmonica. This instrument had 10 holes and two reed plates, each with 10 metal reeds. This meant that each hole had two reeds, one which sounded when blowing, the other which sounded when breathing in. The notes Richter chose for the reeds in his instrument are the same as current diatonic harmonicas.

Mass production of harmonicas began in Vienna in 1829. Harmonicas were soon produced in other cities as well. In Trossingen, a village in Germany, Christian Messner and his cousin Christian Weiss began producing harmonicas in their spare time (their main craft was clockmaking). This business became successful. Some years later, another Trossingen clockmaker, named Matthias Hohner, visited Messner and Weiss, and learnt their harmonica construction technique. He then began his own harmonica business.

Matthias Hohner was apparently not a very good harmonica player, however he was an excellent businessman. He bought out his competitors, and in 1862 began exporting harmonicas to the United States, which soon became his largest market. Hohner continued to expand the business, and in 1900 he handed it over to his 5 sons.

Throughout the first half of the 20th century, the popularity of the harmonica continue to grow. In particular, harmonica bands, with many people playing together, were very popular. The Chromatic harmonica, which include a buttom on the side, allowing all notes to be played, was developed by Hohner. In the 1930’s, Larry Adler became the most famous player of this instrument, and remained so until his death in 2001.

The Blues Harp

In the United States, the harmonica became very popular as a blues instrument. In the 1930’s and early 1940’s a man named John Lee “Sonny Boy” Williamson became well known. After the second world war, Chicago became a major centre for blues, with great players such as Rice Miller (Sonny Boy Williamsom II) and Little Walter. Many people consider Little Walter to be the greatest blues harmonica player. He died in 1968, a sad day in the history of the harmonica.

While the harmonica has been known mostly as a blues instrument, many people were introduced to the harmonica in the 1960’s through the folk music of Bob Dylan. In recent years, great players such as Kim Wilson and Rod Piazza have continued the blues harmonica tradition, drawing on its history while moving it forward. Also, players like Jason Ricci and John Popper have developed new and exciting harmonica styles.

Throughout its history, most of the great harmonica players have come from the United States. However, the Internet is helping to introduce the harmonica to the world. The next generation of great players could come from anywhere.

Harp HistoryWhy harp?

The term harp is a comfortable nickname for the harmonica. Is this coincidence? Again Pat Missin has done a great deal of research. He found that one particular German company, Carl Essbach, actually sold a “French Harp” brand. The Carl Essbach company (Est.1901) was eventually sold on to A.Seydel and Sons in the 1920’s (and is forerunner of the recently resurrected Seydel-Söhne company). Perhaps the term ‘harp’ is their legacy. Pat also refers to the Aeolian harp, or wind harp. Hung outside in the same fashion as wind chimes, this was a stringed instrument played by the wind. Some early harmonica manufacturers chose the Aeolian prefix for their new instruments. Perhaps this is where the term harp originates.

Just for a giggle

Other names for the harmonica: Harp, Tin Sandwich, Tin Biscuit, Gob Iron, Toot Sweet, Harpoon, Lickin’ Stick, Cookie Cutter, Mississippi Saxophone, Moothie (Scottish), Munspel (Swedish ‘Mouth Play’) and Lady Shaver (some old perv who should get out more).

Further reading

For a more detailed history, visit Pat Missin’s great harmonica site.


Why 3rd and 4th Positions Are Minor

Why 3rd and 4th Positions Are MinorClose encounters of the third kind

This question was asked by a student in our Harpin’ By The Sea beginners’ workshop; we had touched on positional playing as a way to extend the scope of the diatonic harmonica. And to be honest, it’s a fair question. Perhaps we accept the fact too easily, without asking or fully understanding the reason why. But we were a group of beginners. So we decided to explain the finer details after the workshop for those who were interested, rather than risk putting the majority off music for life. Here’s the result.

If you are unfamiliar with the concept of modes and positions, then I recommend you first check out the post entitled Modes (or visit Modes via the Theory menu at the top of the screen) and come back when you’re comfortable with everything. It’s quick and it won’t hurt!

Ground control to Major Tom

Why 3rd and 4th Positions Are MinorSo what are positions all about? In the simplest terms, we can take a C major harmonica and use it to play in different keys just by using a different hole as our root note, or starting point, each time. Some keys will be more useful than others, but in theory we could start from any natural, sharp or flat note (black or white key on the piano) and find some fun phrases. In doing so we are inadvertently working in different musical positions.  By way of example, When The Saints works well from 4B, Juke works well from 2D, Summertime works well from 4D and Au Claire De La Lune is best played from 5D. To forge an answer to our original question however, we need to apply some logic and find a workable formula or DNA to explain what’s going on. Why? Because it will enable us to express ourselves as musicians rather than just harmonica players. And with this comes greater understanding and enjoyment of our instrument and music in general. The solution is where music and maths collide in the form of the circle of fifths.

Why 3rd and 4th Positions Are MinorThumbing a lift

Take out your patented, circle of fifths, double-checking system; you’ll find one on the end of each arm. Starting with C on the thumb of your right hand, let’s move five steps up the musical alphabet; so, D is on your index finger, E on your middle finger, F on your ring finger and finally G on your little finger. You’ve just counted a diatonic interval of 5 degrees from C to G. Think of it as Monday to Friday if this helps. I know this is technical stuff, but you’d better get used to it. You’ve just moved from 1st position on a C harp (C), to 2nd position on a C harp (G). From your thumb to your little finger. From Monday to Friday.

Now let’s count up five degrees from G to find third position on the same C harp. Thumbs at the ready. Your thumb is now G, so your index finger becomes A, middle finger B, ring finger C and your little finger D. Getting the hang of it? You could keep this pattern going and eventually work your way round twelve different positions. Which is all well and good, but let’s just pause with third position for a moment. When we actually play along to a tune in D, we find we’re clashing badly. And that’s because our third position is actually D minor, not D major.

Why 3rd and 4th Positions Are MinorBeam me up Scotty

The majority of harp players will accept this and run with it, using third position to accompany minor chords. Fourth position does the same thing. Five up from D on a C harp is A – you can check this on your hand. The detail however, is it’s actually A minor. So how can all this be explained? When is a position major and when does it go all minor on us? Our piano keyboard will help illustrate the answer, which is intervals. The relative distance between notes.

Remember that we’re playing a diatonic instrument in C. This is the same as having a piano keyboard with no black keys. If we chose to play the C major chord using our right hand, this would not present a problem. We’d place our thumb on C (our root note), our middle finger on E and our little finger on G. That’s three notes in all, or a Major Triad. It’s a solid musical building block and it sounds complete. In scientific terms, we’re using the first, third and fifth degrees (notes) of the C major scale. But you don’t have to be scientific if you don’t want to be, just blow 1B-2B-3B together. That’s your C chord and that’s first position done. Just to reinforce things however, let’s play the C major arpeggio – or broken chord – as separate notes up and down:  1B   2B   3B   4B   3B   2B   1B

Why 3rd and 4th Positions Are MinorNow let’s move up to G from C for second position using the circle of fifths and follow the same process. To play the G major triad on the diatonic (white key only) keyboard, we’d place our thumb on G as the root note this time, our middle finger on B and our little finger on D. Once again we’d have a satisfying and complete sound. Try it by playing 2D-3D-4D together. And again we’ve used the first, third and fifth degrees (notes) of the G major scale. And that’s second position nailed. But again let’s reinforce things by playing the G major arpeggio up and down:   2D   3D   4D   6B   4D   3D   2D

Take me to your leader

Are you ready for third position? We move up to D from G using the circle of fifths and place our thumb on the root note of D on our diatonic (white key only) keyboard. Our middle finger then falls on F and our little finger on A. But when we play the chord, it no longer sounds as satisfying and complete as before. It sounds forlorn. This is because it’s a minor triad. But before we explain this change in full, let’s just play the D minor arpeggio, or broken chord, up and down:   4D   5D   6D   8D   6D   5D   4D   Can you hear how 5D is the ‘sad’ note? If we were to ‘cheer it up’, we’d need to sharpen or raise it a half step to make things sound major again. This would turn it Why 3rd and 4th Positions Are Minorinto F# rather than F. But we don’t really have an F# because we’re using a diatonic keyboard remember? White keys only. F# is most definitely a black key. So we’re kind of stuck with what we’ve got.

Lowering the tone

I say kind of for two good reasons. Firstly because those in the know – our advanced players – will tell you that you can find F# by overblowing hole 5. In Harp Surgery tab this would be written as 5B#. Overblowing is the technique that bends a reed pitch upwards to find a missing note – a topic we’ll cover another day. However, you’d be very hard pressed to include an overblow in hole 5 as part of a chord combination. The second reason is that by accepting third position gives us a minor key and finding pleasure in this change, we can turn a negative in to a very big positive. Just listen to Sugar Blue!

Better by half

Now here’s the bit you’ve been patiently waiting for; the underlying explanation for the change from major to minor in empirical terms. We count our intervals chromatically instead of diatonically. Cue the J.Arthur Rank gong and sweaty man. This means re-introducing the black notes of the keyboard, then recalculating the total number of half steps between the notes in our triad chords. Back to the drawing board. Starting with 1st position, or C on a C harp, we played C-E-GChromatically, that’s 5 half steps from C to E, and 4 half steps from E to G. Check it out on the piano above. The result of this combination of chromatic intervals is a major chord. Why 3rd and 4th Positions Are Minor

Now to 2nd position, or G on our C harp. Here we played G-B-D. Chromatically, that’s an interval of 5 half steps from G to B, and 4 half steps from B to D. Check it out on the piano above. Again, the result is a major chord.

Finally, let’s look at 3rd position, or D on a C harp. This time we played D-F-A. Chromatically things have now switched that’s only 4 half steps from D to F, and now 5 half steps from B to D. Check it out on the piano above. The result of this combination of chromatic intervals is a minor chord. We’ve effectively ‘flattened’ or lowered the third degree of the diatonic scale. Which is the basic rule for turning a major key into a minor key. Or a major chord into a minor chord. And that’s all there is to it. It’s all about the half-step intervals between the notes!

Why 3rd and 4th Positions Are MinorG’night John Boy!

As a post script, we mentioned 4th position above, which would be A minor on our C harpSo if we know that the A minor triad is A-C-E, let’s see if  you can work out the chromatic intervals for yourself. We won’t actually find this triad chord on the diatonic harp, but the arpeggio would be  6D   7B   8B   10D   8B   7B   6D  You might find use of 7B-8B as a double stop, or two-note combination, in lieu of the full chord however. Try it now and imagine you’ve just watched The Waltons.


Buying A Harp

Buying A HarpWhere can I get one?

Your local friendly music shop, on line or through specialist harp suppliers (see below). eBay isn’t recommended in this instance as you just don’t know what you’re gonna get or where it’s been!

Music shops are the obvious first choice, however in my experience very few know much about harmonicas. OK you can actually see the harp you want, but what happens if it’s out of tune (with regular pitch or with itself), has a duff reed or just isn’t fit for purpose. Believe me it happens. If you pay up front and try the harp out before you leave the store (no room for being bashful here), will they exchange it if the harp is out of whack? Or will they tell you either you’re not playing it right, you’ve just broken it, or you need to send it back to the manufacturer… Or best still – at a music store in Brighton specialising in guitars – ‘harps don’t go out of tune.’ REALITY CHECK!

Before buying any harmonica, check out the retailer’s ‘returns’ policy. Standard procedure in a music store used to be: pay for the instrument upfront, play it before you leave the premises and exchange any faulty goods on site. If the harp you’re buying is audibly out of tune or sub-spec, does not octave free of any tremolo effect, is not airtight, does not bend correctly or rattles when played – it should be exchanged for another unit. Retailers used to be happy with this.

Nowadays they can get funny. I spoke to Consumer Direct (South East), but they just rattled off the usual consumer advice: The Sales of Goods Act (1979) states that items purchased ‘must be of satisfactory quality and fit for purpose.’ In the UK, failure of the retailer to fulfill these terms is a breach of contract. They then went on to say items you’ve had for less than a month can be refunded. Items you’ve had for more than a month can be repaired or replaced. Thanks Consumer Direct. Try that with a harmonica. You might just as well be honest and tell me unless I present you with a real case, you have no interest in my dilemma. It gets worse if you travel over the pond…

Heads up if buying inside the USA. They’ll tell you that ‘State Law says’ you can’t blow a harmonica and then return it – on health and safety grounds. You must return any defect merchandise to the manufacturer…at your own cost. Hello. Contract with the retailer? They go deaf on you and start serving another punter. Believe me I’ve tried this in New York and San Francisco. No way will they let you blow that thing to check if it’s fit for purpose… And harps are half the UK price over there… Anyway I’ve flagged it up. If you have any feedback pleased get back to me.

So how do you obviate the apparent ignorance shared by high street retailers or the risk of purchasing a dodgy instrument you need to place between your lips? The short answer is work with people who understand your needs.

Of all the on-line distributors, I recommend Harmonicas Direct. They provide an informed, friendly, fast and personal service. I spoke to Peter at HD about all of the above and I can a*sure you he is on our side! Scroll to the foot of HD home page and select Technical. The returns policy is very clear and more than fair.

For that little bit of personal extra, I totally recommend West Weston’s customised harps. For £35 plus postage you receive an original spec Marine Band which West will check and calibrate before he sends it out. Any problems and he’s only a call away. His harps have the juiciest sound and you don’t have to pump ’em hard. Great for tongue blocking.

For an insight into ‘the dark side’….check out my experience with Haight-Ashbury Music in San Francisco. Later repeated on Tin Pan Alley off Times Square in New York.

Choosing a harp

Buying A Harp
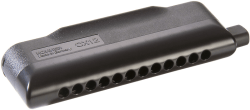
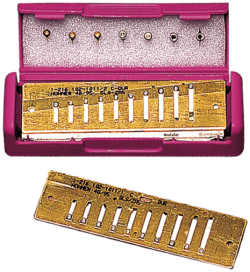
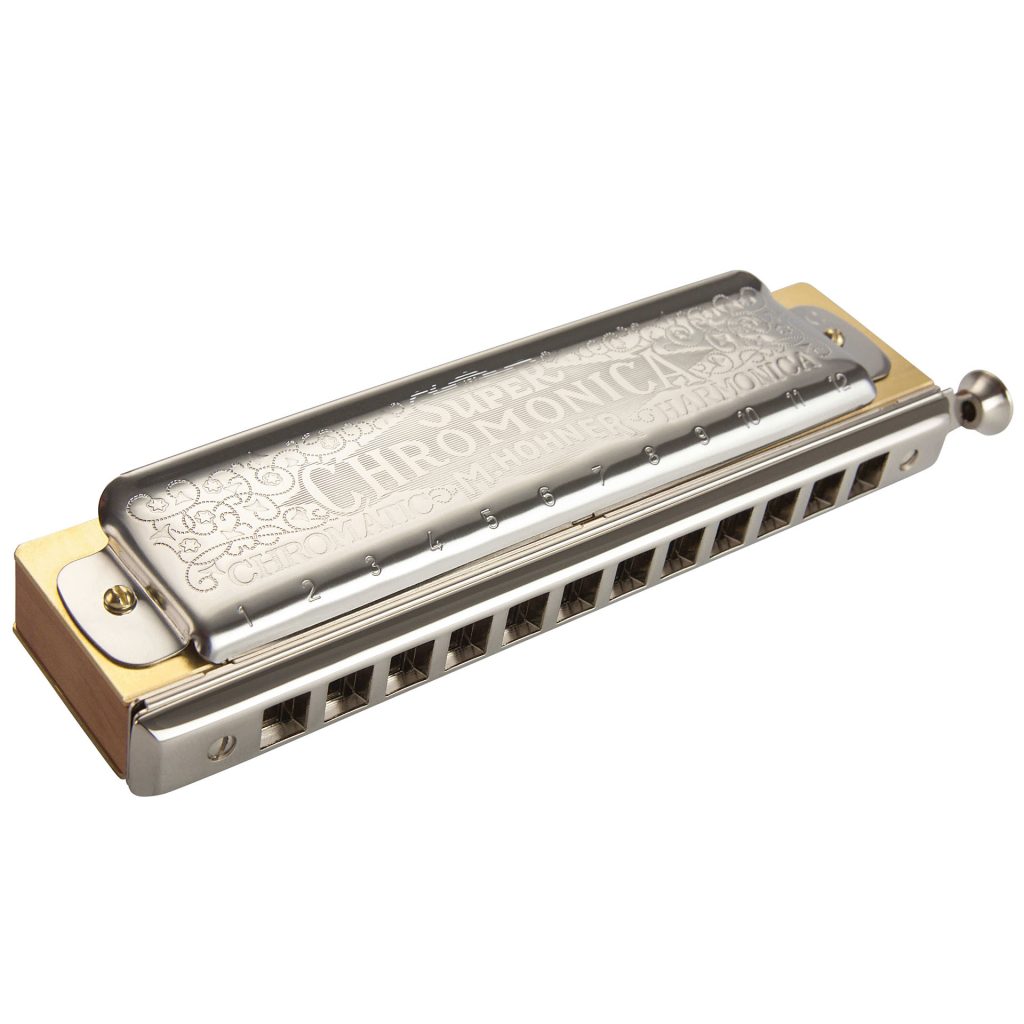
There are so many types of harmonica on offer it can be bewildering at first. Without a doubt you need to start with a standard 10 hole diatonic (commonly called a blues style harmonica or short harp). THis is what the majority of players use for blues, rock, country, folk and celtic. The bulk of non-chromatic reference material is built round this type of harp. It’s going to take time to learn any harp at first, so at this stage the brand is not too important. They’ll all present you with the same obstacles as a beginner. Later on you can try different makes and models and begin to establish your favourites. Ultimately it’s down to personal taste. One man’s tin sandwich is another man’s gob iron. Most retailers will stock Lee Oskars or Hohners. These are fine.

Wooden bodied, plastic or alloy?

I play both. Arguably wooden bodies give a warmer tone. Occasionally they need a little breaking in from new. Then again alloy combs ring out. Plastic and alloy are more durable and won’t swell if they get damp. Currently I favour Hohner Marine Bands (wooden body) from West Weston and Hohner Big Rivers (plastic body) from the high street. I’ve used Herring before (plastic) – they were lovely and rich. I also had an alloy valved Suzuki once which sang out beautifully.

Which brand is best?

The main brands are Hohner, Seydel Söhne, Lee Oskar, Herring, Bushman, Huang, Tombo and Suzuki. The oldest and largest of these was the Hohner company until Seydel Söhne was resurrected.

Hohner produce a whole range of diatonic harps, which you wil find in most music stores or through mail order. Their wooden bodied varieties include the famous Marine Band. There is also the Blues Harp. Plastic bodied harps include the Special 20, Pro Harp, Cross Harp and Big River Harp. Hohner recently shifted their manufacturing plant from Germany to China, and quality has suffered somewhat. However they still offer a good full tone and reliability. The Marine Band can be prone to air seepage between the body and the cover plates making the harp harder to play, but go to West Weston and he’ll sort this out for you.

Another common brand of harp is the Lee Oskar made by Tombo in Japan who also produce good diatonics like the Folk/Blues and the Ultimo. Lee Oskars are really popular because they are airtight and ready to play. Their tone is not as full as a Hohner, but they are great performance instruments. You can venture into all types of tuning too and replace reed plates cheaply and easily.

The other makes of harp are perhaps less common although the Huang Silvertone Deluxe and Star Performer are widely available at the lower price end of the market. Don’t be put off by the low price tag; they are in fact very good value for money and make excellent practise harps. I would recommend these for anyone on a budget.

Which key should I start with?

Diatonic harmonicas are tuned to the key stamped on the cover plate or on the end of the comb. This is straight harp or 1st Position. It means if you buy a Harp in the key of C major you’ll be playing in the key of C major. With time and practice you will be able to switch to 2nd position (also known as cross harp or blues harp). C harps played in 2nd position will open up the key of G for you. Then there’s 3rd position – D minor and… Don’t panic. It will soon become clear. You’re just learning a new language!

Which to key start with? Definitely a C. It’s mid-range and most tutorial books use a C harp. Once you into blow bending, you’ll need something a bit lower like and A or Bb. You’ll certainly need A and D if you want to play along with guitarists. Then there’s F at the high end of things…unless you want to try Low F, Low A. But let’s not muddy the waters too much. But a C harp, buy a tutorial book, phone a friend, ask the audience, then come to me for a lesson.

Do you recommend any tutorial books?

Yes! Anything from Dave Barrett‘s range of books. Sign up for his free bi-monthly newsletter on-line too at HarmonicaMasterclass.com. Also Blues Harp from Scratch by Mick Kinsella is an exellent module for beginners – one or two typos in the tab, but the structure is superb and gets you off into very good habits from the start. Then again you have endless material on-line at You Tube – Jason Ricci and Adam Gussow have been amongst the most prolific and well-regarded contributors. If you have time or can’t sleep, pour yourself a pint, grab a harp and prepare to be dazzled! But beware – they can become addictive! (The lessons on line and the pints that is). And finally Steve Baker. Anything instructional by Steve is worth every penny. His Blues Harmonica Playalongs Vol. 1Buying A Harp is a seminal work – Double Crossed and Blue has to be one of the all time perfect examples of 3rd position harpooning.


Let Us Play

Got yourself a blues harp but don’t know what to do with it? Well, a*suming you are naturally right handed and purse your lips when you try to play, here’s how to get started.

Holding your harmonica

You’ll notice the numbers 1 to 10 are printed on one side of your harmonica. These relate to each of the 10 holes. Hold the harp in your left hand, in the apex between your thumb and forefinger, numbers on top. Your index should ideally run along the ridge at the back of the upper cover plate, so you can see plenty of metal and all the numbers with room to spare.

Let Us Play
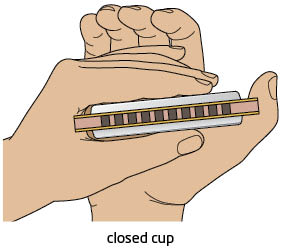
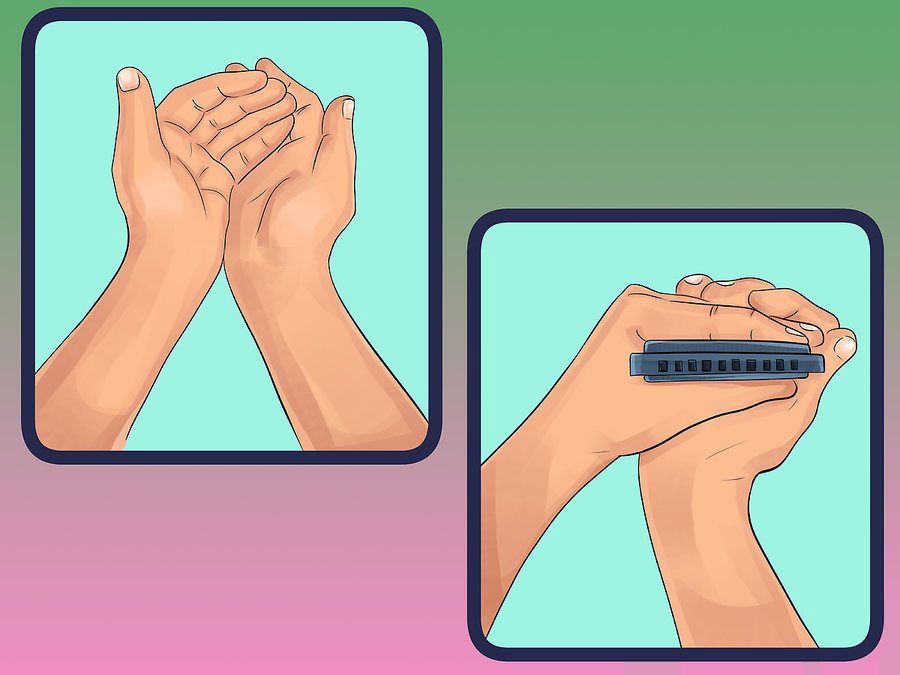
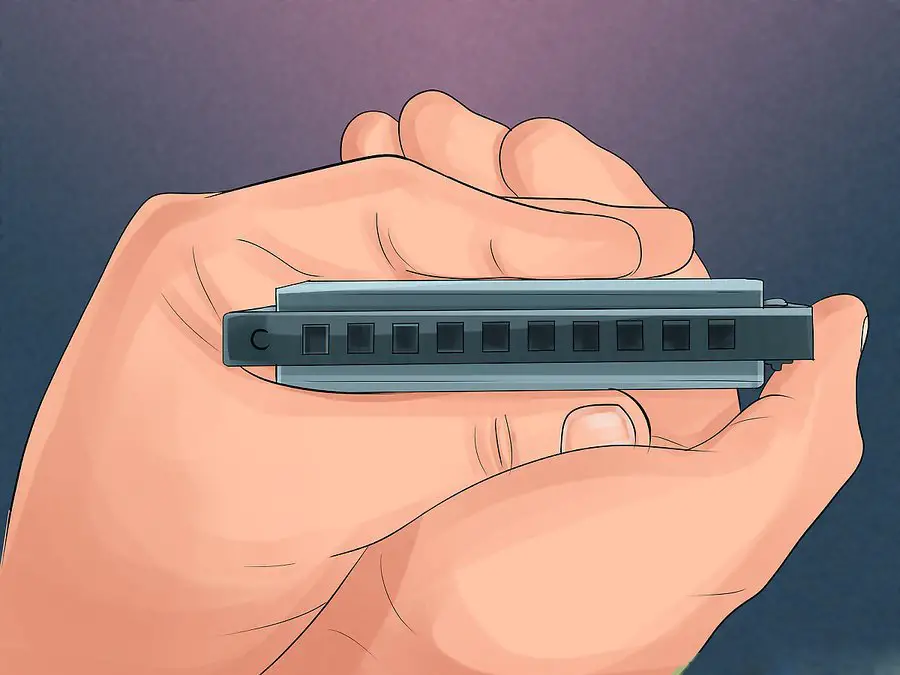
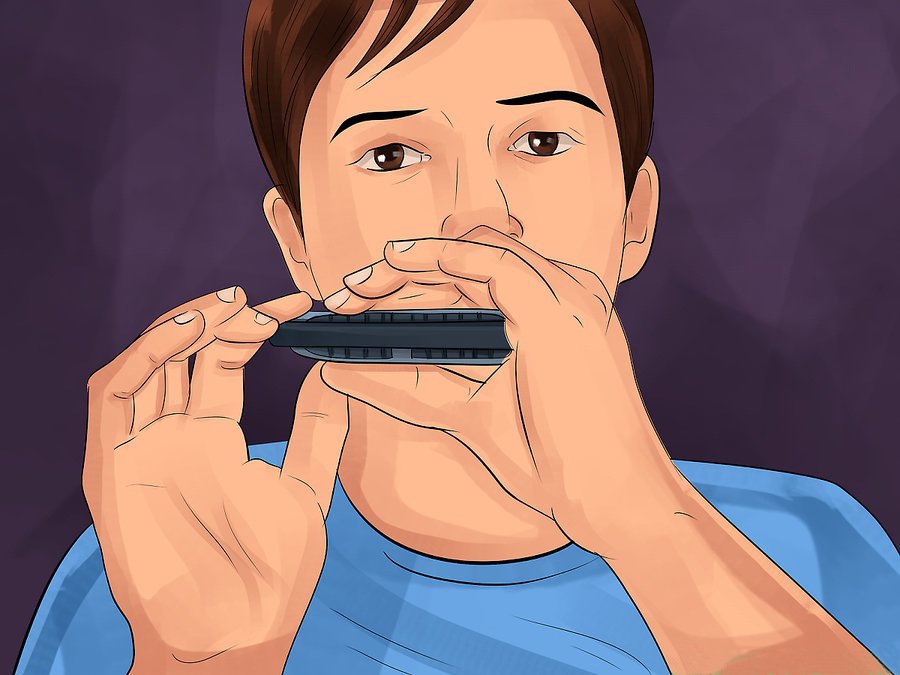
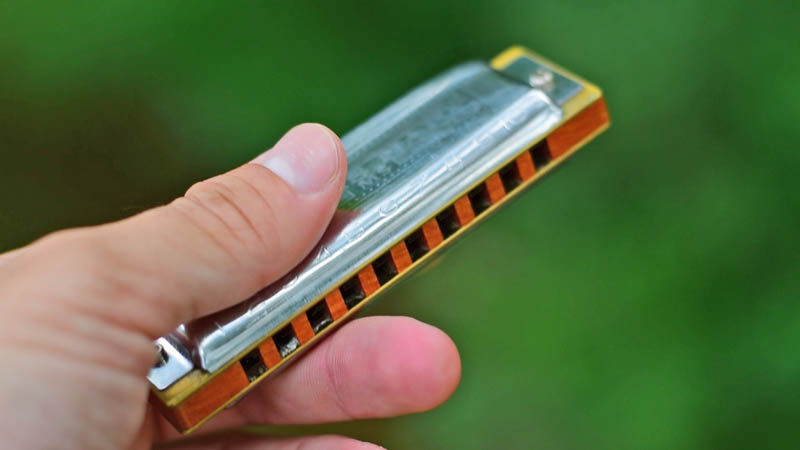
The outer curve of your left thumb should fit nicely onto the ball of your right thumb (see image). I call this the ‘hinge’. Now cup your right hand around the back of the harp to form a chamber. This is the classic hand hold.

In the image, the right thumb is hooked around the top end of the harp. This is an ideal hand hold for digging into those lower notes and bends. Keeping the hinge connected, you can rotate your right hand however you want to open up the back of the harp and project notes, or use a hand vibrato or wah wah. Try it out and see what’s comfortable.

Making a noise

Most important: don’t literally blow and suck! We use these terms loosely, but this is not exactly how we play. We actually breathe the notes from the diaphragm. Exhale normally for the blow notes and inhale normally for the draw notes. No need to blast it either way.

And try not keep those lips too rigid. Loosen up! Make sure the harp is right in  between your lips so that the wet inner parts of your lips touch the metal cover plates forming an airtight seal. Ideally you will be covering the numbers with your lips and knuckle of your left index finger will be resting against your philtrum (the bit just under your nose your mum was always wiping when you were a kid). You should be embracing the harp, rather than addressing it with tightly pursed lips.

You don’t want any air escaping out of the corners of your mouth. To adjust accordingly. Now relax your embouchure (chops) a little with your mouth slightly open and covering the lower three or four holes. Now breath out gently. Don’t try and blow the stuffing out of it. Gently does it. Now try the same breathing in. It should sound like this:

Keep an ear out for any peripheral hissing or whooshing sounds. These are telling you your chops are not air-tight. So try adjusting to eliminate the leaks. A good seal is essential when working on your next two goals.

First goals

Well done! You can make a noise. That wasn’t too hard was it? Now the serious work begins. Your first two goals are developing accuracy and tone. Accuracy is all about individual note playing. Tone is all about building the sound quality of your note playing. Check out the linked pages for more information.


Accuracy

When I say ‘accuracy’, what I mean is clean single note playing.

So

Moving laterally between adjacent holes without under/overshooting.

Skipping holes without missing your target.

Moving diagonally from a draw note in one hole to a blow note in another (and reverse)

Navigational aids: tongue, ears, bridges, muscle memory.

Rhythm… reproduce tunes you already know so that self-correction is automatic.

And

Of course remembering that once accuracy is comfortably achieved, tone should be automatically built in!


Tone

Together with accuracy, this is an essential foundation skill for any aspiring harmonica player. The principle steps to good tone are these:

  • Controlled breathing
  • A moist and airtight seal
  • Accurate single notes
  • Tongue in neutral
  • Open mouth cavity
  • Open vocal tract
  • Work from the diaphragm

Breath control

This is neither table football, nor a MacDonald’s milkshake. Lose the straw and stop trying so hard, or else you’re going to burst a blood vessel. Inhale and exhale gently.

ToneAirtight seal

Playing off the harmonica, or addressing it politely will result in a peripheral hissing sound. This means you have a gas leak! For the benefit of society, you need to sort this out as quickly as possible. Lick your lips and get intimate – just like you, your harp loves a kiss and a cuddle.

Adjust your embouchure so no air escapes. Ensure everything is passing through the instrument. This means pushing the harp between supportive but not rigid lips. If you are tense and your lips are too firm it ain’t gonna happen. Relax a little. We sometimes call the harp a blues burger or a tin sandwich. Don’t be afraid to chomp that thing.  Close your eyes and schmooze your harp.

Accurate single notes

When working on tone, you need to focus on playing clean individual notes, free from interferance. Once you can do this on your first hole, you’re ready to carry the process to the next one. By learning simple tunes – nursery rhymes even – you will quickly coach yourself towards accuracy.

Often when we start learning harp, through lack of emouchure, we activate more than one hole at a time. It’s the Bob Dylan effect. You instantly limit the amount of tone you can produce because you’re spreading yourself too thinly. It’s a big old gas leak. So narrow things down and give yourself a break.

Tone
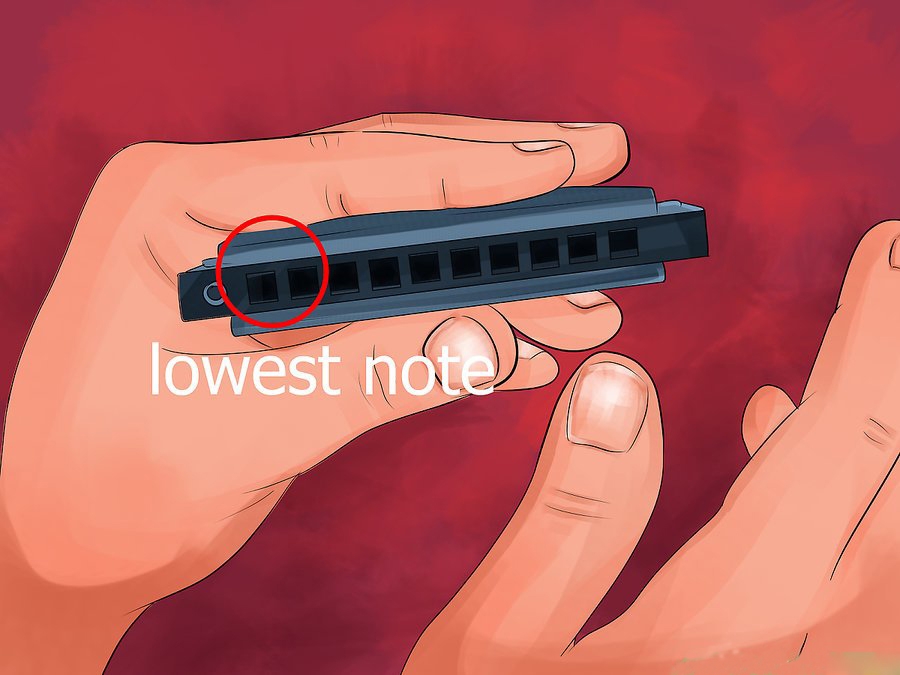
Don’t put up with cheap imitations. If it sounds like a car horn, you’re catching too many holes. If it sounds clean you’re where you need to be. Use your ears and listen to what’s going on. Incidentally, in order to locate the note you want, don’t be afraid to use the tip of your tongue to count up from 1 or down from 10. It’s a legitimate process. Get sloppy. Your harp enjoys intimacy remember.

Narrow tone – the letterbox effect

When you first latch onto a note, you’re tongue will most likely be front of house (near your teeth). This gives you the narrow tone we call the letterbox effect. Being British we can. It’s a sound you’ll hear Sonny Terry, Kim Wilson and Sonny Boy Williamson II use from time to time. So there is a place for it. It’s kind of metallic in thin. But now we want to build it and find that big sound. We’re chasing the Harp Surgery’s best friend – Fat Tone; he’s our Pizza man.

Tongue in neutral

For the biggest tone, you don’t want your tongue near the harmonica. Simply relaxing your tongue, leaving it off the harmonica and resting it will open up the mouth cavity enough for a significant change in the sound you’re producing. Let your tongue fall away and start to pull or push from backstage (vocal tract). On the lower draw notes especially, if your tongue is in the mix, there’s a strong chance the note you need will sound flat. This is because you’re telling the reed you want it to bend. Let it go, back off and draw (or blow) softly from the diaphragm. Breath through the harp.

Hot Potato (or Hard Boiled Egg)

Tone
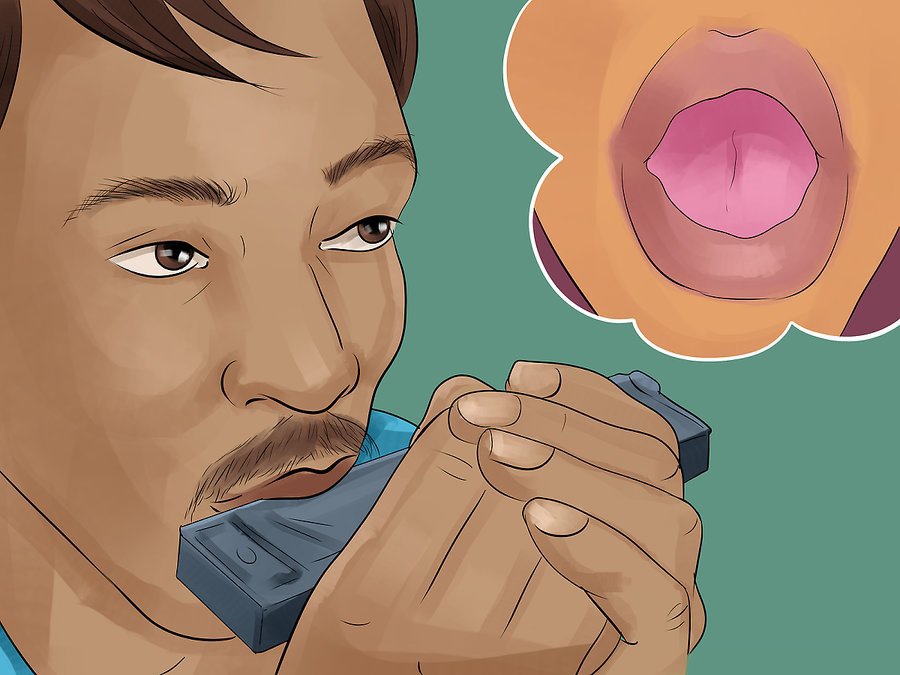
This is the next important concept to take on board. You need an open mouth cavity and vocal tract. So imagine you have a hard boiled egg, or a hot new potato, in your mouth as you play. Resist the temptation of bringing your tongue into the equation. Pretend to yawn. That’s where your tongue should be. Otherwise try speaking like Mr Bean for a while.

Diaphragm, diaphragm, diaphragm

Blow notes – Push from your chest but support the airflow from your diaphragm. Once a clear note is achieved, let your tongue fall back. Open up the throat as if yawning and push a little more from the chest. You should notice greater depth in the resonance and warmth of the note. This is tone!

Draw notes: Once you start to draw and achieve a note, DO NOT manipulate with your jaw, lips or the front end of your tongue. It’s going to bend the reed and we don’t want this yet. Instead, pull from your chest and diaphragm. Now try again. Breath inward across the reed. Pull from your chest and diaphragm – but resist manipulating from the ‘front end’. Let air in through your nose initially if it helps balance the pressure on the reed and correct any bending – you will hear the pitch alter. Continue to pull from chest. Let your tongue loosen and fall comfortably as far back as possible.

Open up the throat as if yawning. Pull more from the chest. You should notice greater depth in the resonance and warmth of the note. This is tone! Still not there yet? Whistle a low note or pretend to yawn. This is where your jaw, tongue and throat need to be positioned for the best resonance and fullest tone.

Conclusion

ToneIf you can’t hear it yet, go back to the start and work through again. It’s worth it. Playing one note with the best possible tone beats loads of weak notes every time. Think cricket or baseball. Listen to the sound you’re making and find the meat of the bat. The sweet spot. You know when you’ve found it because it will ring in your ears and fill the room. You will hear a full, rounded and, above all, warm sound quality.

Post script

Don’t confuse tone with volume. Tone applies to any note, quiet or loud!


Pucker or Block

Pucker or Tongue Block

Both methods of playing are correct, neither is wrong. You should be able to switch comfortably between the two. So, which ever is alien will eventually need mastering. At first this is akin to using a knife and fork with the wrong hands. Given time it will drop into place, but you will have to be patient. Either way you are starting to get your chops in as we call it. In professional circles this is called developing one’s embouchure (from the French word bouche meaning gob, chops, mush or laughing gear).

Puckering

Puckering is the commonest way to start playing. I would say 95% of students who visit the harp surgery use the pucker method and it is certainly the easiest way to tackle blow and draw bends. First moisten your lips with a quick lick. Purse your lips to create the same aperture as if whistling. Now loosen up slightly and relax your lips. Locate the hole you want to play with the tip of your tongue and apply your pucker right round the harp. Get stuck in.

You should be covering the numbers on the cover plate with your top lip and your index finger should be gently pushing the area under your nose. Now exhale gently and push from the diaphragm. Inhale gently, pulling from the chest and diaphragm. If you can hear more than one note that’s fine at first, but you will have to learn to play individual holes. Listen and learn to adjust your pucker to narrow down the sound. Check out Beginner’s Twitch to learn more about navigating and the geography of the harp. Remember that while you are aiming at one hole, you do have a margin for error – the dividing bridges either side of the hole. So the area you are aiming at is actually greater than it might appear.

Tongue Blocking

Blocking takes time to master if you are a natural puckerer. It is ideal for that big tone and will give your sound a chunky quality (especially when amplified). Chord and rhythm accompaniment, tongue slapping, octaving, fluttering and some other great effects all become available once you crack this method.

Let’s say your mouth naturally covers four holes. Blow and draw holes one to four on your harp. Now close down holes one to three with your tongue, until you can only hear hole four. You will probably need to adjust the corner of your mouth also, to eliminate any overspill into hole five. Once you are used to this position, try moving it up to cover holes two to five. Block off holes two to four until you can only hear hole five. This time you may have to adjust both corners of your mouth to eliminate overspill into holes one and six either side.

Move around the harp using this method. Try playing the major scale 4B 4D 5B 5D 6B 6D 7D 7B just tongue blocking. Experiment lifting and reapplying your tongue for chord playing or to create a rhythm. Practice starting with your tongue off the harp and slapping it on to play a single note. This is what gives that classic Chicago crunch and bounce. Like this:

I have focussed on ‘right hand’ tongue blocking. There are players out there who can tongue tongue block ‘left handed’ too.

U-Tongue or Finger Block?

You will sometimes read about the U-tongue style for playing accurately as a beginner. Until last month (Aug 2007) this very paragraph advised everyone to ignore the style as I had never encountered anyone that used it in all my years of playing and teaching. Then, lo and behold, I had a call from a beginner who wanted coaching sessions: at our initial diagnostic session she disclosed that U-tonguing was the technique she employed. Fully prepared to revise my understanding and bias on the matter, we proceeded to run through some basic exercises together. The result reinforced my pre-existing opinion… This technique is useful in pinpointing specific holes, however it hinders the development of other essential techniques (such as tone building and reed bending) where alternative use of the tongue is necessary.

With a little persuasion the student in question learned to pucker. I hasten to add that she knows I do not dismiss any technique out of principle – as long as it promotes the best possible musical performance. If you use U-tonguing partially or exclusively in your playing, I would be very interested to receive your feedback!

On the other hand I once had a student who, when starting lessons, located notes by covering the holes either side with his forefingers. He had copied this method from a well-known harmonica instruction book. Even as a temporary aid to accuracy, I find this system highly dubious and do not recommend it in the slightest. More especially for anyone who has recently been peeling onions.

U-Tongue Feedback

Phil Lloyd writes: I don’t U-block but maybe some day. [Which is an interesting opener. Ed]. It took me years to figure out tongue blocking because I thought the tongue was more active than it actually is. For tongue blocking (a misnomer) the key is playing out of the riight (or left) corner. It is really corner playing. That is why when people TB they are really playing out of the corner and the main thing the tongue is doing is getting out of the way to open that right side corner. Players who switch from left to right corners in order to make rapid jumps from say 1 Blow to 4 Blow call it Corner Switching. Had I understood the roll of playing out of the corner I would have picked up corner playing decades earlier.

Your statement that bending is impossible with U-blocking is probably not true. It is the rear of the tongue –where it is attached to base of the mouth — that causes bending by narrowing the passage and making the air go faster,, raising the pitch. Bending of course, is exactly like whistling on the inhale (for draw bends) and exhale (for blow bends). The problem is that most people don’t whistle anymore and don’t know how to do it. Whistle a high note G and then a low note C and notice how it feels.  It’s just like saying yee-ooww on the inhale.  The yee or eee brings the note up to pitch and the ooww bends it down. Bending is possible with tongue blocking even though the front of the tongue is up against the comb. Same is true with U-blocking. The front of the tongue does not affect the rear and bending. Norton Buffalo was a U-blocker. But then he’s dead now. I think people  who play the harp like a cigar (hands-free) use the U-block. Phil.

[Point conceded Phil. I’ve tried bending while keeping my tongue in contact with the harp – without doing so would be puckering in my opinion – and it can be done; although it feels cumbersome to a new user and would require some work to make it less awkward. But I still don’t see what advantage this offers, or what need it serves, when you can accurately bend the same note without any contact with the tongue. Going back to your opening comment, I still welcome comment from any full-time U-tongue users. Ed].

Danny Harris writes: Hi Mate [Can you tell he’s from Oz? Ed] I was reading your site today and noticed you’d like feedback for U tongue blocking technique. I use this technique and it was initially great for isolating individual holes as a beginner. However, once I started to learn to bend it’s not the best method. I completely agree with you. I use a bit of a hybrid approach. Rightly or wrongly I use my tongue to feel for the hole (phnar phnar) and once I’ve located it I then pucker. Like you said you just cannot do most techniques with U bending. Cheers and all the best mate. [QED. Ed]


Draw Bends

Bend it!

Draw Bends
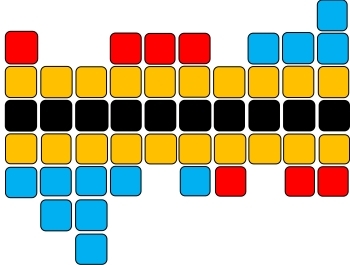
There is no doubt that learning to draw bend marks the transition from beginner to intermediate harmonica playing. When we find our first bend, it feels like we’ve just won the lottery. After hours of perseverance, we’re punching the air and yelling ‘woohoo’ like Homer Simpson. We want to tell all our friends. We want to start a band too. And fair play; bending is what gives the diatonic harmonica it’s signature sound. We can now start to learn the coolest licks and enjoy a new universe of musical expression. This was probably the reason we chose to play the harmonica in the first place.

Mapping it out
In our bid to master the art of draw bending, first it’s important to quantify the task in hand. Knowledge is power. It’ll also save embarrassment on the bandstand. We know that without any bending at all, we can produce 19 different notes on the 10 hole diatonic harmonica. These are the yellow squares in the picture above. You’may be thinking ‘hold on a moment, 10 blow notes and 10 draw notes is a total of 20 notes’. Well fundamentally you’re right, however 3B and 2D repeat the same tone, so the available note selection is actually one less than 20. If this is new to you, try 3B and 2D on Draw Bends
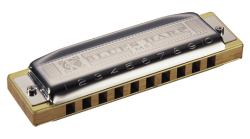
your 10 hole harmonica now. There is a logical explanation for this duplication, which we cover in Why are 2 draw and 3 blow the same?, but for now, let’s get back to drawing board.

Draw Bends

Terminology
With fluent use of the 12 regular bends (blue squares) and 7 over bends (red squares), it is possible to produce 38 new notes on the diatonic harmonica, simultaneously turning it into a fully chromatic instrument. But we’d have to be advanced players with many practise hours under our belts before we could manage all of these. For beginner and intermediate players, regular bends are plenty to be going on with. But just before we get stuck into them, let’s quickly clarify the terminology we’re using. Regular bends, the easiest bends to achieve, is a collective term for the eight regular draw bends (holes 1, 2, 3, 4 and 6) and the four regular blow bends (holes 8, 9, and 10). Once again, these are the blue squares in our diagram. Mastering all the regular bends will add twelve new notes to our tonal range. This is a significant achievement and mercifully they’re within everyone’s grasp. With the regular bends firmly in our skill set, and fluency in 1st, 2nd and 3rd positional playing, we are ready to realise our musical aspirations and share good times with others. Overbends is a collective term for the four overblows (holes 1, 4, 5, and 6) and the three overdraws (holes 7, 9 and 10), adding a final seven notes to our tonal range. And again, these are the red squares in our diagram.

Caveat Emptor
Unless we can already play individual notes cleanly and with tone, we’re on a hiding to nothing with reed bending. Air leakage, and catching neighbouring holes, strips us of the basic disciplines we need. If you have yet to master single note playing, put the quest for Draw Bendsbends on hold and learn this essential skill first. You’ll be glad you did.

Countless intermediate students have arrived at Harp Surgery lessons or workshops believing they can already bend. On closer scrutiny however, it is clear they have missed the basics, or their bends simply aren’t watertight. The Good Doctor’s advice to anyone investigating bends is be thorough. This skill makes our instrument unique and we need to understand how, why and where bends occur before we start to experiment. We must avoid approximating them, then going live armed with cheap imitations, in the belief we are already a Jedi harp master. Stark exposure can be a wounding lesson, and it’s best avoided.

So to begin with, ask yourself the following questions – and if you are uncertain about any of the answers, there’s important groundwork to be done. How many draw bends are there? How Draw Bendsmany blow bends are there? Where are they all? Can you play them individually and accurately? Do you know what direct bends are? Are there bends in holes 5 and 7? What about hole 10? Which reed bends when we play a draw bend? What’s happening in each chamber when a bend takes place? What is the tonal theory behind bends? Be honest, because one thing’s certain: if you take time to perfect every aspect of bending from a knowledge perspective as well as a practical one, you’ll have built foundations that are far more solid than errant cohorts of other players. So let’s roll up our sleeves and let’s enjoy the journey to enlightenment.

Why bends happen
The answer is a quirk of engineering, some physics, some musical theory and a healthy dose of pure magic. First of all, bends occur where two free reeds share the same chamber Draw Bends
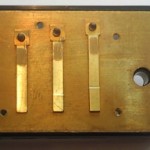
or channel. It is the interaction between these two reeds that is the source of bending. Valving reeds interrupts this process, which is why it is difficult to play bends on a chromatic harmonica. Where there is a difference in pitch between the two reeds of one full tone or more, physics says the potential for a half step bend has been created. As this difference in pitch, or interval, increases by an additional semitone, so an extra semitone bend is facilitated.

Let’s put that another way. Where two harmonica reeds equate to two white Draw Bends
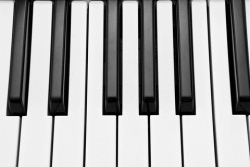
keys on the piano keyboard, if there are one or more other keys separating them you’ll find the equivalent bend, or bends, in the harmonica. So for example C and D are two white keys with one black key Db/C# dividing them. Two reeds with the same pitches of C and D, sharing the same channel in a harmonica, would facilitate the same semitone bend of Db/C#. This the case for holes 1 and 4 on a C major harmonica. In contrast, if our two reeds were B and C, or E and F, we wouldn’t find a bend as there is no key between these two keys on the piano. Admittedly, experienced players will say you can achieve a partial dip, but we won’t get snarled up in this debate just now.

How bends happen
In simple terms, whether drawing or blowing, regular bends move from the higher note to the lower note. In holes one to six, the higher notes are the draw notes, so we encounter draw bends. In holes seven to ten however, the higher notes are the blow notes, so we Draw Bendsencounter blow bends. But here’s the surprise – while the sensation of bending feels like we are dragging the higher reed down with our breath, the truth is the exact opposite. If you could watch the reeds while you played a bend, you’d actually notice the lower pitched reed moving more than the higher one. This is because the technique required to work the bend alters the air pressure across both reeds, effectively ‘neutralising’ the higher reed, as the lower reed moves ‘in sympathy’.

The technique involved is almost exactly the same as changing the pitch of a note when you whistle. When we blow or draw the higher reed normally, it vibrates in pitch. By adjusting our vocal tract – the area between the back of our tongue and back of our throat – and using our tongue as a plunger, we create the appropriate resonant space for our intended bent note and also apply the air-pressure needed to flex the reed, altering its pitch as we do so (it’s like playing a Swanee Whistle). The airflow across the higher reed slows and the lower reed starts to vibrate in sympathy. As the reed flexes, a dip Draw Bendsor bend in the tone results.

The bending process can be broken down into three steps. Firstly, the front of the tongue triggers the reed, by using a sipping movement or a more percussive ‘reverse spit’ (pretend to spit out a grape pip, then do this in reverse). Next comes the ‘K’ spot. Try saying ‘Kit-Kat’, or ‘Kah-kah-kah’, and notice how your tongue touches the roof of your mouth to produce the ‘K’ consenent. Now hold this contact point and pull the ‘K spot’ backwards as you breathe in through pursed lips. You’ll hear a sucking sound rather like a bicycle pump filling up. Finally, try whispering ‘hello Harry, how high have you hopped?’ or make a fake laugh ‘ha ha ha ha’. The ‘H’ spot is the control area you’ll be transferring everything towards at the back of your vocal tract. Arching your neck slightly can help create the extra space for this – especially on the deep draw bends in holes one and two. More about technique later. First let’s get theoretical…

Where bends happen
We have already learned that it’s the difference in pitch between two reeds sharing a channel that determines the potential for additional bent notes. So it follows that wherever the difference – or interval – between two reeds is greater than a semitone, you will find a Draw Bendsbent note. The greater the interval the greater the number of bent notes. Picture a piano. You have white and black keys. Consider the scale of C major (do re mi etc). It comprises eight full tones (the white keys) or a total of thirteen half tone steps (white and black keys). Moving from middle C to the next C across the eight white notes is diatonic, playing all thirteen half notes is chromatic. In regular blowing and drawing, we are only equipped with the white notes, and we have a complete major scale between holes 4 and 7. Hence a diatonic harmonica, rather than chromatic one. Regular bending (blue squares) enables us to find many, though not all, of the missing black keys. Overbending (red squares) fills in the remainder.  Let’s look at the blue squares in more detail.

Quantifying the draw bends
Draw Bends
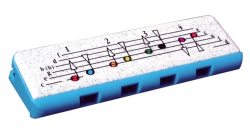
Our diagram of a C diatonic harmonica shows you which notes are found in each hole (click it to enlarge). Using a standard scale of chromatic notes, or a piano keyboard, we should be able to calculate the number of bends in each hole and their names. Here’s the chromatic sequence starting from A: A Bb B C C# D Eb E F F# G Ab A. For the technocrats, I am avoiding enharmonic tags as this fogs the issue. You will find enharmonics labelled in the diagram however. 

In holes one and four, where the blow note is a C and the draw note is a D, there is one semitone in-between (C#) and correspondingly one draw bend. In hole two, where the blow note is an E and the draw note a G, there are two semitones between (F# and F) and correspondingly two draw bends. In hole three, the blow note is a G and the draw note is a Draw BendsB, so there are three semitones between (Bb, A and Ab) and correspondingly three draw bends. In hole five, with blow E and draw F, there is no semitone interval and consequently no bend. Finally in hole six, with a blow G and a draw A, once again we have one semitone available (Ab) and correspondingly one draw bend. In short: 1 in 1, 2 in 2, 3 in 3, 1 in 4, 0 in 5 and 1 in 6. Understand and memorise this simple list; it will make you more informed than hundreds of other harmonica players. Remember too that in holes 6 to 10, the higher notes becomes blow notes, and so any bent notes will be blow bends. The how, why and where for blow bends is on a separate page. Back to draw bends. We’ve done the theory, so now it’s time to put everything into practise.

Draw BendsYour passport to heaven
For any diatonic harmonica teacher, note bending is one of the hardest techniques to teach. It can’t be shown, it can only be demonstrated, explained and heard. Dave Barrett has produced an ultrasound video of the process, which is fascinating, but even this doesn’t teach us the practical skills we need. Ultimately, like walking, whistling and riding a bike, we have to work it out for ourselves. However, to help you on your way, here’s how the Good Doctor steers his students towards their Holy Grail.

  • Accuracy and tone first
    It’s fine to experiment with bends. Many players discover the 2D hole bend even before they know that bends officially exist! But there’s little point attempting bends before you can play clear, single notes with good tone. Only then are you able to direct your breath efficiently and only then are you truly ready for the next step.
  • Maintain your embouchure
    Draw Bends
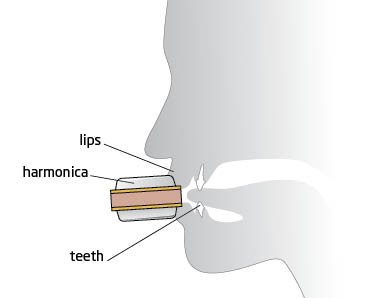
Your lips shouldn’t spread wider or change shape as you bend. They are there to maintain a good seal around the target area. Loose air means no bend. The bending process then begins in your vocal tract and in your mind. By anticipating the bent note the rest will follow. It’s how we pitch our notes when we sing or whistle. The reeds replace your vocal chords!
  • Think the note
    This may sound strange at first, but it helps. You prepare your vocal tract when you want to whistle a note without really thinking about it. The same goes for singing and speaking. Note bending follows the same path. The reeds replace your vocal chords!
  • Whistle backwards
    Whistling normally at first, blow a high note and gradually lower the pitch as far as you can. Now try this in reverse, whistling inwards. Notice how your tongue and vocal tract positions alter. This is the same as the bending process, so all you need to do is attach your reverse whistle to a harmonica!
  • The clutch analogy
    As you start to bend, you engage the reed and feel a pull or purchase from the back of your tongue and your vocal tract. It’s like sipping froth from hot chocolate. As you start to pull your tongue back, the reed flexes and audibly dips or chokes for a split second. Draw Bends
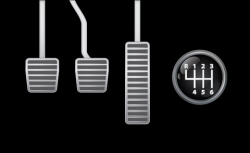
This the bite point. When you learn to drive a manual car, you have to synchronise the clutch and accelerator (gas) pedals in order to engage the engine and pull forward. Miss the bite point and you stall the engine or the car kangaroos up the street. This is because you’re slipping the clutch. Learn to recognise the bite point as each bend engages. And as soon as the bend cuts in, increase the pull from your throat and chest. Attack it! Eventually you will feel the reed drop into a whole new position and the pitch will drop with it. If you overshoot the bite point, don’t hang on fruitlessly. This is wasted effort. Let it all go and start again.
  • Ee-you-yore and the K Spot
    This has nothing to do with melancholic donkeys or anatomy. This method demonstrates how control is transferred from the centre of your mouth tract to the back of your vocal tract. Your tongue effectively works as a plunger drawing the reed into a bend and holding it there. Start by saying ee-you-yore out loud. Running the words together, say this again and note what’s happening to your tongue. It falls back in stages until you are effectively ready to yawn. Now purse your lips, or tongue block, and articulate the same words, drawing inwards this time. Ee is the first stage of the process, when you engage the reed. You is the pre-bend, when you gain a purchase on the reed. You should detect an audible dip in the tone of the reed. Be aware that it’s easy to overshoot this point, as explained above. Yore is when you transfer control to the back of your throat, applying more pressure to the reed as you do so and bending it accordingly. Apply this three-step process to 4D and see what happens. Now try it on 1D. Usually you’ll find that one of these starts to dip. A similar method is to say the letter K as we’ve mentioned before, and note where your tongue touches the roof of your mouth. Moving the K spot back will help engage the reed and deliver your bend.
  • Milk shake, snake bite and a bicycle pump 
    Draw BendsSounds like quite a partay! But seriously, sometimes it helps to imagine yourself pulling thick milkshake through a straw, or sucking venom from a snake bite. The sucking or plunger process created by the tongue is integral to draw bending on the harmonica. If shakes and snakes don’t do it for you though, picture a standard bicycle pump. As you pull the top end of the pump, it draws in air. You’re doing the same on the harmonica with your tongue acting as the pump.
  • Abseiling
    Draw Bends
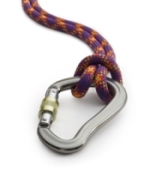
I make no apology if abseiling and reed bending appear totally unrelated. However, you will understand this analogy if you have actually abseiled; especially if you can recall the very first time. When you leaned back into nothing with only a rope to keep you from falling, your heart was racing and you felt a rush of adrenalin. Well note bending is a similar leap of faith. You don’t know what you’re trying to find, whether you’ll get there in one piece, or what it’ll be like on the way down, but once you make the break through, it feels fantastic. So lean back and take the reed with you. All the way to the bottom.
  • Sip and Swallow
    Draw BendsTo get used to the transfer of control centres when attempting low end draw bends in hols 1, 2  and 3, consider the way you might drink a cup of hot chocolate. Initially you’re going to sip the froth using your lips, the tip of your tongue and a tug of air between your teeth. As the sipped liquid cools in your mouth, you’re then ready to swallow it. Sipping and swallowing are the start and end control points of low end draw bends. In time, as your throat muscles strengthen, you’ll learn to pull directly from the vocal tract. The 4D’ and 6D’ bends are one shorter reeds however, and the control point tends to remain further forward in the mouth.

Different reeds have different characters
When you start out, you will notice how some bends seem easier than others. More often than not the two draw bend can be elusive and the three draw bend can be hard work. Don’t lose heart. It will all come with practice. The lower reeds take more effort because they are longer and more air is being moved. You will learn to adjust and your head may drop slightly to afford more space for your tongue and vocal tract to retreat. In time you will also learn to economise your effort, getting more bend for your pound per square inch (psi).

Direct bending
Once you have found all your bends, there’s still plenty of work to be done. You’re probably still approaching them from above – scooping into them. This is normal, but eventually you will need Draw Bendsto treat each bent note as an individual piano key. This is called direct bending. To master this skill, start by moving between a clean draw and a full bend, down and up, as slowly as possible. This will help you develop muscle memory and strengthen your bending technique. In the holes that have more than one bent note, 2D and 3D, pause and hold each semitone bend momentarily en route as you descend and ascend. Finally, you need to hit each bend in isolation. And yes this includes all three in hole three. For every hole though, a good trick is to remember you also have a blow note and to include this in your training. Map out a steady journey from the clean draw, down to the full bend and out on the blow note. Now do this in reverse, without scooping as you move from the blow note to the full bend. This will help you to nail the full direct bend. In holes 2D and 3D, you’ll also need to disengage the full bend and reach for the middle bend(s) without scooping, before working your way back up to the clean draw. This is where the muscle memory you developed moving up and down at a snails pace will pay dividends. Slow and steady wins the race. Now check out our Beef Up Your Bends series (see the mini-menu on the right of the screen).

The trigger
You may find it helps to trigger direct bends by placing your tongue behind your teeth and sounding a short reversed ‘tuh’ to get things started. Alternatively, try using the K spot further back and attack the direct bend with a reverse ‘Kooo.’ It is normal to scoop into direct bends until you develop enough muscle memory to hit them head on. Throw away your crutches as soon as possible and learn to play each one cleanly. Accurate direct bending marks the difference between those who think they can bend, and those who know they can.

How do I know I am getting an accurate bend?
Draw Bends
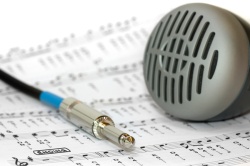
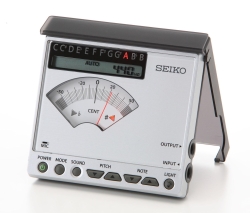
A pitch pipe, piano or correctly tuned guitar will give you the notes you need. Play the target note and try to match it with your bent note. This is a good method as you are developing your musical ear at the same time. There are also many tutorial CD’s that will give you the notes you need. But if you’re worried about whether your bent note is scientifically accurate, then you can buy an electronic tuner. There are many types; we use a SEIKO Chromatic Tuner Model SAT1100 that uses Draw Bends
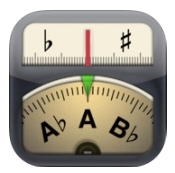
two AAA batteries. You can find it on Amazon and eBay. Otherwise, for Apple iPad users, there’s the Cleartunes app, which is a cheaper option and just as good. But you could always save your money, play songs that require bent notes and use your ears to judge whether or not you’re playing accurately. Or better still, record yourself and listen back. You’ll be surprised by what you hear; no accurate bends, no tune!

Do’s and dont’s
Do persevere. Do be thorough. Do perfect your direct bends. Don’t be satisfied with half measures. Drag those whole bends right down into the muck! Don’t avoid the 3D bends. They are tricky and their inherent inaccuracy is the weak point on the diatonic harmonica. Embrace it!


Blow Bends

Blow BendsPart One

Be aware that blow bends take place at the top end of the harp. We’re talking holes 8-10 in principal. You will also find a slight dip in hole 7, however as there is no semitone interval between the blow and draw note, political correctitude says this is officially not a bending hole.

Why at the top end? Because we bend from the higher note in each hole. In holes 1-6, the draw note is higher than the blow note, so we use draw bends. From 7 up, it’s the other way round, so we use blow bends. Avoid using higher keys, C, D, E, Eb and F as you’ll probably burst a blood vessel before you get a bend. Give yourself a break and use a key Bb or lower.

Top end reeds are shorter than the others. Consequently they need a lot more pressure in order to play an accurate and controlled bend. They are not as delicate as you think. Ever tried twanging a ruler on the edge of a desk? The shorter you make it, the higher the twang and the harder you have to pluck. Same principle. Ever tried to balance on a stationary bike? It’s hard. Once you start moving, it gets a lot easier to stay on. Try a blow bend with a feeble blow and you’ll get little or no response. Blast it and, in time, you’ll be able to bring down light aircraft. So put the dog out, plug your ears, and let’s get started.

Part Two

It helps if you know how to whistle through your lips in the traditional way. Much of what you do to achieve a whistle – tongue and jaw position – is similar to blow bending. Try whistling a high note and lowering the pitch. Bending a blow reed uses the same mechanisms – you’re just projecting your effort through a hole on a harmonica.  Whether you can whistle or not, try this preliminary exercise:

Hold the palm of your hand in front of your face (about 20cm away). Make sure your hand is open flat, finger tips pointing at the ceiling and palm level with your mouth. (It doesn’t matter where your thumb points, as long as it doesn’t obstruct your palm). Now purse your lips and blow a jet of air into your palm. By adjusting your lips and jaw, try redirecting the jet of air upwards onto your fingers and downwards onto your wrist without moving your head or hand. Now see if you can keep a small cushion of air inside each cheek as you do it. Be a Mini-Gillespie, don’t go blowing your cheeks out all big! Finally, keeping your lips closely pursed, increase the force of the air jet by pushing from the diaphragm.

Part Three

Grab a low key harp and experiment using the technique outlined above. It’ll sound grim to begin with, but persevere. Remember to push hard – it will sound loud at first, but you’ll have more control and in time you will learn to economise your effort. On your first few attempts, you will probably find that the reed schreeches and then stops responding, or slips free. The screech is the reed telling you it doesn’t quite know where to go – this is the ‘bite point.’ By pushing a little bit harder still, you should break through the screech and find the bend. The scenario is similar to the clutch and accelerator pedals on a car. So when you find that bite point, let the clutch off and squeeze the accelerator! I would suggest you start on the 8 blow bend as it is marginally more forgiving…

Part Four

Listen to real examples of what can happen. Jimmy Reed and Sonny Boy 2 were great exponents. You’ll find blow bends come into their own particularly, though not exclusively, in first position playing (straight harp). Jerry Portnoy’s ‘Home Run Hitter’ is a fine example. Of course you can blow bend in other positions too. Check out Magic Dick’s ‘Whammer Jammer’ – he’s playing in second position (cross harp).

And finally

You can hasten the start of a blow bend by articulating a ‘Tuh’ or ‘spit’ from between your lips to trigger the reed. Once you start blowing the bend, sustain it and make a slight up and down movement with your tongue and lips to produce a fancy modulation in the bend. The blow bend at the start of Whammer Jammer is a good example of this effect.

And finally try looping off a bend reed – direct blow bend to straight blow (or reverse) in the same hole and pass into an adjacent straight blow hole. For example: 8 blow bend, 8 blow, 9 blow or perhaps blow 9, blow bend 9, blow 8. It’s the start of bigger things. Trust me I’m a doctor.

The opening to ‘I’m In The Doghouse’ on 9 Below Zero’s ‘Don’t Point Your Finger’ album is an excellent example of this.


Octaving

What is Octaving?

Octaving is playing two notes an octave apart in unison. It is a great way to reinforce a note by playing its adjacent octave simultaneously. The result is a ‘bigger’ sound, but a clean one as there are no harmonic notes involved. The good doctor sometimes calls it double-barrelled harpin’.

A good example is the opening to Little Walter’s ‘Juke’. The run up passes through draw 2, draw 3, draw 4, blow 5, and twice on blow 6. Or does it? Actually try draw 2, draw 3, draw 4, blow 5, and twice on blow 3-6 octave. Like this:

Owing to the layout of the reeds, some octaves are four holes apart, while others are five holes apart. We normally start by learning the four-hole octaves as these are easier and more widely used. Once we investigate 3rd position playing, five-hole octaves come into their own.

How do you do it?

Let’s start with holes 1-2-3-4. You should find your mouth sits comfortably across all four holes. Gently blow all four at once. This is the major chord in the key of your harmonica. Now draw the same four holes. This is the major chord one tone above the key of your harmonica. In each case, the notes in the 1 and 4 holes are the same, only an octave apart. So you need to block the middle two holes and just play 1 and 4.

Gently place the tip of your tongue against the bridge between holes 2 and 3. No need to ‘poke’ your tongue, keep it relaxed and square-on. Now allow the corners of your tongue to touch the 1-2 and 3-4 bridges at the same time. Holes 2 and 3 are now covered. Push your lips forward slightly to close down the corners of your mouth and avoid catching holes outside your targets 1 and 4. At the same this will help your tongue to plug the middle two holes. Now breathe out, or in, gradually keeping an ear on the result. No need to push or pull hard – stay relaxed. If you achieve a ‘clean’ result – two notes in unison – you’ve found your octave. If not, adjust your chops to eliminate the unwanted tones.

Now try transferring from blow 1-4 to the next octave, blow 2-5. Ignore draw notes for the time being, and continue working up the blow reeds: 3-6, 4-7, 5-8, 6-9, and 7-10.

Can I Octave anywhere on the harp?

No! This is why I suggested staying with the blow reeds in the exercise above. You can octave the length of the harp on the blow reeds, as they are arranged uniformly in arpeggio.

The draw reeds are arranged differently and are not in a uniform pattern. You can octave draw 1-4 as we know. However 2-5, 3-6, 4-7 and so on will give you dissonant note combinations.

To octave draw holes 3 upwards, you have to replicate Chromatic Harmonica octaving by spreading your chops across 5 holes! This is wide-mouth frog territory. In simple term you now place the central tip of your tongue in one hole, let the corners overlap into the holes either side, purse to close down the corners of your mouth and carry on as before. In this way you can octave holes 3-7, 4-8, 5-9 and 6-10.

Advanced players can switch readily between 4 hole and 5 holes octaves. Check out David Barrett’s ‘Exploring 3rd Position’ tutorial book (ISBN: 0-7866-6107-0), exercise 4.46A as a great example of this technique.

What other benefit does Octaving have?

If you normally pucker, it’s an excellent way to start using your tongue. On a four hole spread, the next step is to block all three lower holes instead of just the middle two. Carry on playing the top hole in isolation. Now you’re tongue blocking!

And finally…

Going back to those dissonant 4 hole draw spreads. A couple of these can prove very useful as Country or Cajun effects. Try sliding through draws 3-6, 4-6, 3-6 and out on blow 3-6. By changing the beat and exploring around these combinations you can soon get countrified and even branch into a little Zydeco… et toi! Enjoy.


Tongue Effects

Tongue slaps

This is a technique which goes hand in hand with the tongue block method of playing harmonica. Instead of pursing or puckering, you are covering about four holes with your mouth, blocking off three holes with your tongue and playing the remainng hole. Typically this means blocking the three holes to the left and playing the remaining hole on the right. So you might blocks holes 1 to 3 and play hole 4 (blow or draw). The reverse can also be true however – you could block 2 to 4 and play hole 1 (blow or dreaw). Either way the result is a system of playing where you work from the side of the mouth rather than from a central pucker. Tongue slapping is achieved when you briefly catch all four notes before ’slapping’ your tongue onto the harp to single out the one note you need. It adds a crunch effect to the sound. By repeating the process, a jig or shuffle rhythm can be created.

Tongue Rolls

This is when you roll your ‘r’ like a Scotsman (She was a bonny girrl) or Spaniard (Muy grrrrande). It is only possible on blow notes. When used lightly on lower notes you can mimic a cat’s purr. On upper notes you can mimic a cricket or 1970’s trim telephone.

Triple Tonguing

By articulating with your tongue, you can give the impression of playing single notes rapidly. Try saying either ‘Ta-ta-ta’ or ‘Diddley’ as you blow or draw. Your tongue does not actually touch the harp, but stays inside your mouth. For the record, I find diddling easier and faster than ta-ta-ing! For a great effect, try alternating rapidly between draw 2 and blow 3 using a single ‘Diddley’ in each direction. This an effect Mark Feltham uses on 9 Below Zero’s fantastic album ‘Live At The Marquee’.

Fluttering or Dabbing

Check out the very start of Whammer Jammer or Walter’s Boogie. In both cases Magic Dick and Walter Horton use what I call the dabbing technique. In effect it is octaving or note splitting across 4 holes, while quickly uncovering and covering the two middle holes to produce an intermittent chord. This is achieved by rapidly and repeatedly ‘poking’, ‘dabbing’, ‘fluttering’ or ‘tongue slapping’ with the end of your tongue.  It’s an in-out movement rather than a side-to-side movement.

In Whammer Jammer, Magic Dick plays a direct bend on hole 4, moves into a straight 4 draw and then splits draw holes 2 and 5, with dabs on holes 3-4. The bridge between holes 3 and 4 is the target point for the dab. In Walter’s Boogie, Walter Horton plays a very quick direct draw bend on hole 3, through a straight 3 draw and then octaves 1 and 4, with dabs in holes 2-3. The bridge between holes 2 and 3 is the target point for the dab. He then transfers up to draw split holes 2-5, back to octave draw 1-4, up to draw split 2-5, up to blow octave 3-6, and finally up to draw split 4-7. In each case (except for the 4-7) the dabs are played in a sequence of four triplets. Lots of puff needed for this one!

Articulation

Any of the sounds produced with the tongue during speech can be articulated through your harmonica. Try ‘ka’, ‘tah’, ‘tuh’, ‘dah’, ‘doh’, ‘deh’, ‘doy’ and ‘diddley’ (articulation can also be produced from glottal stopping vowel sounds – see Glottal Stops). Articulation can help to trigger the start of a note, separate a sequence of notes or lend certain sound qualities to specific notes. An extreme version is Doc Watson’s ‘Mama Blues’. Using hand wah-wah and articulation, he mimics an infant saying ‘I want my Mama!’.


Trills, Rolls and Trains

What’s a trill?

Trills, Rolls and Trains
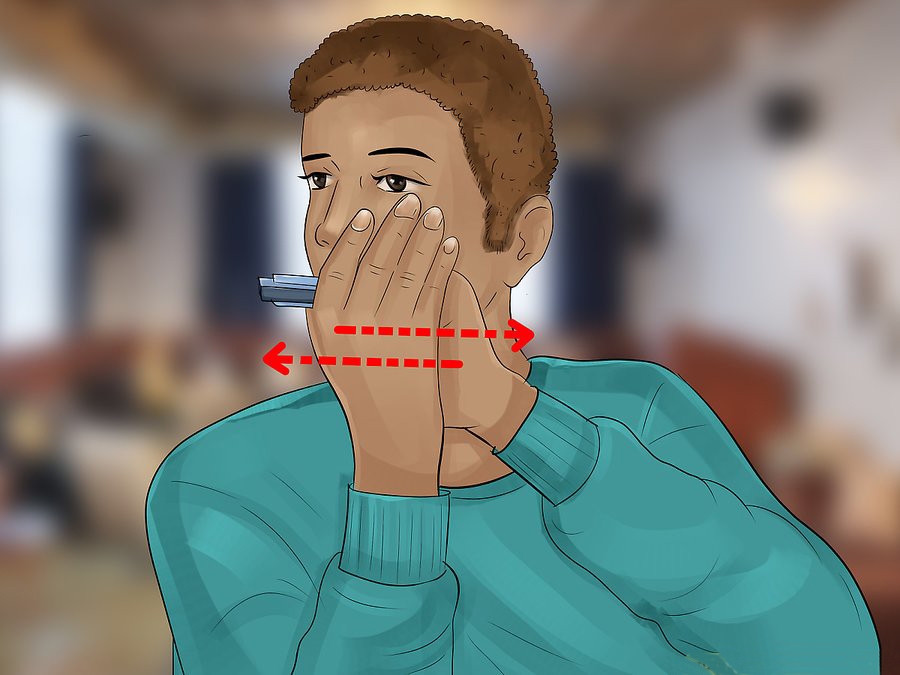
It’s when you alternate (move back and forth) rapidly between two adjacent holes. Trills can be achieved by puckering or tongue blocking. I find puckering best for control, but remember seeing an interview with James Cotton in which he cites Little Walter’s tone when playing tongue-blocked trills as totally ground breaking.

Technically trills can be achieved between two adjacent holes anywhere on the harp; across draw or blow reeds respectively – but not really between a draw and a blow note. Most often trills are played across draw holes 3-4 or 4-5; this produces that signature effect on the harp everyone loves.

It can and is used elsewhere though. On one version of ‘Walter’s Boogie’, Walter Horton extends down to a trill across blow holes 1-2. On other blues tracks players trill across blow holes 8-9 at the top end of the harp – sometimes moving into a blow bend across both holes and back to a straight blow.

The ability to bend into, and during, trills is something else you’ll need to master, as it lends an extra dimension to the finished effect. It’s something you’ll hear used on no end of harp tracks. Visit our Glissando and Portamento page for further information.

Whichever technique you adopt, the lateral movement is very slight. You are passing the air-flow back and forth across a bridge dividing two adjacent holes to create a trill or ‘quivering’ sound. The finished effect is a classic harp sound that appears in countless films and on numerous recordings. When you’ve refined it, it will become a central piece of your toolkit. Treasure it and don’t over use it!

Standard trills
The lateral movement necessary to achieve a trill is often referred to as a roll. This normally comes from moving your harp and hand grip laterally as you play using puckering or tongue blocking technique. Perhaps this should be called a ham roll.

Head rolls
A trill can also be achieved by rolling or shaking your head from side to side while puckering or tongue blocking. This is a head roll. It looks great on stage or in front of a mirror, but doesn’t promote accurate playing in my opinion. And it’ll give you a headache if used too vigorously!

Tongue Roll
Finally you can try a tongue roll – sometimes referred to as a U block. It is an unusual technique and something I am new to, but it is a valid technique nonetheless. Place the end of your tongue just under the bottom cover plate or just below the mouthpiece of your harp, with the target hole above. Push your tongue slightly forward and relax the sides so they are pushed in, and supported, by the inside of your cheeks. Now draw (or blow) your target hole. You should produce a clean note and feel air cooling the surface of your tongue.

Pull from the back of your throat and move your tongue laterally to transfer control into the adjacent target hole. At the moment I find I move my jaw and tongue when it comes to the trill. Perhaps with practice it will get easier. Mick Kinsella has tongue roll tracks in his excellent beginner’s blues module – Blues Harp From ScratchTrills, Rolls and Trains (ISBN 0-7119-4706-6). Sadly however, he doesn’t really explain how it works. I hope the above helps.

How to do it – the Harp Surgery way
First hold the harp as you would normally, but in one hand only. Your mouth should be right round the harp – no numbers showing – and the knuckle of your index finger should be nudging right into your philtrum. Dig into the harp and take control!

Now let the harp do the work. By this I mean avoiding head rolls at this stage – you can experiment with them later. Instead, try to develop muscle memory in your forearms and wrists while controlling the harp from an accurate, even and balanced sideways movement of your hand grip. Work the bridge between the two target holes.

Start your trill from, and end on, the lower note preferably. It sounds better musically as it lends itself to resolution. Weight each note evenly, keeping your delivery symmetrical. Listen to yourself and decide whether you are emphasising one side or the other. If you are, slow down and regain your balance. Control and balance are everything. Ensure you give both sides of the trill equal measure. Snatch it one way or the other and you have an ‘asymmetrical’ twitch rather than a balanced trill.

At all cost avoid the ‘toothbrush’ trill. This involves holding one end of the harp and shuttling or jerking it rapidly in front of your lips – like you’re brushing your teeth. My inebriated aunt can do this and it’s just not pleasant. Yes she still has her own teeth. Did Lee Brilleaux really do that? Well at Harp Surgery we don’t care – he always declared he wasn’t a harp player anyway; but look what he (and the Feelgoods) did for kicking the arse back into British and world music… I digress.

Now start your trill evenly and slowly. Pick up the tempo but keep control. Take it to top speed and then slow right down again, emulating the decay of a bouncing basketball. Doesn’t it feel far more complete? And no need to reach for the Colgate!

When to do it
9 Below Zero’s take of Rocket 88 shows it can be used as much or as little as you like – across the right chords. Alternatively it’s just an effect and quickly becomes boring or predictable. Better to judge it musically and play over the right chords or at the optimum point of a phrase. Mick Kinsella’s Southern Jive takes you round the chords beautifully, with optimum use of trills. Incidentally, he takes you around the chords on all his tunes – with and without bends. I really recommend his Blues Harp From ScratchTrills, Rolls and Trains book for beginners as it promotes best musical practice and avoids nasty comfort zones (one or two typos in the tab Mick, but hey…).

Further reading

Using Your Head (Or Your Hands)


Vibrato

Good vibrato is difficult to achieve initially, but vital in bringing a mature quality to your playing. There are three identified forms of vibrato; hand, diaphragm and throat. Of these throat vibrato is by far the most widely used and, I think, the most impressive form.

Diaphragm Vibrato

Not to be confused with throat vibrato, even if the end product is very similar, though often weaker. Diaphragm vibrato comes from the rapid tension and relaxation of the diaphragm muscles. I have never knowingly seen anyone use this technique, although I understand that Charlie Musselwhite is an exponent. If I was a sceptic, I’d say don’t bother with diaphragm vibrato – you won’t be missing anything.

Hand Vibrato

This involves nudging the harmonica back and forth (towards and away from the chops) without breaking the contact between your lips and the harp. It can be done rapidly, or more slowly to add texture to a quiet piece. Again this is not a widely used technique and sits, in my humble opinion, on the naff side of the tracks. Again you’re not missing much. First hand I have only ever seen Johnny Mars use this technique – to good effect I hasten to add!

Throat Vibrato

This is where it’s really at. It’s the standard vibrato every player should master. I remember when I started out, blow bends and throat vibrato were the two greatest mysteries in harp playing. Set your barrow down and get stuck in. If I can get there, so can you.

Throat vibrato is a controlled staccato effect. It is related to bending (especially on draw notes) and to the glottal stop, because much of the control is achieved from the back of the throat.

Try repeating the letter ‘h’ or ‘uh’ when playing a blow or draw note. It’s somewhat easier on the draw notes because you can use the tension of the pre-bent reed as your counterpoint. It will take a while, but if you can hear yourself gasping at the back of your throat when you start the draw notes, you’re on the right track. Blow notes are a lot easier but not as much fun!

It will be hard at first. But think opera singer, relax and persevere. Once you get it you can really milk it. In its extreme form it can be combined with draw bending to ‘choke’ the harmonica. Sonny Boy Williamson II was a great exponent of this technique.

For an extended explanation and coaching in throat vibrato contact me direct.


Wah-wah

Wah-wah

Wah-wah
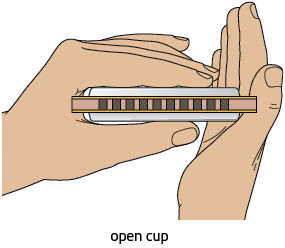
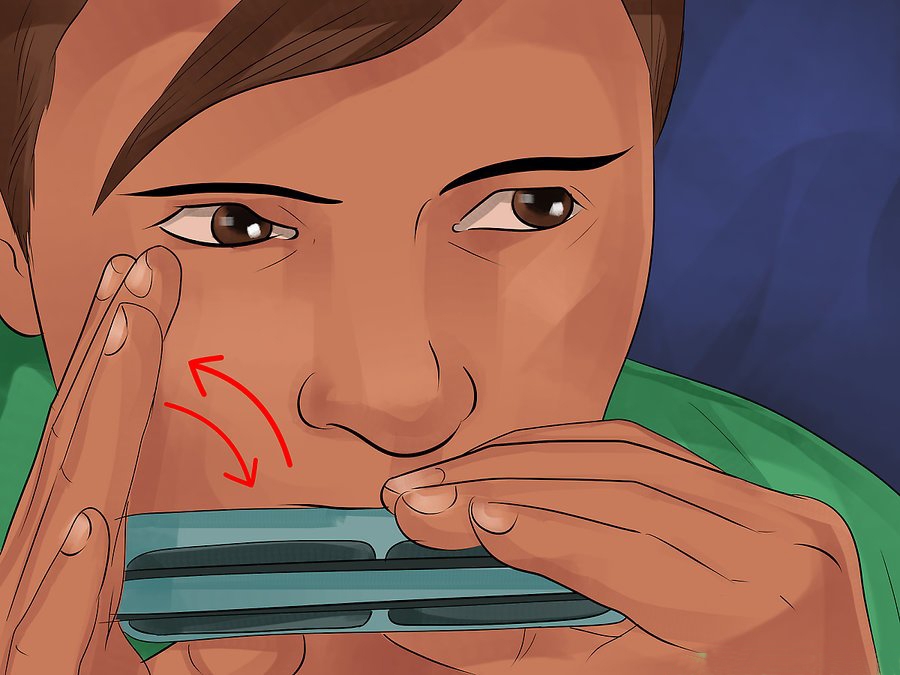
This starts by cupping the harp, which is when we use both hands to create an airtight chamber around the harp. It actually amplifies the sound and gives it a warmer tone. In terms of physics, we are harnessing waveforms and using them to our advantage. The image (left) illustrates the cupped hand hold for acoustic harp playing.

By lifting one or more fingers on the left hand, opening the right hand alone, or throwing both hands open together, we can produce the well known ‘wah-wah’ effect. The vocal equivalent would be an alternation between a closed ‘mmm’ (or hum) and an open ‘aaah’. On the harp however, our hand movement adds an interim ‘www’ sound to the mix. Repeated slowly, the result is a ‘mwah-mwah’ sound. Accelerated, this becomes the straight ‘wah-wah’. Reducing this process to one rapid opening (or ‘throw’) of the hands and a symultaneous attack on the reed makes the harp ‘bark’.

The wah-wah can be played acoustically without mic or amp. It can also be played semi-acoustically into a free standing vocal microphone. Best not to actually touch the mic however, and also to have a sound check beforehand to avoid any feedback.

Once you progress to using a separate hand-held harp mic, you will find that only a semi wah-wah is attainable as your hands are already busy holding the harp and mic.

A related effect is the hand vibrato – the ‘campfire’ sound. This is produced by rapidly fluttering the outermost hand as we play, normally with the fingers extended vertically, although you could also use a cupped, semi-cupped or open hand hold.


Glissando & Portamento

Glissando & PortamentoHere are a couple of simple techniques that will elevate your phrasing and musical expression. Call them musical ornamentation.

Glissando

Glissando (gliss.) is derived from the French verb glisser or it’s adjective glissant, meaning sliding or gliding. A glissando can be achieved in an upward or downward direction. It often preceeds the beat and target note for impact. It can also follow the beat and note for statement. Occasionally it appears during a passage for dramatic effect. The range of the sweep can vary, but follows a natural spread and decay. Piano players achieve glissandos by running a finger or thumb across a spread of keys. Jerry Lee Lewis is a prime exponent.

Portamento

Portamento comes from the Italian verb portare, to carry. This is a continuous and smooth upward or downward movement between two notes. Herbie Flowers uses it on the bass throughout Lou Reed’s Walk On The Wild Side. Guitarist can achieve the same effect by bending a string, or strings, laterally across the guitar neck. Slide guitar is all about portamento. And of course there’s the whammy bar – Hank Marvin used it on numerous hits with The Shadows including Apache, FBI, Dance On and Wonderful Land. Vocalists will ease into, or out of, a note using portamento. A Slide or Swanee whistle is another example – great for emphasising comic slips and falls. And finally, how about a wolf whistle….

Glissando on the harp

Blowing or drawing, run your breath lightly over a set of neighbouring holes, sounding them all in passing. This can be achieved by ‘snatching’ the harp – a short twitch from the wrist – or a light head movement. Now pick a target note and end your sweep there with a clean, full tone. Your glissando can run up to, or down to, the target hole to provide impact. It can also create colour as you reverse the process, sweeping off your target note, usually (but not exclusively) in a downward direction.

There are endless examples! On J.Geil’s Band’s Pack Fair And Square, Magic Dick uses a glissando after each line of the chorus (4 3 2…2 draw on an F harp in 2nd position). The first phrase on Sonny Boy II’s Help Me ends with a glissando (3 4+ 4′-4…4 3 2…on a Bb harp in 2nd position). Little Walter often used glissando, hanging on the 2 draw and snatching a drawn sweep down from the 4 hole ahead of the downbeat.

Portamento on the harp

This often comes as a tastefully phrased bend into, or a bend off, a note. No bend, no glissando. It soon become so instinctive you probably won’t even realise you’re doing it. Why stop dead on a note when you can add character and expression by bending off it before letting it go? Why start cleanly when you can milk a bend into a note? It all adds human quality to the sound.

Gerry Portnoy’s Real Gone Guy from his classic 1995 album Home Run Hitter is played on a Bb harp in 2nd position. The last note of the introductory run (before the three stabs) is first draw bend on hole 3. Play it cleanly and it just doesn’t sound like Portnoy. Follow it with portamento into the second draw bend on the same hole, and it’s in the pocket. Just one of countless examples out there.

As ever Magic Dick provides us with a fine reference. Check out the start of the harp break in Pack Fair And Square by the J.Geils Band; it’s on an F harp. His lengthy and pronounced full draw bend on hole 1, released into straight draws 1 and 2, makes your toes curl right up….then you start leaping about, nodding your head like a goon. Tension, impact and resolution to the max!

Portamento into trills and flutters

Portamento or bending into a trill is a classic trick on the harp.. Sugar Blue’s version of Ain’t Got You or Nine Below Zero’s early version of Rocket 88 both use this right from the start. The Portamento starts on a momentary draw bend in the the lower of the two holes, before breaking into a regular trill. Back to Magic Dick on Whammer Jammer…the very start of the number demonstrates portamento from a full draw bend in hole 4, through clean draw 4 and into a fluttered 2-5 draw.

Glissando and Portamento connected: The ‘Jungle Call’

This is a lick that Billy Boy Arnold uses to great effect in Ain’t Got You. Grab an A harp. It comes at the end of each verse and the notes are 1 (2 3) 4 4′ 4. Buy yourself a copy of his fabulous 1995 album Eldorado Cadillac.


Monkey Swings

A Monkey Swing is when you loop off one bend into a neighbouring hole. You can continue the journey bending reeds as you go. Alternatively you can swing right back to where you just came from, sustaining the original bend for your return. Monkey swings can be used at the top or bottom of the harp, wherever there is a bend or ‘vine’ to grab hold of. If you are unsure what this actually sounds like, we should probably use some examples.

Basic Monkey Swing

Itty Bitty Pretty One

Low End Combination Monkey Swings

9 Below Zero / Swing Job

Middle Range Combination Swings

Top End Combination Monkey Swings

Dog House / 9 Below Zero