How to breathe when playing Harmonica?
To play like a pro, it’s essential that you learn how to breathe correctly. It’s the only way to produce notes that sound full and pleasing to the ear without running out of breath.
Blows and Draws
Each note on the harmonica is produced by blowing or drawing on the holes. In some instances, you’ll also change the pitch of a draw or blow note with a technique called bending (see How to Bend Notes on the Harmonica).
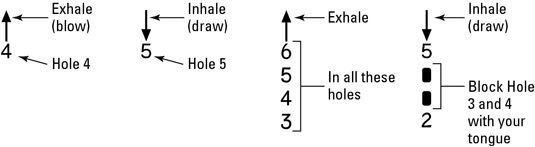
Blow notes (blows): Notes sounded by blowing into the harmonica
Draw notes (draws): Notes sounded by sucking air out of the harmonica
Nearly all beginners make the understandable mistake of a*suming that to play blows they should just blow into the harmonica as they would a balloon, and that to play draws they should suck in air as they might do to smoke a cigarette. On the contrary, you should never do either—the sounds that result will be unpleasant and difficult to control.
Proper Breathing
The steps below show the proper way to play blows and draws.
Relax
You always hear people–musicians, athletes, and people skilled at just about any activity–talking about being relaxed or the importance of relaxation, don’t you? The best ice skaters look perfectly comfortable and at ease, the best athletes seem to glide, float, and coast, the best performers seem relaxed and at home on their stage. Even when they are heavily exerting themselves. When they say “relax” they don’t mean relax all your muscles–they mean, relax all the muscles you don’t need to be using. Don’t fight yourself. Muscles work in pairs often times, and if you are tense, one muscle that you don’t need to be using may be fighting a muscle that you do need to be using. To relax the proper muscles, you first have to become aware of what muscles you are using, and which ones you need to be using. Then you have to control the ones you don’t need to be using so they remain relaxed. Relaxation takes control over your muscles. Relaxation is a form of control. Adding relaxation is adding control. If you don’t have enough control over some element of your play, try to isolate the muscles involved–the ones you need to use and the extra ones you’re using besides, and gain control by relaxing the muscles you don’t need to be using.
From Your Diaphragm
Through out these pages you have heard (or will hear) me harp on breathing from the diaphragm. Hopefully it has sunk in (or will sink in) that breathing from the diaphragm is important, worth paying attention to, worth working on, worth thinking about, considering, contemplating… and even practicing.
But what does it even mean? Well, basically, we humans can breathe through our nose and/or mouth by using our lungs and/or our diaphragm to pump air in and out. Our lungs are up in our chests, and our diaphragm is underneath, about the level of our stomachs. Learn to isolate and separate the feelings of breathing from your lungs, both your lungs and diaphragm, and just your diaphragm.
The common advice on how to go about isolating your diaphragm breathing is to lie on the floor (hard surface helps) on your back and relax. Put a book on your stomach and watch it move up and down. Feel the weight of the book against your stomach and feel where your stomach pushes back against it. Down there. That’s your diaphragm. Breathe from there. Breathe all the way out and cough. Feel the pounding of your diaphragm?
Get your lungs out of it. If you feel your chest expanding you’re breathing from your lungs. Chest equals lungs. Stomach equals diaphragm. Some guys say “play from your toes.” From deep. As deep as you can get. If your shoulders are going up and down you’re breathing from your lungs. Lungs are higher up. Feelings caused by breathing that are high up in your body–your chest and your shoulders–are caused by breathing from your lungs. Relax those muscles. Stop expanding your chest and raising your shoulders.
Why? You don’t like the answer that experience shows that breathing from the diaphragm works and sounds best? You’re not happy with the thought that all the great players say the same things, and that the same wisdom is known by singers? Okay, here’s another justification for you.
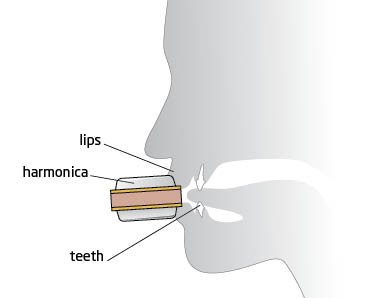
Put the harmonica to your mouth: Lick your lips as well as a few of the middle holes of the harmonica. Then bring the harmonica to your mouth so that its holes push just past your lips and the outside of your mouth and are right in front of your teeth—don’t simply reach forward with your lips and put them around the holes. In proper position, your lips should rest on the cover plates and press up gently against the fingers of your left hand. In general, the deeper you can hold the harmonica in your mouth while still breathing comfortably, the better your tone will be. Make sure to maintain proper hand positioning, and keep your cup open about halfway.
Drop your lower jaw: Without changing the position of your mouth, lower your jaw slightly to expand the resonating space within your mouth. This will improve the tone of the notes you produce.
Take a few breaths: With the harmonica properly positioned in your mouth, exhale and inhale as you normally would into the holes near the middle of the comb. Continue breathing until your blows and draws begin to feel natural.
As you experiment with blowing and drawing, pay attention to your posture as well. It’s best to sit up straight with your shoulders back, not slouched. In time, you’ll get comfortable breathing properly in a more casual posture.
Resonance
Resonance is a reinforcing of sound wave echoes so that some frequencies in essence get amplified more than others. Resonance is what breaks the crystal goblets when singers hit just the right note in just the right way. Echoes are sound waves bouncing around, and since sound waves in air basically travel at the same speed, the affected (amplified) frequencies (how fast the sound waves jiggle the air, which jiggles our ear drums, which rate determines the pitch we hear) are determined by the size of the echo chamber; the distances of the walls from each other. The lower the note, the longer the wave length, the bigger the chamber must be to affect that frequency. This amplification of certain frequencies greatly influences the resulting tone and volume of the note being produced.
It turns out that our mouths are not quite big enough to provide an optimally sized resonant echo chamber for the sounds we produce either playing or singing, especially on lower notes. The mouth is very important in manipulating the resonant chamber size (and shape) so we can tune it to the notes we are playing, reshaping the sound, but we need a little bigger chamber, something with more volume. We add our hands, and this helps both in creating a larger chamber and providing a way to manipulate the chamber size to maximize the impact of each individual note. But hands and mouth together are still not big enough. The control comes from there, but the capacity–the size and volume of the chamber in which the sounds echo and resonate, benefits from use of the entire vocal tract, everything below the throat and back down into the lungs. The lungs themselves are full of tissues and fluids, along with a myriad air sacks, so I don’t know how much the lungs themselves add to the resonance chamber–but, the airways that lead to the lungs are very important. We need to relax the chest muscles that operate the lungs so we can control and expand the vocal tract resonance chamber. Then we can still use the diaphragm to control the air flowing into and out of our lungs while maintaining control over the vocal tract that feeds the lungs. We need to make ourselves big on the inside to take advantage of the resonant capabilities of our bodies.
Through the Nose?
Most of us play the harp with our mouth most of the time. Unfortunately, there are exceptions, but let’s try not to think about that.
What do you do if you run out of air, either breathing in or breathing out? Well, pretty much you have to breathe out or in to compensate, if only a little. If your mouth is on the harp and you change your breath direction, you change the note you’re playing as well, and if you don’t want to do that you have two choices: breathe through your nose or remove your mouth from playing position.
You can quickly take a bite of air, or let some go, by momentarily taking your lip off the cover plate and breathing through your mouth but not through the harp. This feels much like a biting motion, where you’re biting at the harp. This lip biting technique can be used to articulate notes, and the articulation can be combined with breath equalization.
More often, excess air is expelled through the nose while playing notes while breathing out. Some players talk about almost always letting a little air out when they play blow notes because they know they’ll need the lung capacity later, since they play mostly draw notes. Running out of air is seldom the problem. Having too much air is often the problem, and this letting out of air during blow notes helps keep their lungs in equilibrium.
On the other hand, air leaking in through the nose during draw notes is usually not a good idea. Control over draw bends and vibrato is greatly reduced or lost if air is allowed to come in the nose. And besides, as I said above, too much air is usually the problem, and excess air coming in is not what you need. If you have trouble holding notes for a long time, see if you are letting air enter or escape through your nose. If you are, you need to learn to control that. Don’t get discouraged if you can’t control it right away. Like so many things, it’s something you have to work at and learn. But once you get it you probably won’t even think about it again, unless you read something that reminds you…
Exercises
Whenever you do breathing exercises, use caution not to overdo it and make yourself dizzy or hurt yourself in any way. You’re not trying to force your body to do something it doesn’t want to do, you’re trying to train it and teach it and condition it to want (or be able) to do more. I’m no physician, so if you have any health problems that concern you–as always, check with a doctor first.
Anything that helps you gain relaxation control over your breathing should be beneficial to your harp playing.
Meditation in its various forms and guises tends to emphasize controlled, often slow and deep breathing, sometimes even with chanting. Breathing exercises a*sociated with meditation practice can be applied to breathing for the harmonica.
Running, swimming, and other aerobic exercise can help strengthen your lungs and possibly improve your lung capacity, or at least allow you to more effectively utilize the lung capacity you have.
Most people breathe from only the top third or so of their lungs. Most of the capacity lower in the lungs is not used, not well developed, and not contributing much to the person’s breathing. Playing diatonic harp in cross harp position (2nd position) involves mostly breathing in. When you “run out of air” it’s usually because you are getting too much air into your lungs. We need to develop the lower parts of the lungs, breathing fully and deeply.
Breathe out slowly as far as you can. Completely empty your lungs. Squeeze out the last bits of air. Got it all out? Try coughing–see how much more there was? Cough some more. Get all that old deep stale air out of there.
Then slowly and willfully allow your lungs to begin filling. This is a process of gradually relaxing the muscles that have been called into play to force the air out, up to a point. After a while your lungs will be comfortably full of air, but keep slowly and gently filling them deeply. Concentrate on using your diaphragm to take your slow deep breath. It should feel like you are pushing out with your stomach. Make sure your chest is not expanding and your shoulders aren’t rising. Take several such long slow breaths, completely emptying your lungs first, then relaxing with control to slowly fill them back to neutral, then drawing with your diaphragm to fill them completely full. Think you’ve got them all the way full? Try a few quick inward pants just when you think you’re holding as much air as you can. Picture the videos you’ve seen of pot smokers trying to inhale just a little bit more.
Pant like a dog. Go on. Feel the exercise your diaphragm is getting? Open yourself up and go to it. Let out all your air and pant. Fill your lungs full and pant. Keep panting while slowly breathing all the way in and all the way out. That’s not as easy as it sounds, is it.. Keep at it, you’ll be gaining strength and control.
Practice rhythmic breathing.
Practice train songs.
Practice holding notes for a long time, both breathing in and breathing out.
While you’re holding notes, slowly vary the volume from soft to loud to soft. Gain control of how much pressure you are using to generate the different dynamics.
Practice with the harp in your mouth, and play big full round smooth even chords.
Practice without the harp in your mouth when you can think about breathing, but can’t play your harp.
Playing the harp
Begins and ends
With breathing.
Breathing in and out.
When you want.
As fast or slow as you want.
As hard or soft as you want.
For as long as you want.
Whenever you want.
Work on all those things.
How to Build Harmonica Playing Endurance
Beginners often run out of breath when they first try harmonica breathing. You might also find that your lips crack and your mouth dries quickly as you play. This is natural. Playing the harmonica is a demanding form of respiratory exercise, and until you train your body for it, you’re likely to run out of breath after just a few minutes. The best way to overcome these problems is by building up slowly. Try proper harmonica breathing for five minutes the first time, then add five minutes each day for a week. Your body will adapt, and your endurance will improve quickly.


 Why harp?
 Where can I get one?
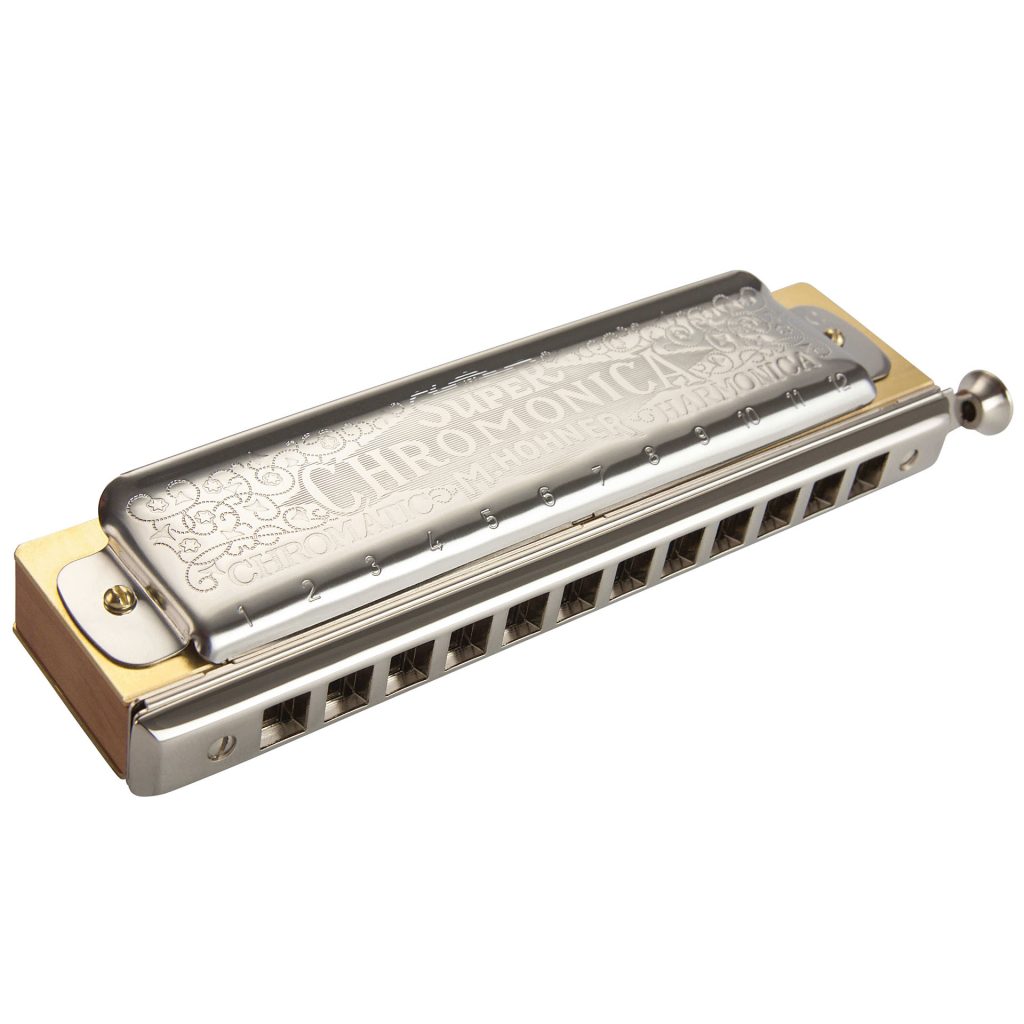
 There are so many types of harmonica on offer it can be bewildering at first. Without a doubt you need to start with a standard 10 hole diatonic (commonly called a blues style harmonica or short harp). THis is what the majority of players use for blues, rock, country, folk and celtic. The bulk of non-chromatic reference material is built round this type of harp. It’s going to take time to learn any harp at first, so at this stage the brand is not too important. They’ll all present you with the same obstacles as a beginner. Later on you can try different makes and models and begin to establish your favourites. Ultimately it’s down to personal taste. One man’s tin sandwich is another man’s gob iron. Most retailers will stock Lee Oskars or Hohners. These are fine.
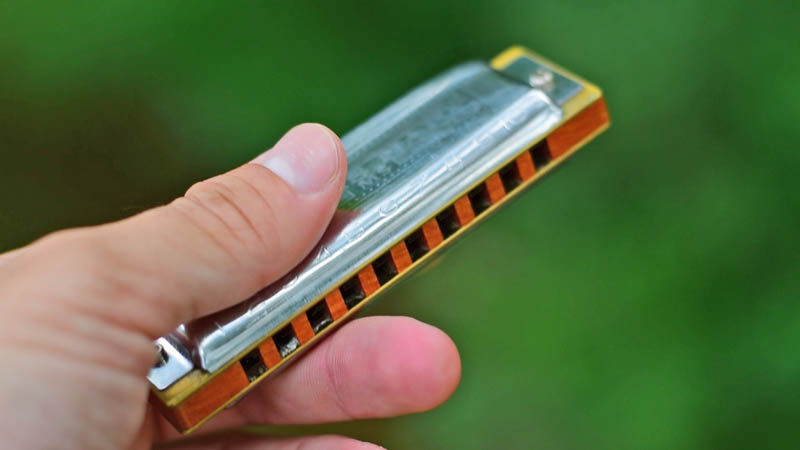
 The outer curve of your left thumb should fit nicely onto the ball of your right thumb (see image). I call this the ‘hinge’. Now cup your right hand around the back of the harp to form a chamber. This is the classic hand hold.
 Airtight seal
 Don’t put up with cheap imitations. If it sounds like a car horn, you’re catching too many holes. If it sounds clean you’re where you need to be. Use your ears and listen to what’s going on. Incidentally, in order to locate the note you want, don’t be afraid to use the tip of your tongue to count up from 1 or down from 10. It’s a legitimate process. Get sloppy. Your harp enjoys intimacy remember.
 This is the next important concept to take on board. You need an open mouth cavity and vocal tract. So imagine you have a hard boiled egg, or a hot new potato, in your mouth as you play. Resist the temptation of bringing your tongue into the equation. Pretend to yawn. That’s where your tongue should be. Otherwise try speaking like Mr Bean for a while.
 If you can’t hear it yet, go back to the start and work through again. It’s worth it. Playing one note with the best possible tone beats loads of weak notes every time. Think cricket or baseball. Listen to the sound you’re making and find the meat of the bat. The sweet spot. You know when you’ve found it because it will ring in your ears and fill the room. You will hear a full, rounded and, above all, warm sound quality.
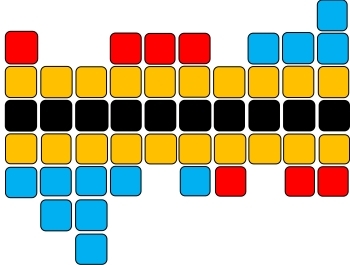 There is no doubt that learning to draw bend marks the transition from beginner to intermediate harmonica playing. When we find our first bend, it feels like we’ve just won the lottery. After hours of perseverance, we’re punching the air and yelling ‘woohoo’ like Homer Simpson. We want to tell all our friends. We want to start a band too. And fair play; bending is what gives the diatonic harmonica it’s signature sound. We can now start to learn the coolest licks and enjoy a new universe of musical expression. This was probably the reason we chose to play the harmonica in the first place.
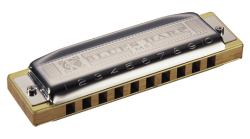 your 10 hole harmonica now. There is a logical explanation for this duplication, which we cover in Why are 2 draw and 3 blow the same?, but for now, let’s get back to drawing board.
 bends on hold and learn this essential skill first. You’ll be glad you did.
 many blow bends are there? Where are they all? Can you play them individually and accurately? Do you know what direct bends are? Are there bends in holes 5 and 7? What about hole 10? Which reed bends when we play a draw bend? What’s happening in each chamber when a bend takes place? What is the tonal theory behind bends? Be honest, because one thing’s certain: if you take time to perfect every aspect of bending from a knowledge perspective as well as a practical one, you’ll have built foundations that are far more solid than errant cohorts of other players. So let’s roll up our sleeves and let’s enjoy the journey to enlightenment.
 or channel. It is the interaction between these two reeds that is the source of bending. Valving reeds interrupts this process, which is why it is difficult to play bends on a chromatic harmonica. Where there is a difference in pitch between the two reeds of one full tone or more, physics says the potential for a half step bend has been created. As this difference in pitch, or interval, increases by an additional semitone, so an extra semitone bend is facilitated.
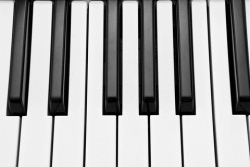 keys on the piano keyboard, if there are one or more other keys separating them you’ll find the equivalent bend, or bends, in the harmonica. So for example
  encounter blow bends. But here’s the surprise – while the sensation of bending feels like we are dragging the higher reed down with our breath, the truth is the exact opposite. If you could watch the reeds while you played a bend, you’d actually notice the lower pitched reed moving more than the higher one. This is because the technique required to work the bend alters the air pressure across both reeds, effectively ‘neutralising’ the higher reed, as the lower reed moves ‘in sympathy’.
 or bend in the tone results.
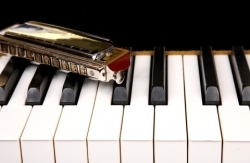 bent note. The greater the interval the greater the number of bent notes. Picture a piano. You have white and black keys. Consider the scale of C major (do re mi etc). It comprises eight full tones (the white keys) or a total of thirteen half tone steps (white and black keys). Moving from
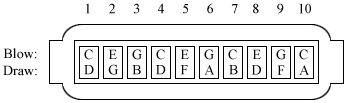
  Our diagram of a C diatonic harmonica shows you which notes are found in each hole (click it to enlarge). Using a standard scale of chromatic notes, or a piano keyboard, we should be able to calculate the number of bends in each hole and their names. Here’s the chromatic sequence starting from A:
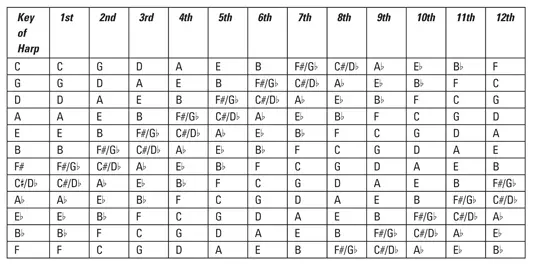
  B, so there are three semitones between (
 Your passport to heaven
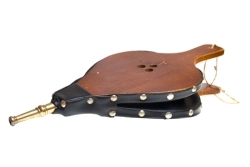 Your lips shouldn’t spread wider or change shape as you bend. They are there to maintain a good seal around the target area. Loose air means no bend. The bending process then begins in your vocal tract and in your mind. By anticipating the bent note the rest will follow. It’s how we pitch our notes when we sing or whistle. The reeds replace your vocal chords!
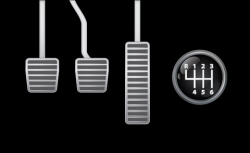 This the bite point. When you learn to drive a manual car, you have to synchronise the clutch and accelerator (gas) pedals in order to engage the engine and pull forward. Miss the bite point and you stall the engine or the car kangaroos up the street. This is because you’re slipping the clutch. Learn to recognise the bite point as each bend engages. And as soon as the bend cuts in, increase the pull from your throat and chest. Attack it! Eventually you will feel the reed drop into a whole new position and the pitch will drop with it. If you overshoot the bite point, don’t hang on fruitlessly. This is wasted effort. Let it all go and start again.
 Sounds like quite a partay! But seriously, sometimes it helps to imagine yourself pulling thick milkshake through a straw, or sucking venom from a snake bite. The sucking or plunger process created by the tongue is integral to draw bending on the harmonica. If shakes and snakes don’t do it for you though, picture a standard bicycle pump. As you pull the top end of the pump, it draws in air. You’re doing the same on the harmonica with your tongue acting as the pump.
 I make no apology if abseiling and reed bending appear totally unrelated. However, you will understand this analogy if you have actually abseiled; especially if you can recall the very first time. When you leaned back into nothing with only a rope to keep you from falling, your heart was racing and you felt a rush of adrenalin. Well note bending is a similar leap of faith. You don’t know what you’re trying to find, whether you’ll get there in one piece, or what it’ll be like on the way down, but once you make the break through, it feels fantastic. So lean back and take the reed with you. All the way to the bottom.
 To get used to the transfer of control centres when attempting low end draw bends in hols 1, 2 and 3, consider the way you might drink a cup of hot chocolate. Initially you’re going to sip the froth using your lips, the tip of your tongue and a tug of air between your teeth. As the sipped liquid cools in your mouth, you’re then ready to swallow it. Sipping and swallowing are the start and end control points of low end draw bends. In time, as your throat muscles strengthen, you’ll learn to pull directly from the vocal tract. The 4D’ and 6D’ bends are one shorter reeds however, and the control point tends to remain further forward in the mouth.
 to treat each bent note as an individual piano key. This is called direct bending. To master this skill, start by moving between a clean draw and a full bend, down and up, as slowly as possible. This will help you develop muscle memory and strengthen your bending technique. In the holes that have more than one bent note,
  A pitch pipe, piano or correctly tuned guitar will give you the notes you need. Play the target note and try to match it with your bent note. This is a good method as you are developing your musical ear at the same time. There are also many tutorial CD’s that will give you the notes you need. But if you’re worried about whether your bent note is scientifically accurate, then you can buy an electronic tuner. There are many types; we use a SEIKO Chromatic Tuner Model SAT1100 that uses
 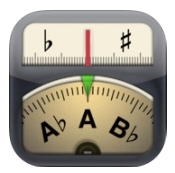 two AAA batteries. You can find it on Amazon and eBay. Otherwise, for Apple iPad users, there’s the Cleartunes app, which is a cheaper option and just as good. But you could always save your money, play songs that require bent notes and use your ears to judge whether or not you’re playing accurately. Or better still, record yourself and listen back. You’ll be surprised by what you hear; no accurate bends, no tune!
 Part One
 It’s when you alternate (move back and forth) rapidly between two adjacent holes. Trills can be achieved by puckering or tongue blocking. I find puckering best for control, but remember seeing an interview with James Cotton in which he cites Little Walter’s tone when playing tongue-blocked trills as totally ground breaking.
 This starts by cupping the harp, which is when we use both hands to create an airtight chamber around the harp. It actually amplifies the sound and gives it a warmer tone. In terms of physics, we are harnessing waveforms and using them to our advantage. The image (left) illustrates the cupped hand hold for acoustic harp playing.
 Here are a couple of simple techniques that will elevate your phrasing and musical expression. Call them musical ornamentation.